Authentic Borscht recipes often use rye flour to thicken the soup, and might include “Kwas” (a fermented rye brew). For those used to fermenting foods, it’s nothing too tricky; after rye flour and water ferments for a few days, the water’s poured off. The water gets fermented some more, which gives the soup its twang.
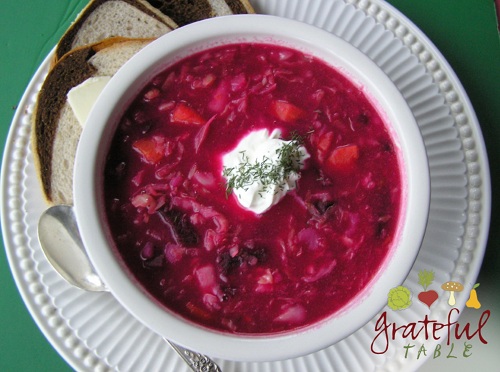 Beets and other veggies make this a colorful, flavorful vegetarian-style borscht recipe. A touch of sauerkraut, Kwas, or other fermented veggies will add a little zip, but a dash of vinegar would sub in a pinch.
Never heard of Kwas? It can be likened to a beer of sorts. A rye flour (or rye bread) and water mixture ferments for days; the water is poured off to ferment some more. An already-brewed Kwas might be found at some specialty markets, but the soup is quite good without it.
Some authentic Borscht recipes also call for homemade sauerkraut, but many prefer the milder, less tangy recipe below. If the tang of sauerkraut is desired, homemade is fairly easy to make, and is completely different from canned sauerkraut. To make it, slice up a cabbage, sprinkle it well with salt, and let it juice up for an hour or so. Put it into a jar, keeping the cabbage weighted down with a plate, so it is submerged in its juices. Pounding it down helps it to juice up that much more and won’t hurt it! Let it sit in a crock, jar, or other glass or ceramic container, at room temperature. Refrigerate after five days or so; it turns into authentic, naturally fermented sauerkraut, which many claim is a healthful food full of beneficial probiotics.
Beef broth and/or chunks of beef can be added as well, for a heartier soup with even more flavor. Serves 4-6.
INGREDIENTS
- 2 medium-sized beets
- 2 potatoes, peeled and cubed
- 1-2 carrots, peeled and sliced
- 1 c. or so slivered cabbage
- 1 TBS. rye flour (or substitute white flour)
- 1 TBS. olive oil (for roux)
- Salt to taste
- 1/4 tsp. toasted caraway seeds
- 2 tsp. white vinegar
- Optional: 1/4 c. sauerkraut, beef, and/or beef stock
PREPARATION
1. Bake an hour or more (depending on size), at 375 degrees, wrapped in foil, until tender: > 2 medium-sized beets
2. After beets cool, remove skins and julienne. Set aside.
3. Peel, then cook in water to cover, until tender: > 2 potatoes, cubed > 1-2 carrots, sliced
4. Grill in olive oil in a hot pan, adding a splash of water so it will steam some and get tender. Use: > 1 c. or so slivered cabbage
5. In medium-large pot, mix together: > 1 TBS. rye flour (or substitute white flour) > 1 TBS. olive oil
6. Add cooked cabbage to the flour/oil roux and mix well.
7. To the cabbage/roux mix, slowly add hot liquid, mixing until smooth, bringing the mixture to a boil. Use: > Vegetable broth from cooked veggies, plus more water if necessary
8. Bring roux/broth mixture to a boil, then simmer for 2 minutes. Add all ingredients to the pot: > The cooked cabbage/broth > The cooked potato/carrots > The julienned beets > salt to taste > 1/4 tsp. toasted caraway seeds > 2 tsp. white vinegar (or substitute sauerkraut > beef chunks and/or beef stock, if desired
Serve topped with sour cream and dill weed.