Chicken w/ Sesame Orange Marinade (Easy Recipe for a Crowd)

I’m starting to plan for our annual Easter Egg Hunt on Palm Sunday, and think I’ll serve this, since it makes so much. Yes, it’s also nice to serve on a smaller scale (just reduce the recipe). But it’s ideal when you need a big batch of something, and don’t have a lot of time for preparation. Sesame oil is a key ingredient–it’s loaded with flavor, and is a healthier choice than many other vegetable oils. It’s the base of a great sauce!

Sesame Orange Chicken for a CrowdOccasions come up when a simple meat recipe is desired, to serve a large number of people. Boneless chicken thighs are a tasty, economical choice; creating a simple marinade makes preparations easier. The thighs can be partially cooked in the oven, then brought to the grill if desired, to add extra flavor.

This chicken will be tender and moist; it can be served with the homemade sauce, or on its own. 40 or so servings.

INGREDIENTS

20 lb. boneless, skinless chicken thighs

2 c. hot water

3 TBS. salt

1 c. frozen orange juice concentrate

1 c. lime (or lemon) juice

1/2 c. sugar

1/4 c. white vinegar

1/4 c. toasted sesame oil (or peanut oil)

SAUCE INGREDIENTS

1/2 c. frozen orange juice concentrate

2 TBS. lemon juice

1 1/4 tsp. salt

2 tsp. hot pepper oil (or 1 tsp. cayenne)

1 c. toasted sesame (or peanut) oil

1 red pepper, finely chopped

1 bunch chives (or green onion), finely chopped

PREPARATION

1. In a 3-5 gallon bucket, or other large container, mix to dissolve: > 2 c. hot water > 3 TBS. salt

2. Add remaining ingredients and stir well: > 1 c. frozen orange juice concentrate > 1 c. lime (or lemon) juice > 1/2 c. sugar > 1/4 c. white vinegar > 1/4 c. toasted sesame oil (or peanut oil)

3. Let marinade cool off some; marinate in the above mix overnight: > 20 lb. boneless chicken thighs

4. Bake 20 minutes at 400 degrees. Finish on grill for extra flavor, or bake a bit longer, until done. Serve warm or cold.

5. To serve with the above sauce, add the following to a small bowl: > 1/2 c. frozen orange juice concentrate > 2 TBS. lemon juice > 1 1/4 tsp. salt > 2 tsp. hot pepper oil (or 1 tsp. cayenne)

6. Slowly whisk in, in a slow stream, until incorporated: > 1 c. toasted sesame (or peanut) oil

7. Garnish sauce with: > 1 red pepper, finely chopped > 1 bunch chives (or green onion), finely chopped


The Weatherman Says Drought, But Joel 3:18 Promises Water!

We went on a little tour of the Napa wine country this past summer, taking this picture of a fountain at one of the wineries. It was almost like a dream; we bought some cheese while there; it was still warm from being “pulled” that morning. We had some excellent bread and other snacks to go with that cheese, and had a beautiful view of the countryside.

Remember the Lord's Promises! ("In that day...")Even though a drought has been officially declared here in California, I post this picture on one of the (few) rainy days we’ve had this season. Perhaps the ravines will yet indeed run with water! After all, God promises.

In the bleakness of winter, it’s good to look back on a perfect summer day, and remember that God has even better things in store. We can rest in confidence, even if (or when) things look bleak. Because God ultimately pours out His blessings on those who love Him, working all things out for the good. What an encouragement.

Wallpaper: Desktop Backgrounds w/Verses

“In that day the mountains will drip new wine, and the hills will flow with milk; all the ravines of Judah will run with water. A fountain will flow out of the LORD’s house and will water the valley of acacias.” Joel 3:18

Below are links to a couple of computer backgrounds you might enjoy (similar to the above picture, but formatted to fit a desktop screen).

To use for desktop wallpaper, left click on appropriate monitor size, then right click and choose “select :

Desktop Background for wide monitor, w/Bible verse from Joel 3:18Click here for Background for wider monitors

Click here for Background for shorter monitors

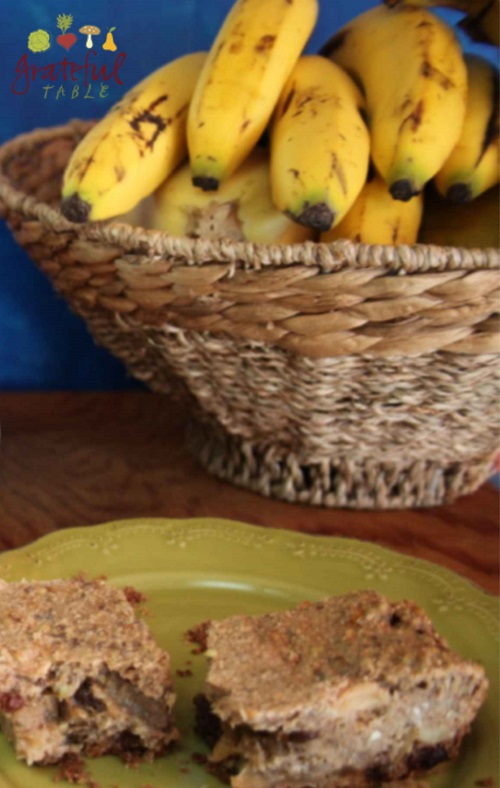
Banana Bread Breakfast Bars: Vegan, Healthy, Hearty

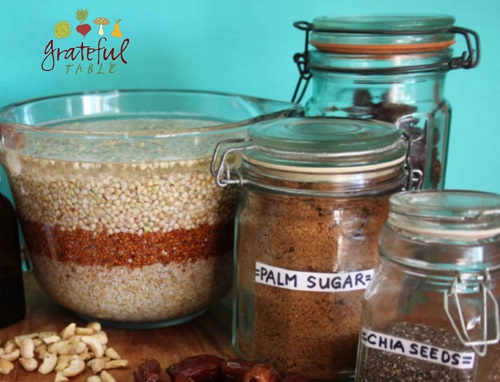
Breakfast-Bars-w-Quinoa-BuckwheatSome of us are really into soaking grains. Maybe this started because of some difficulties digesting wheat. Maybe it began after reading articles on how grains can be loaded with phytates, which interfere with absorption of nutrients.

For me, it was all the above. Plus, a savvy friend mentioned soaking oatmeal overnight in some yogurt (or lemon or vinegar), before cooking it. I was intrigued, since I’d been on the raw food band-wagon. At that point, I’d been soaking grains overnight, then eating them raw. As I researched the reasons behind adding yogurt (or lemon/vinegar) to the soaking liquid, I discovered numerous articles on how difficult raw grains are to digest. Maybe that explained, in part, why my iron levels were rather low, despite a “healthy” diet.

In the past year, since changing how I prepare grains, I’ve seen my iron levels improve dramatically. There have been other improvements as well; I am sold on the pre-soak method!

Part of the beauty of the following recipe is that it makes a big batch. I don’t go through the whole soak process daily–this batch lasts my husband and I over a week, which makes it worth my while. It can store in the freezer for weeks (or in the refrigerator, for a week or so).

For an easier recipe, the Oatmeal Breakfast Bar Recipe uses standard rolled oats, and doesn’t need to be processed, since the oat flakes are soft enough. And for an alternative to bananas, you might try subbing apples (plus extra cinnamon and nutmeg). That’s delicious too!

Makes 12-16 large bars.

INGREDIENTS

  • 1 1/3 c. whole raw buckwheat groats
  • 1 1/3 c. quinoa (red or other)
  • 1 1/3 c. steel-cut oats
  • 1 1/2 c. boiling water
  • 1 c. coconut oil
  • 1/4 c. chia seeds (soaked in 1/2 c. water)
  • 3 medium bananas, lightly mashed (or thin-sliced) (or sub apples)
  • 1 1/3 c. diced dates, raisins, or other dried fruits
  • 2/3 c. coconut palm sugar
  • 1 c. coconut oil
  • 2/3 c. macadamias, cashews, or other favorite nut/seed
  • 2 tsp. vanilla
  • 1 tsp. almond extract (or substitute spices)
  • 2 tsp. salt

PREPARATION

1. Soak the buckwheat, quinoa, and steel-cut oats for one day. The following day, rinse, drain, and let sit one more day in a large strainer, in dark cupboard. Use: > 1 1/3 c. whole raw buckwheat groats > 1 1/3 c. quinoa (red or other) > 1 1/3 c. steel-cut oats

2. After a day of soaking and a day of sprouting, process about half the mixture in a blender or food processor- this will make the grains into a “batter”. (The other half of the grains can stay whole, to give the bars more texture.) Process only about two cups at a time if using the blender (so the blender isn’t over-taxed). While processing, add the following, so mixture is liquid enough to process better. Use: > 1 1/2 c. boiling water > 1 c. coconut oil
Banana Bread Breakfast with Whole Grains

3. Set processed mixture aside; prepare other ingredients. Add chia seeds and water to a mixing bowl, letting the chia seeds absorb the liquid, stirring some if necessary. Use: > 1/4 c. chia seeds > 1/2 c. water

4. After chia seeds have softened, add to that bowl: > 3 medium bananas, lightly mashed (or thin-sliced) > 2/3 c. coconut palm sugar 1 1/3 c. diced dates, raisins, or other dried fruits > 2/3 c. macadamias (or other favorite nut) > 2 tsp. vanilla > 1 tsp. almond extract (or cinnamon and other spices) > 2 tsp. salt

5. Stir until the mixture is blended, then stir in: > The processed grains, plus the extra (that didn’t get processed)

6. Add mixture to an oiled 13″x9″ pan.

7. Bake at 375 degrees for 25 minutes.

8. Turn oven off, let finish baking with oven off for 25 more minutes. Serve warm or cold.

Lobster Bisque- What’s More Romantic (& Easier?!)

Lobster Bisque might be the perfect menu selection for Valentine’s Day, if you’re not going to a fancy restaurant. If they have it on their menu, you can bet it’ll cost a whole lot more than what it takes for you to make it.

If you’re really pinching pennies, you can substitute langostino (not exactly lobster; more like a small crab) or shrimp. Definitely cheaper than lobster! (Even if lobster is so good…)

This recipe just happens to be low-carb and gluten-free. Not to be trendy, but mainly because this is how it tastes best- with just a bit of sauteed onion and tomato to give it body, and none of those flour-y thickeners that are sometimes used. This Lobster Bisque is also very easy to make, so the cook has enough energy left to still feel romantic. Perfect for Valentine’s Day! Serves 4-6.

(Lobster or) Shrimp Bisque- Simple RecipeINGREDIENTS

  • 1 lb. or so shrimp heads, if available
  • 1 medium large onion, chopped
  • Virgin Olive oil
  • 1 12-oz. pkg. frozen Langostino (or sub shrimp, or real lobster)
  • 16 oz. canned tomatoes
  • 1/2 c. cream
  • 1 tsp. salt
  • 2-4 c. shrimp stock (or sub chicken stock)
  • Fresh herbs (tarragon and thyme, or others)
  • Grated pink peppercorns (or chili flakes)

PREPARATION

1. Ideally, you might purchase head-on shrimp for previous meals; save the shrimp heads to make an excellent stock. The shrimp heads are particularly high in the esteemed nutrient “Astaxanthin“; plus, it makes super delicious stock. Prepare shrimp stock using heads of shrimp, covered in boiling water and cooked until flavorful. Use: > 1 lb. or so shrimp heads

2. Saute in some olive oil until translucent and soft: > 1 medium large onion

3. Process in blender (or use immersion blender): > Sauteed onion > 2 c. (16 oz.) canned tomato

4. To the processed onion and tomato, add and pulse/mix just until blended: >1 12-oz. pkg. frozen Langostino (or sub shrimp, or real lobster) > 1/2 c. cream > 1 tsp. salt > fresh herbs > 2-4 c. shrimp stock (or sub chicken stock)

5. Put back into soup pot, heat, and garnish with fresh-grated pink pepper (or pepper flakes) to serve


Chocolate-Dipped Strawberries- Easiest Romantic Dessert

Chocolate Chips, Butter, Strawberries- Good!As is typical, I seemed to run out of time to make a fancy dessert for Valentine’s Day. I guess the good news is, it’s easier to burn off the calories from this dessert, than from one more heavily-laden with starch and fat and sugar!

We won’t be going to a fancy restaurant (so expensive), so I thought I would spice things up for our Valentine’s Day with an easy (but delicious) batch o’ chocolate-dipped strawberries.

This is a super simple recipe using whatever chocolate you have on hand. Just add a bit of butter to the chocolate, melt (in microwave, or gently, on stove), then dip.

I used 1 c. chocolate chips to 1/4 c. butter. (That works out to 6 oz. chocolate, if you’re using a scale, plus 2 oz. butter.)

It took just over a minute to melt this much in the microwave. I added a dash of almond extract too, since it seems to go so well with strawberries. (In my opinion!)

I was happy I’d found some good, organic strawberries at Trader Joe’s yesterday- they’re delicious. (Even tastier with chocolate on them.)

We’ll have a light, chocolatey dessert, which should leave us with enough energy to enjoy the rest of the evening as well. A great Valentine’s Day to you all!

Healthy Bathing: Turn Chlorinated Water into Liquid Gold

A recipe for relaxation can be as easy as adding 1 tsp. (or one 1000 mg. tablet) of Vitamin C (Sodium Ascorbate Crystals) to your bathwater, which will neutralize the chlorine and chloramine. If you haven’t experienced dry, itchy skin or red eyes from soaking in a bath that uses chlorinated tap water, you still might want to consider: Chlorine’s been noted to potentially increase allergies and asthma, cancer, and fluid in the lungs, sometimes damaging breathing passages and soft tissue, and even reducing beneficial gut flora. Crazy, right? Well, not to obsess. I’m not going to worry about it. But I am going to start dropping Vitamin C’s into my bathwater on those long-soak nights…

A group of us are going to mix up various spa stuff for Christmas presents. I know I’D like the bath salts for Christmas! Below is a basic, easy recipe.

Bath Salts

INGREDIENTS

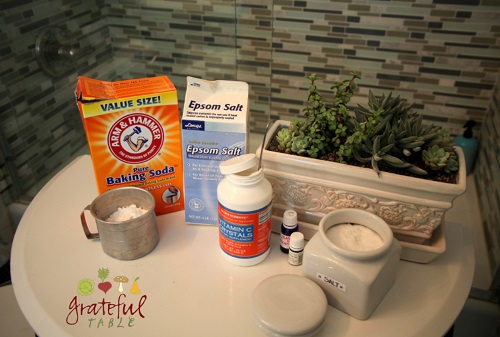
  • 3 c. Epsom Salts
  • 2 c. Baking Soda
  • 1 c. Sea Salt
  • 8 drops or so lavender essential oil (or other)
  • Vitamin C powder (to counteract the chlorine that’s in most of our water)

Mix all ingredients and package in jars.

Meanwhile, I got quite inspired by Wellness Mama’s article on baths (and on clay), so I’m also adding Bentonite clay to my baths! Her directions mention to shake well, 2 TBS. clay in a jar of water, then add to the bath 2-5 minutes after dissolving ascorbic acid into the bath water. This way, the vitamin C has dechlorinated the bath water, and the clay can work its magic.

Salt Bath, Baking Soda Too, LavenderI pulled out the Epsom salts after a darn dog bit my arm recently; a soak in this was recommended to help draw out any toxins. Well, my arm has healed nicely, but I’ve also realized that the Epsom salts might be handy on occasions besides emergencies. There are recipes for desserts and main dishes, but… how ’bout a recipe for relaxation, using various natural household ingredients?! Laurie at Empowered Sustenance recommends this little recipe: “2 cups of epsom salts, 1-2 cups of non-iodized salt and 1/2 cup of apple cider vinegar OR baking soda (but not both).”

If you’re in a real detox kind of mood, up the baking soda to 1 c. (8 oz.). After a 30-minute soak, wrap up in a big towel and rest for fifteen minutes, as the toxins released can make one feel a bit weak.

I’ve added a few drops of favorite essential oils to my baths too; I get mine from Nature’s Gift, for a real treat. I love Marge at Nature’s Gift–she’s very down-to-earth and eager to help, and determined to offer optimum quality. I’m not subsidized by this company, in case you wondered. I just think they’re great! Several years back, I researched my options for aromatherapy-quality oils (not convinced that Young Living was offering the best price for the best quality), and determined I could get the best value for quality oils through Nature’s Gift. I’m still happy with all I’ve received from these folks!

If you’re ever feeling uptight in the late evening, consider that the magnesium sulfate in Epsom salts can relax muscles. (It can even help with constipation!) And regular salt helps keeps cells hydrated. Drink a glass of water before your bath too- that’s another healthy tip!

Good Vibrations (Zip Up the EMFs, Be Less Zapped)

Swich from Electric Clocks, Cordless Phones, Etc.First off, I want to remember, above all else, that God is ultimately in control. The world’s getting kind of toxic, and pretty messed up, but I can’t freak out about it. Matthew 6:31 tells us, “So do not worry, saying, ‘What shall we eat?’ or ‘What shall we drink?'” God can take care of our needs.

Given that, I do pray that we can lead wholesome lives, being wise stewards of what God’s given us. One of the things He gave us is our body, so of course we should take care of it!

To do that well, maybe I need to be informed, and do what I can reasonably do to limit our exposure to “electro-pollution”.

You’ve probably heard someone making a brash, extremist comment before, about how, “Cell phones give you cancer!” Of course, now that practically everyone has a cell phone, we may not want to think about it. But it wouldn’t hurt to do a few things to protect ourselves, would it?

Some examples of electropollution are:

  • Cell phones and cell towers
  • Cordless phones
  • Dirty Electricity from power grids (signals similar to radio station static)
  • Fluorescent Lights
  • Wireless baby monitors
  • Smart Meters
  • Appliances and electronics

The following are a few easy things I can do to reduce our exposure and/or improve our home environment:

  • Turn cell phone to airplane mode at night and recharge in another room (away from the bed)
  • Use speaker phone with cell phone- less time is spent with the phone up to the ear (and the brain, which is most sensitive to the radiation). Especially important for kids’ developing brains!
  • Set the alarm using an old-fashioned clock, removing electric one. I got this retro clock that runs on one AA battery- it’s pretty cool. (Apparently, the batteries don’t emit many ETFs.)
  • Most everyone’s also gotten rid of their cordless phone by now, which is great, since they constantly give off radiation. Alternatives. This $33 Slimline Corded Phone or  this retro-style Black Rotary Dial Phone (similar one) are options. If needed at all.
  • Get Beeswax Candles! Whether you’re “into” all this good vibration stuff or not, who doesn’t like candles? (So can you really go wrong?) I get these 100% Beeswax Candles. Says care2.com, “Beeswax candles produce negative ions,  helping remove pollution from the air and increasing the ratio of negative ions to positive ions, meaning- cleaner air.”
  • Keep florescent bulb use to a minimum when possible.
  • House plants- they clean the air. And they’re so refreshing. Spring’s coming- what better time to stock up on some extra house plants. Here is a plant list NASA drew up, of particularly good ones for improving the air quality in space stations. Another plus about most of these plants: They are very hardy, even if your thumb isn’t super green…

Silly Pic, But EMFs Not?!Here’s the list of stuff you might want to do (though I’m not quite ready to commit to these!):

  • Turn WiFi off at night
  • “Salt Lamps” are also supposed to charge the air, making the pollutants fall to the ground, making the room feel a bit like a day at the beach. This Air Purifying Himalayan Salt Lamp is a possibility? But I’ll stick with my Beeswax candles for now…
  • Install Stertzerizer Filters? I’m leary, after reading this review on Amazon
  • Some folks get crystals to improve/amplify the body’s “good vibrations”. Note: “happy, healthy people have strong vibrational states”, so- maybe an attitude of gratitude would do just the same?

Lauren at Eempowered Sustenance has even more info in her post here. (You might even want to get the book, “Zapped: Why Your Cell Phone Shouldn’t Be Your Alarm Clock and 1,268 Ways to Outsmart the Hazards of Electronic Pollution“, too. Or, maybe not- maybe it’s TMI!)

Cacao Nib Fudge: Toasted, Tasty, Healthy, Easy

“Easy”? OK, maybe three out of four’s not bad, but dealing with cocoa nibs in NOT easy! My teeth are getting pretty old, so I don’t even like crunching the nibs in their natural state much anymore. And grinding those nibs into a smooth paste is also challenging. You’re probably not crazy if you don’t want to deal with them. They can be a bear to puree, unless you happen to have a Ghiradelli-style stone grinder outback. Forego the whole process and maybe just stick to this Easiest Healthy Fudge recipe I made for my mum- it just uses regular ole’ cocoa powder. (I wanted a way for her to get extra coconut oil in her diet, which might help her Alzheimer’s. I don’t know if it slowed that down any, but she did love the “fudge”…)

OK, got it? This is not for everybody. A Vitamix blender can work pretty well for grinding nibs, even if it’s super loud. But I happen to own a Champion juicer, which I’ve had since 1983. It’s pretty amazing. And it is the best thing I’ve found for pureeing those cocoa nibs. (I get this economical, 5-lb. bag myself.)

Forego the whole grinding process, and eat your nibs raw and chunky, using this Coconut Bark recipe.

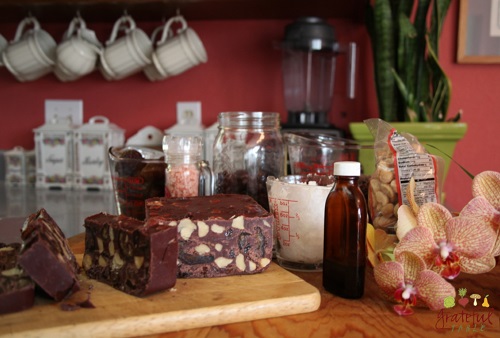
Toasted Cacao Nibs Creamy FudgeINGREDIENTS

  • 1 1/2 c. raw cacao nibs
  • 1/2 c. melted coconut oil
  • 1/4 tsp. salt
  • 1 tsp. vanilla
  • 1 c. macadamias, roasted, unsalted (one 8-oz. package)
  • 1 c. dates, halved (Medjool are a favorite)
  • Optional: 1/2 c. raisins (if you prefer a sweeter mix)

PREPARATION

1. Toast in oven at 375 degrees for 10 minutes in iron pan; stir once. Turn oven off and let finish toasting for 10-15 minutes more: > 1 1/2 c. raw cacao nibs

2. Process toasted cacao nibs until quite smooth in a sturdy blender (Vitamix is good). OR- do you happen to have a Champion juicer? (Apparently, they’re not available on Amazon, but eBay has some.) Run the nibs through that, for a pretty smooth blend. Use: > 1 1/2 c. toasted cacao nibs

Add and process again with: > 1/2 c. melted coconut oil > 1/4 tsp. salt > 1 tsp. vanilla

3. In a big bowl, mix together blended mixture with: > 1 c. dates, halved > 1 c. macadamias > Optional: 1/2 c. raisins (for extra sweetness)

4. Spread in loaf pan, then refrigerate overnight.

5. Turn the solid fudge mixture out onto cutting board (run upside-down pan under hot water if necessary). Cut into slice; will last in refrigerator for a month or two.

Which One? Pros & Cons of Probiotics: Kombucha Vs. Kefir

Kefir (cute) vs. Kombucha (scary mushroom!)I’m all for probiotics as part of a healthy diet for anyone. But which probiotic might be preferable? Let’s talk about “Water Kefir” and “Kombucha” today, since those are two probiotics you can brew at home from simple ingredients. They’re economical too, since they aren’t based on dairy. If you go so far as to get organic milk to make your own milk kefir, the pricing goes up, you know?

Laurie from Common Sense Home spells it out in detail; basically, this is the simplified version:

Kombucha is great for the digestion, but it’s also a cleanser, detoxifying the liver too.

Kefir is also great for digestion, and doesn’t contain the caffeine Kombucha can have (although it does have a touch of alcohol). But it’s not really a cleanser and detoxifier.

The Heal Thyself Forums mentions that the detox Kombucha might bring on is not ideal if you’re pregnant or nursing. or for anyone with a lot of excess mercury stores.

Heal Thyself also includes this word of caution: “Kombucha has Saccharomyces boulardii which displaces and replaces candida albicans in the gut. Candida binds mercury to keep it out of circulation. When you kill off candida in the gut, stored mercury is released back into circulation to redeposit into other organs and the brain.

That last paragraph concerns me! I ended up spending a day researching how to deal with mercury toxicity in the system. Read Dr. Mercola’s article, “Revised Protocol to Detoxify Your Body” for more info. Also, Dr. Mark Hyman mentions many of the complications that might be connected to mercury toxicity. Meanwhile, I have come to a few conclusions:

1. Drinking kefir is a no-brainer. Of course it’s good for you! And you don’t have to worry about going into some heavy detox mode.

2. Kombucha might be good for you (if you’re not pregnant or nursing), but do be prepared to deal with the candida/mercury issue, as your body might start freeing up it’s mercury stores. Metals need to leave the system, not just roam free!

3. Amalgam silver fillings aren’t cool. Though being used less often now, many of us still have silver fillings which leach mercury into our system. Apparently, the mercury constantly emits vapors that are carried from our mouth, on down through the digestive system, wreaking havoc along the way.

4. If you want to detox from mercury, you shouldn’t keep exposing yourself to the metal. Which means, if you have silver fillings, you should get them removed by a trained biological dentist (not by the average dentist that doesn’t know how to deal with this toxic substance).

5. I’m probably not getting my fillings removed any time soon.

6. But I can avoid shark, swordfish, tuna and other big fish that contain more mercury. Alaskan salmon and smaller fish contain less- I’ll stick to those.

7. I can keep taking my chlorella, since Dr. Mercola mentions that it’s helpful for getting rid of mercury and other toxins in the body. I’ve bought mine from Nuts.com, here. (They offer organic chlorella, which I really like.) But Amazon has a good deal on 1.1 lb. of the powder; find that deal here.

8. This whole mercury problem depends a lot on genetics. Some folks have a certain gene which discourages natural detoxification from heavy metals. So, while some people can get more exposure to toxic metals with no adverse effect, there are others who may ingest less, who suffer for it due to the inability of their system to process and eliminate the metals from their body.

9. Those more sensitive to mercury, due to their genetic makeup, might suffer from autism, dementia, Alzheimer’s, heart problems, Type 2 diabetes, chronic fatigue syndrome, autoimmune diseases, and/or depression. And more!

10. My dad’s trying out certain nutritional supplements on my mom, to see if that might help her release stored mercury. Meanwhile, I think I’ll try brewing some Kombucha, adding a bit of that to my diet. Should it cause me to release some stored mercury, I’m hoping the chlorella will help me weather the detox successfully. I don’t like taking supplements (unless they’re food-based), but I always feel safe using super foods. If I notice anything, I’ll be sure to report back!

If you’ve experienced any symptoms after beginning a Kombucha regimen, please share it with us below in the comments section!

How This Happened: Jen’s Story of Getting Saved

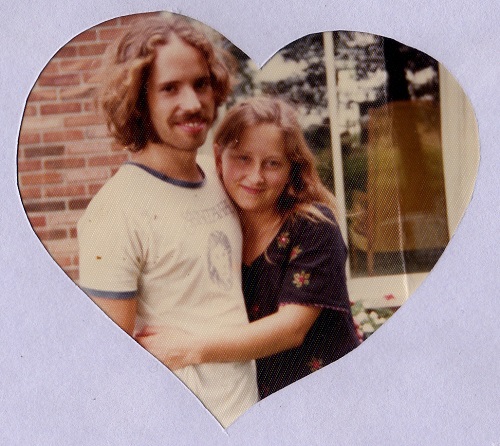
Hippies in Rochester, MichiganFor 38 years, I knew something was wrong. I just thought I could fill in the spaces myself! I was into new age stuff, eastern religion, astrology, I Ching…

I had gone to church at least two times a year when I was a kid, but the whole family got lazy about that. Our hearts probably just weren’t in it. I doubt any of us went for the right reasons.

But I wanted to understand what the deal was. As a youngster, I’d ask the grownups, “WHO is the Holy Spirit?!” They would try to explain God the Father and Jesus the Son to me… I could almost wrap my head around those two, but the Holy Ghost eluded me. And no one seemed able to explain Him. Of course that was because it’s not a head thing- it’s a heart thing. But even back then, I was quite the intellectual. So I just couldn’t figure it out.

Eventually (at 38 years old), some rather unmanageable stuff came up in my life, and I knew I really needed to connect with God, and PRAY. I somehow realized I needed that “go-between”. I needed the Holy Spirit. A co-worker had been on my case about Christianity, so I’d been fending her off by telling her, “Yes, I KNOW Jesus died for my sins. Yes I KNOW I’m a sinner. Yes I AM a Christian.” But when I needed to pray, I felt like I wasn’t quite “in the club”. So… I prayed to God, asking for the Holy Spirit. He GAVE it to me! I started speaking in tongues, in a sort of musical prayer song, as I stood at the stove making dinner. I’m pretty sure God wanted to give me something to confirm that this didn’t come from me. And this unknown language certainly didn’t come from me! So I finally got it. I was completely transformed. Night and day.

Thankfully, my high school sweetheart, rebel comrade, hippie style, non-believing husband also got saved in the following six months- thank you LORD! At one point, before Tom’s conversion, me in tears again (as this had become a common thing for me now), I begged him to just, “Confess that Jesus is Lord and you will be saved”. He said he could not say that, as he didn’t KNOW Jesus is Lord. I think I was hoping for a magical chant by that point, that Tom just had to say the words. But my husband knew better. I’m glad he didn’t just go through the motions, and pretend.

Nope, you can’t wrap your head around it- you really do need for the Holy Spirit to speak to your heart about this truth. I am eternally grateful that Tom received that, and that we’ve both been able to work together in Christ for all these years since then. I’m thankful too, that our kids came more easily to Christ- maybe they didn’t have as much baggage. And now, we are so blessed, knowing the One True God, having Jesus Christ as our Savior. We continue on, almost twenty years later, serving the Lord, enjoying that unique fellowship we have with other believers, praying, and loving God. Praise Jesus.