Turkey Roasting Tips (Like, How Much Else IS in that Oven?)

I guess a lot of cooks are checking their resources today, so cooking a turkey tomorrow will be a breeze.

It should be a breeze! Practically all you have to do is pop it in the oven, and take it out hours later.
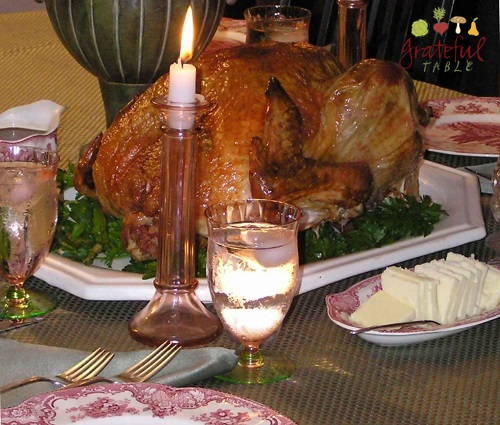
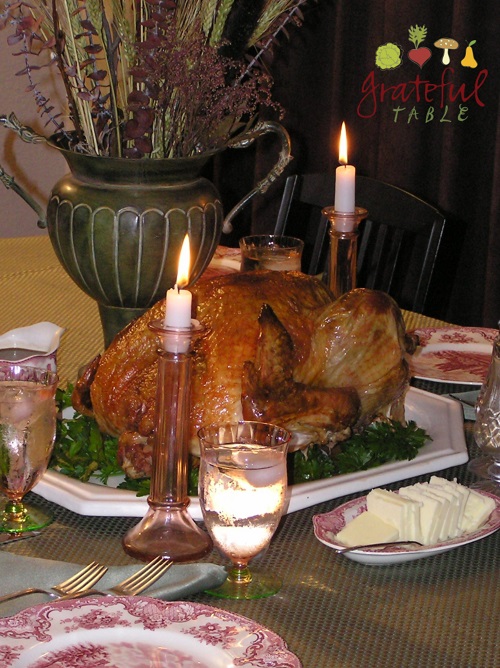
Thanksgiving Turkey Roasting Tips

I don’t baste mine, but it still turns out so juicy. You might spread chopped fresh herbs in the cavities (or stuff it), but other than that, it’s pretty good to go. If you aren’t going for the “Norman Rockwell Style” Thanksgiving table. you could just cook that  bird upside-down (breast down), since the back side has juicier dark meat and more skin to render, effectively “basting” the turkey on its own. The breast (which can dry out faster) steams a bit more, being on the bottom. So good.

You’d think with all the cooking we do at The New Deli, that I might have a fancy oven at home. No. Remember, my husband and I were hippies, and we didn’t splurge much. Translated, that means that the simple electric stove that came with our house almost thirty years ago is the one we use. It doesn’t even have two racks, so that’s challenging!

But I can still pull off that Thanksgiving dinner with it, so I bet you can too! I have a routine that works, for Thanksgiving Day. I have everything prepped early in the morning, so that the pies can go in right away. Stuffing ingredients are also prepped, but other than a bit of stuffing herbs and such that I might brush around the inside of the turkey, most of the stuffing goes in a dish that I can heat up just before dinner.

Think about it: In the midst of all the last-minute preparations, before actually serving the meal, do you really want to be digging that stuffing back out of the turkey? I mean, you can. Sometimes, it’s no big deal, and it’s part of the tradition. But on other occasions (like when you’re having a larger crowd), might it not be more convenient if that stuffing’s already in a casserole dish, preheated and ready to serve?!

Some cooks suggest baking the stuffing separately, since the turkey takes longer to cook when stuffed and may turn out a bit drier. But there’s also the whole oven schedule to consider. If all kinds of dishes have to cook in that oven along with the bird, the bird will take longer to cook. A chart might say it’ll take so many hours to cook, but if you throw in variables, that time changes. Variables include: How many other things are cooking along with that turkey? Are those items cold to start, or room-temperature? (Because, all that will pull heat away, don’t ya know…)

A few more turkey tips: If you need to get the turkey cooked faster, cut the leg/thigh portion off. Cooking the cut-off leg/thighs alongside the turkey will help the bird cook quicker, insuring moister meat.

Another tip: Let the turkey rest before slicing. More juices will be reabsorbed that way. The latest I heard was to give it a 45 minute rest. Well, that’s convenient! Because any side dishes that need reheating can then go in the oven during that time, getting good and hot just in time for serving.

After the meal: Leave some meat in chunks. If not serving it all right away, chunks (wrapped in plastic wrap) will slice easily after refrigerating; perfect for leftovers, etc.

God bless your Thanksgiving!
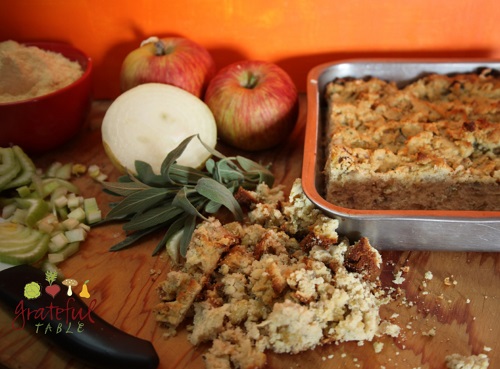
Gluten-free Stuffing for Thanksgiving’s Bird: “Un-dressing”!

I’ve already posted my gluten-free corn bread recipe here; I thought I’d post this pic I just took of the batch of it I made for Thursday’s turkey stuffing. Because it’s not just a good corn bread- it’s a great dressing  to stuff your turkey with too!

Gluten-free Stuffing for ThanksgivingI experimented this year, using “masa corn flour” from the grocery store. It’s still gluten-free, though it wasn’t quite the same as the corn flour I usually get from the health food store. But either one works, for a delicious corn bread stuffing!

A lot of corn bread recipes call for part all-purpose flour, plus some generic corn meal. Using all corn meal gives the bread a little too much texture, and of course, adding the all-purpose flour ruins its gluten-free title. So the corn flour is a good substitute, helping the corn bread to have a better consistency.

You can do like I did and make a big batch of the corn bread, saving most of it for turkey stuffing. (It makes a nice side for one of those pre-Thanksgiving meals.) I think I’ll add extra sauteed apple to the crumbled mix, plus more sauteed onion, celery, and herbs  (like for the basic stuffing recipe I already posted), just because I like the idea of more veggies in my stuffing; makes it a bit more paleo.

Since we’re having enough people over to warrant cooking two birds, I’ll stuff one of them with the traditional stuffing, and one with this gluten-free corn bread stuffing. Something for everyone!

Happy Thanksgiving, y’all!

Thanksgiving Stuffing: Dressing Your Turkey, New Deli Style

There are a number of options when looking for dressing recipes, but I always return to one I’ve used for years, adapted from a very basic Betty Crocker recipe. It’s easy to get creative, adding personal favorites: Apple, raisins, sausage, pecans, wild rice, and cornbread are all popular additions. Some stuffing recipes suggest using dry bread cubes, but liquid needs to be added to the mix to compensate. Also, packaged dry bread cubes often contain other ingredients (dough conditioners and such) that we might rather avoid.

Some folks may prefer sour-dough bread, but most popular with my group is a stuffing made with good quality, sweeter bread, preferably from the bakery section or a specialty store. Wheat bread or sprouted wheat bread can make up all or part of the mix; sweet French bread is also nice. Look for breads that aren’t too tough. Also, avoid breads that are too soft; generic, brand-name breads lack texture, deflating into a gummier mass; not what you want!

The method of sauteeing the celery and onion first helps the flavors to permeate, and it turns out somewhat moist, but not soggy. I personally like to bake a side dish of this as well; the top gets deliciously crunchy. Makes 9 cups stuffing; enough for a 12-lb. turkey.

Dressing for Turkey: Use Good Bread!

INGREDIENTS

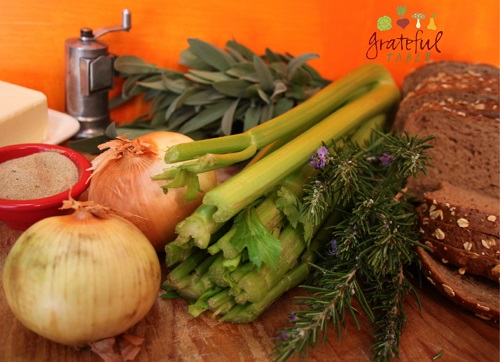
  • 3/4 c. minced onion
  • 1 1/2 c. chopped celery (including leafy parts, if there are any)
  • 1 c. butter
  • 2 tsp. Vege-sal (or substitute regular salt)
  • 1/2 tsp. pepper
  • 1/4 c. chopped, fresh thyme, sage, and rosemary (or personal favorites, or substitute 2 TBS. dry herbs or poultry seasoning mix)
  • 9 c. (soft) wheat bread cubes

PREPARATION

1. Saute in large iron pan: > 3/4 c. minced onion > 1 1/2 c. chopped celery > 1 c. butter

2. When veggies are translucent, add the seasonings: 2 tsp. Vege-sal (or salt) > 1/2 tsp. pepper > 1/4 c. fresh herbs (or 2 TBS. dry herbs)

3. In large bowl, add: > 9 c. soft bread cubes

4. To the bread cubes, add the ingredients from the pan, tossing to mix. Stuff the cavities of the bird just before roasting. Don’t pack the stuffing in too tightly, which makes it too dense.

Cranberry Bread- Whole Grain (The Pilgrims Might’ve Even Ate!?)

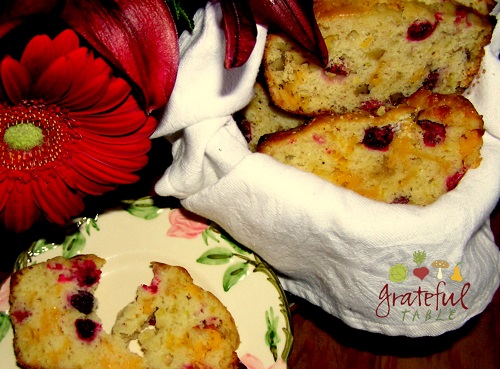
I just wanted to mention, real quick: I tweaked my Cranberry Orange Nut Bread recipe, and I like it even better. Those of us that are eager to forego excess dairy should be glad to know: one can skip the cheddar cheese, to no bad effect. (I inadvertently left it out, and then I was glad I did…)

Whole Grain Cranberry Bread

This is actually a picture of the original cranberry bread. Because I don’t want to take another pic right now!

Now that I have a VitaMix, I thought I’d grind up some fresh whole wheat flour to substitute for two thirds of the white flour. Then I substituted corn flour for the other third. Using part corn flour gave it a nice hearty texture.

I meant to make a trip to the health food store to get more whole-grain corn flour, but since I ran out of time, I wondered if the “Masa Corn Flour” from the grocery store would substitute. Corn meal would’ve been too coarse, but the masa corn flour worked great. The manufacturer is savvy too; even though this is probably a product bought out of tradition, so that many folks can make their holiday tamales, they are now marketing it as “gluten-free”. It is nice that it’s a gluten-free flour, and if you’re concerned about the high phytate content of so many grains, you might appreciate knowing that the corn flour gets treated with lime, which effectively eliminates any phytate problem, too.

So… anyone else up for experimenting? You might try substituting a mix of fresh-ground whole wheat and corn flour for your next baking venture. Let me know how it turns out!


Cranberry Orange Bread w/Cheddar Cheese, Nuts (Thanksgiving?!)

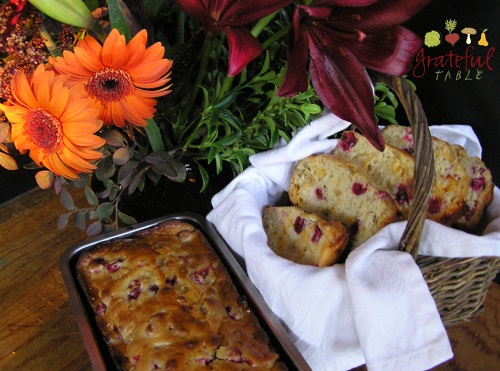
Cranberries, cheddar cheese, nuts, and orange zest make this bread a favorite in our house. It combines Thanksgiving flavors in a nut bread that makes a perfect pre-dinner snack. We usually have it for breakfast on Thanksgiving, to pace ourselves! (It’s a great way to start the day.)

This recipe is adapted from a Betty Crocker one, with just a few changes. IF there are any leftovers, toast slices for an extra treat, just like fresh out of the oven. Makes one 9×5″ loaf, or two 8 1/2 “x 4 1/2 ” loaves, or three 5×3″ loaves.

Thanksgiving recipes: Cranberry Orange Nut Bread

INGREDIENTS

  • 1 c. chopped nuts
  • 1 1/2 c. grated cheddar cheese
  • 1 1/3 c. cranberries, cut in half or chopped coarsely
  • 1 1/2 TBS. grated orange peel
  • 2 1/2 c. flour
  • 1/2 c. sugar
  • 1/2 c. brown sugar
  • 3 1/2 tsp. baking powder
  • 1 tsp. salt
  • scant 1/4 c. olive oil
  • 1 c. milk (or yogurt)
  • 1 egg
  • 1/4 c. frozen orange juice concentrate

INGREDIENTS

1. Prep the following, setting aside: > 1 c. chopped nuts > 1 1/2 c. grated cheddar cheese > 1 1/3 c. cranberries, cut in half or chopped coarsely > 1 1/2 TBS. grated orange peel

2. In a large bowl, mix dry ingredients together: > 2 1/2 c. flour > 1/2 c. sugar > 1/2 c. brown sugar > 3 1/2 tsp. baking powder > 1 tsp. salt

3. To the dry ingredients, add the nuts, cheese, cranberries, and orange peel, plus: > scant 1/4 c. olive oil > 1 c. milk > 1 egg > 1/4 c. frozen orange juice concentrate

4. Stir all ingredients together lightly, barely mixing it smooth. Pour into greased loaf pan (or pans), using butter to well-grease the bottom only. Bake a big loaf at 350 degrees for 60 to 70 minutes, until toothpick inserted in center comes out “clean”. Smaller loaves will cook faster, 40-50 minutes.

Pumpkin Pie w/Simple Ingredients- Perfect Crust, Not Soggy!

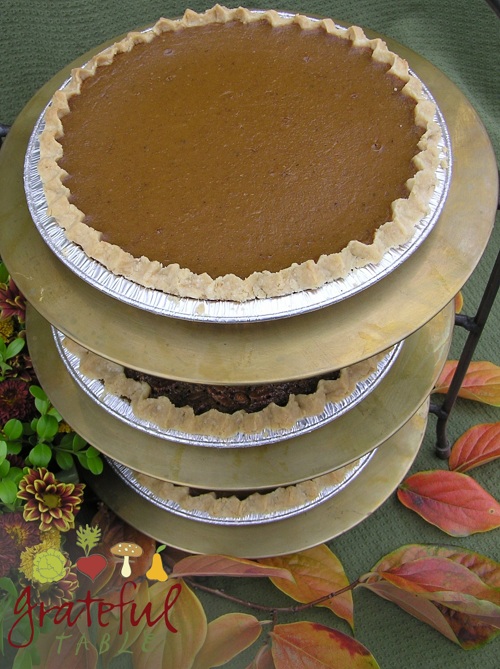
I’ve “had” to make this pie every Thanksgiving for years. “Had” to, because the kids love it so much! (I personally just need some pecan pie, and I’m a happy camper.)

Partially bake the pie crust before-hand, and use the microwave (or stove-top) to get the filling ingredients (except eggs) up to temperature; a moist, flavorful pie will result.

Time permitting, add a generous layer of sugar to the top of the cooled pie, using a blow torch to caramelize it, just before serving. To get that “brulee” style, crunchy sugar topping, it has to be done last minute, but is quite a treat!

Try with an almond-flour crust, and sub coconut palm sugar for regular, for a gluten-free, more paleo-style dessert. Serves 8 or so.

Traditional Pumpkin Pie Recipe, but No Soggy Crust

INGREDIENTS

  • 1 1/2 c. cream
  • 1/2 c.  brown sugar
  • 1/4 c. sugar
  • 1 1/2 tsp. cinnamon
  • 3/4 tsp. ginger
  • 2 c. pumpkin
  • 1/4 tsp. nutmeg
  • 1/4 tsp. cloves
  • 1/4 tsp. allspice
  • 1/8 tsp. salt
  • 3 eggs

PREPARATION

1. Bake a chilled pie crust at 375 degrees, with foil pressed on firmly and weights in place. Bake 20-22 minutes.

2. Remove foil, baking 10 minutes more. Fill any cracks with reserved crust dough, if necessary.

3. Bake 10-15 minutes more, until golden. Remove from oven.

4. Lower oven temperature to 350 degrees; prepare filling.

5. In a microwaveable bowl (or on stove-top), heat the cream 2-3 minutes, until hot: > 1 1/2 c. cream

6. Add the following to the cream, mix well, and microwave again until hot (3  minutes or so): > 1/2 c. brown sugar > 1/4 c. white sugar > 2 c. pumpkin> 1 1/2 tsp. cinnamon > 3/4 tsp. ginger > 1/4 tsp. nutmeg > 1/4 tsp. allspice > 1/8 tsp. salt

7. Add and stir in: > 3 eggs

8. Pour the filling into the still warm pie crust, bake for 30-40 minutes, until custard’s set. The center should look firm. Don’t overcook; it will set up more as it sits. Cool for 2 hours or more.

9. If desired, just before serving, add a generous layer of sugar to the top of the cooled pie; use a blow torch to caramelize the sugar, creating “bruleed pumpkin pie”.


Pie Crust (Two Crusts)

INGREDIENTS FOR TWO PIES

  • 1 stick cold butter, sliced into pieces
  • 2 c. plus 2 TBS. flour
  • 1/4 c. cold water

PREPARATION

1. Process into a coarse meal in a food processor: > 1 stick cold butter, sliced into pieces > 2 c. plus 2 TBS. flour

2. (A fork or pastry cutter can also be used to “cut” the butter into the flour.) Next, add the water through the top of the processor while pulsing: > 1/4 c. cold water

3. Pulse just until fairly mixed. Turn dough out onto a large piece of plastic wrap; if a pastry cloth is used, flour the cloth first. Let the dough rest a few minutes, then roll it out between two pieces of plastic wrap. Remove one piece of wrap, lifting the crust into an 8-10″ pie pan; ease the crust in and pinch top into decorative shape. Floured hands make forming the crust easier.

4. The crust may be frozen for weeks; no need to thaw it before adding filling and baking.

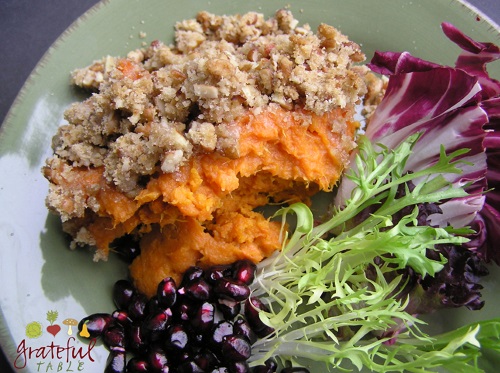
Sweet Potato Casserole, Healthy-Style, Topped w/Streusel

This is my favorite yam dish for the Thanksgiving meal. Sweet potatoes take little prompting to make a tasty dish, but the streusel topping on this easy recipe puts it over the top. Modify the recipe if necessary; coconut milk substitutes nicely for the cream. Serves 6 or so.

Thanksgiving Yams, Healthy Style

INGREDIENTS

  • 3-5 sweet potatoes (weighing approx. 2 1/4 lb. total)
  • 2 eggs
  • 1/4 c. cream
  • 1 TBS. olive oil
  • 1 tsp. vanilla
  • 1/2 c. brown sugar
  • 1/4 c. flour
  • 1/2 c. pecans, chopped
  • 2 TBS. soft butter

PREPARATION

1. Cook sweet potatoes (a day ahead, if necessary). Flavor and nutrients are lost when cooked in a pot of water, but a slow cooker is a nice alternative, with just a bit of water at the bottom of the crock. Or bake in oven at 375 degrees, wrapped in foil, for one hour or so, until tender. Use: > 3-5 sweet potatoes (weighing approx. 2 1/4 lb. total)

2. Let potatoes cool, then slip skins off. In bowl, mash w/ potato masher or fork (or process), then add to bowl and mix in: > 2 eggs > 1/4 c. cream > 1 TBS. olive oil > 1 tsp. vanilla

3. Put mixture into oiled casserole dish or 8″ square pan. Top with mixture of the following: > 1/2 c. brown sugar > 1/4 c. flour > 1/2 c. pecans, chopped > 2 TBS. soft butter

4. Bake at 375 degrees for 35 minutes, until topping is golden brown.

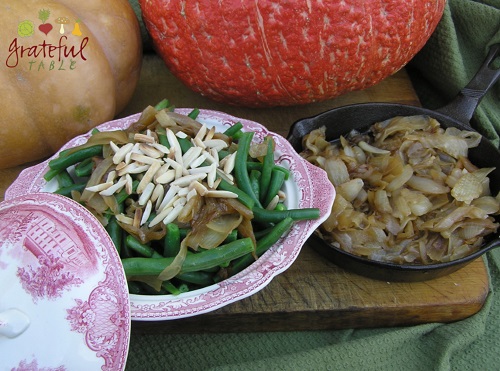
Green Bean “Casserole”, All Natural

This month I’ll feature some of my “classic” Thanksgiving recipes, which are mostly traditional recipes that I’ve tweaked to make as healthy and easy as possible. Enjoy your Thanksgiving preparations!

This is a fairly simple recipe; a healthier rendition of the classic Thanksgiving dish, “Green Bean Casserole”. There’s no can of soup, no MSG, no gluten. And it tastes fresh and delicious!

Caramelized onions substitute for that can of onion rings; they can be cooked ahead of time, which makes holiday prep easy.

The onions take some long, slow cooking to develop their sweet, mellow flavor; texture comes from the addition of slivered, toasted almonds. Serves 12 or so.

Grateful-Table-Green-Beans-w-Onion-Almonds

INGREDIENTS

  • 2 lb. yellow onion
  • 1/2 c. Olive oil
  • 2-3 lb. Green Beans
  • 1-2 (8 oz.) pkg. toasted, slivered almonds
  • 1 tsp. salt

PREPARATION

1. Hours ahead of serving (even the day before), prepare the caramelized onions. Slice into strips: > 2 lb. peeled yellow onion

2. Crowd onions into a medium iron pan (if the pan is too large, the onions lose too much moisture and burn too easily). Lightly brown the onions on medium-high heat, adding: > 1/2 c. olive oil

3. Stir the onions more often at first, then turn heat down some. Turn the onions occasionally for an hour or two, keeping the heat low enough for some moisture to develop. Turn the heat up briefly if too much moisture accumulates. Eventually, onions will be reduced to a much smaller amount; they will develop a sweet, caramelized flavor. Set onions aside. Refrigerate if making a day ahead of time.

4. On serving day, trim beans by cutting ends off, and steam them. In cooking larger quantities, the beans towards the bottom of the pot may get more cooked; cook beans in batches if necessary.

5. In a medium-large pot, add: > One inch boiling water > 2 lb. trimmed green beans

6. Use a metal steamer in the bottom of the pan, if available. Cover the beans and cook on medium high heat until the beans are tender. (Be sure that the water doesn’t boil away.)

7. To serve, mix together: > The caramelized onion > 1 tsp. salt > The cooked beans > 1-2 pkg. toasted, slivered almonds

8. The dish can be kept warm in the oven until serving time, or can be microwaved for a quick warm-up.

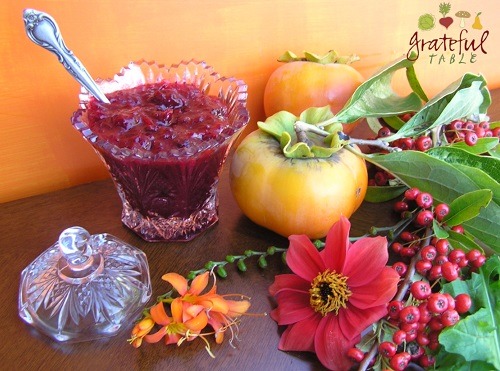
Easy Cranberry Chutney (Like on the Bag, but Classier)

The terms “Chutney” and “relish” are fairly interchangeable, although a touch of spicy peppers is usually added to chutneys. A dash of cayenne qualifies this simple recipe as “chutney”, which certainly sounds classy! Serves about 12.

Cranberry Orange Chutney w/cayenne, cinnamon

INGREDIENTS

  •     1/2 c. water
  •     1/8 tsp. cayenne (or hot peppers of choice)
  •     1/8 tsp. salt
  •     Cinnamon stick
  •     1 bag cranberries
  •     1 c. sugar
  •     Zest from one orange
  •     2 TBS. frozen orange juice concentrate

PREPARATION

1. Rinse the berries and remove bad ones. Use: > 1 bag cranberries

2. Bring water to boil. Add: > sorted cranberries > 1/8 tsp. cayenne > 1/8 tsp. salt > 1-2 cinnamon sticks and sugar.

3. Bring mixture back up to a boil, stirring constantly. Simmer 10 minutes or so, until cranberries pop. Add: > zest from one orange > 2 TBS. frozen orange juice concentrate.

4. This recipe can be made ahead and chilled; the chutney will thicken as it cools.

Thanksgiving Gravy (Make some stock ahead & Make it Easy!)

Gravy’s easy to pull together when stock’s made a week or more ahead of time. Chill it overnight and the hard layer of fat on top is then easily removed; freeze stock if necessary.

At serving time, you may find that gravy thickens as it sits. If it’s thin at first, it’ll probably be perfect by the time it’s served. If it seems thick add more stock or water. Another tip: After making the gravy, pour it into a gravy boat and cover with plastic wrap, microwaving just before serving. Microwaving the gravy boat is easier than making sure the saucepan doesn’t scorch. (Just don’t microwave any chinaware that has gold or silver paint on it.)

Serves 12-15.

Easy Gravy Recipe

INGREDIENTS

  • One 12-lb. (approx.) turkey
  • 1/2 c. (approx.) turkey fat and drippings
  • 1/2 c. all-purpose flour
  • 1 quart turkey or chicken stock, preheated
  • 1 tsp. salt
  • 1 tsp. white vinegar
  • 1/2 tsp. black pepper

PREPARATION

1. Try cooking turkey “upside down,” with breast facing down instead of breast up. More of the cooking juices soak downward, leaving the breast meat moist and tender. Basting is not necessary this way. Roast until done: > One 12-lb. (approx.) turkey

2. Set cooked turkey aside, using roasting pan to make the gravy in. For gravy, pour off excess turkey fat from pan, leaving: > 1/2 c. (approx.) turkey fat and drippings

3. To pan, add, mixing until smooth: > 1/2 c. all-purpose flour

4. To the thick mix of flour and fat in the pan, slowly add: > 1 quart turkey stock, preheated

5. When mixture’s smooth, pour the mix into a saucepan; bring to a boil, then simmer 2 minutes. Add: > 1 tsp. salt > 1 tsp. white vinegar > 1/2 tsp. black pepper

6. Serve gravy hot.