Persimmon Bread, New Deli Seasonal Fave!

Long ago, my aunt made this recipe; it was so delicious! She used Grand Marnier, which can be a bit cost-prohibitive. So I altered the recipe some, substituting frozen orange juice concentrate. It was still delicious!

As this year’s crop of persimmons are ripening on our tree, the New Deli crew hopes I’ll make more of this delicious confection. OK, we’ll do it! After all, it can be challenging to eat them all au natural…

Preferably, use the heart-shaped Hachiya persimmons for this recipe (although the pumpkin-shaped Fuyu can be substituted). When they get really soft, you’ll know they’re fully ripe and ready to use. Put containers of the ripe, skinned, seeded pulp in the freezer if too many ripen at once. This recipe makes 2 large loaves, or 4 small.
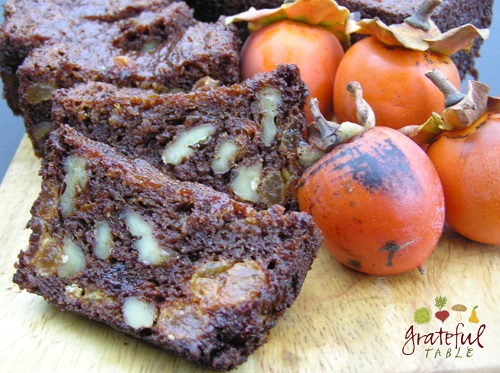
Holiday Nut Bread with Persimmons, chocolate chips

INGREDIENTS

  • 1 1/4 c. mashed persimmon
  • 1/4 c. frozen orange juice concentrate
  • 2 eggs
  • 1 tsp. vanilla
  • 1/4  c. melted butter
  • 1 c. flour
  • 1/2 tsp. salt
  • 1 tsp. cinnamon
  • 1 tsp. baking soda
  • 1 c. sugar
  • 1 c. walnuts or pecans
  • 1 c.  golden raisins (or regular)
  • 1 c. chocolate chips

PREPARATION

1. Prepare the persimmon pulp, removing skin and seeds. Put in bowl: > 1 1/4 c. mashed persimmon

Also, let thaw and add to pulp: > 1/4 c. frozen orange juice concentrate

2. To the pulp and orange concentrate in a bowl, add : > 2 eggs > 1 tsp. vanilla

Stir in: > ¼ c. melted butter

3. In large bowl, mix dry ingredients together separately: > 1 c. flour > 1/2 tsp. salt > 1 tsp. cinnamon > 1 tsp. baking soda > 1 c. sugar > 1 c. nuts > 1 c.  golden raisins > 1 c. chocolate chips

4. Last, add the persimmon mix to the dry ingredients, mixing just till blended. Pour into well-buttered, floured pans, lined with wax paper on bottom. Use 4 small loaf pans, or 2 large pans. Bake at 350 degrees for 45-55 minutes for large loaves, or 30-35 minutes for smaller loaves, until browned and “set” (not squishy in the middle). Let rest an hour or so before removing; it will be easier once the bread firms up a bit.
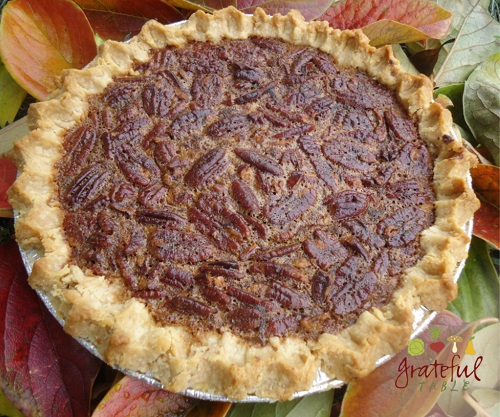
Traditional Pecan Pie (but More Pecans)- Easy Double Recipe

It’s hardly twice as much work to make two pies, so why not? Plus,a double recipe uses exactly one full bottle of dark corn syrup, which makes for easy measuring.

I rarely consume corn syrup in any form, but I’ll save my yearly ration to eat it all in this pie. Honey or maple syrup will substitute if necessary, but this pie is so worth it as is.

Also, maybe because pecan pie’s almost like candy, this particular pie keeps quite well. That is, if you don’t eat all of it on Thanksgiving!

Makes 2 pies.

Traditional pecan pie

INGREDIENTS

  • Two prepared, unbaked pie crusts (see below)
  • 2/3 c. butter
  • 1 1/3 c. sugar
  • 1 bottle (2 c.) dark corn syrup
  • 1 tsp. salt
  • 6 eggs
  • 3 c. pecans, whole, raw

PREPARATION

1. Prepare two pie crusts (see below). For filling, add to a microwaveable bowl, and microwave the butter 1-2 minutes until melted (or heat in pan): > 2/3 c. butter  

2. To butter, add: > 1 1/3 c. sugar > 1 bottle dark corn syrup > 1 tsp. salt > 6 eggs  

3. Mix well, stir in: > 3 c. pecans

4. Pour into twp pie shells; bake 40-50 minutes at 375 degrees.

Pie Crust (Two Crusts)

INGREDIENTS FOR TWO PIES

  • 1 stick cold butter, sliced into pieces
  • 2 c. plus 2 TBS. flour
  • 1/4 c. cold water

PREPARATION

1. Process into a coarse meal in a food processor: > 1 stick cold butter, sliced into pieces > 2 c. plus 2 TBS. flour

2. (A fork or pastry cutter can also be used to “cut” the butter into the flour.) Next, add the water through the top of the processor while pulsing: > 1/4 c. cold water

3. Pulse just until fairly mixed. Turn dough out onto a large piece of plastic wrap; if a pastry cloth is used, flour the cloth first. Let the dough rest a few minutes, then roll it out between two pieces of plastic wrap. Remove one piece of wrap, lifting the crust into an 8-10″ pie pan; ease the crust in and pinch top into decorative shape. Floured hands make forming the crust easier.

4. The crust may be frozen for weeks; no need to thaw it before adding filling and baking. To finish making the two pies, see instructions, top of page.

Chicken Roasted Easy Style, Seasoned w/ Herbs Under the Skin

Use time efficiently by implementing this recipe, preparing a healthy, delicious meal with minimal work. Make a double or triple batch of the herb mix, and season several birds all at once, to be especially efficient. The pre-seasoned birds will keep in the freezer, ready to thaw and roast at a future date.

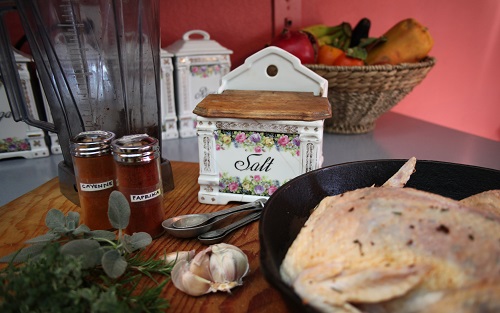
Under the skin, seasoned whole chicken

A blender (or Vitamix) will quickly process a whole bunch of fresh herbs (and garlic) fine; much quicker than hand-chopping. It might be a bother to clean the blender for a small batch, but for large quantities, it’s worth it.

The paprika in this mix lends a bit of color, making the skin a deep brownish color; the cayenne adds some kick. I happen to have sage, thyme, and rosemary running rampant in my yard, so I use those, but almost any combination of herbs and spices can work, according to preferences. Dry herbs can substitute for fresh, if necessary. The main point is that the seasoning gets rubbed on the meat under the skin, infusing it with so much flavor.

Organic, free-range chickens turn out perfectly; generic whole chicken fryers can be used, but there will be an excess of fat. Part of the beauty of the organic chickens is that they’re much leaner; one doesn’t have to remove an inch of fat from the roasting pan before serving the meal. Plus, many studies show that the fat of organic chickens is of a different chemical makeup; I don’t feel guilty using the rendered fat from this recipe, mixing it in with the juices to flavor the meat I pull off the bone, or to flavor any accompanying veggie dishes.

Makes 2 small whole chickens, to serve 6-8.

INGREDIENTS

  • 2 whole chickens
  • Large handful of fresh herbs (sage, rosemary, and thyme are good choices)
  • 1-2 TBS. garlic, fresh, chopped
  • scant 1 TBS. salt
  • 1 TBS. paprika
  • 1/2 tsp. cayenne (or to taste)

PREPARATION

1. To prepare seasoning blend, hand chop or process in blender: > Large handful fresh herbs > 1-2 TBS. garlic, fresh, chopped

2. Mix into chopped garlic and herbs: > scant 1 TBS. salt > 1 TBS. paprika > 1/2 tsp. cayenne

3. Gently work fingers under the skin of chickens. On both ends, and on top and bottom, the chicken skin can be separated some from the meat, enough for one to rub the seasoning mix onto the meat. Go into the drum/thigh/wing areas a bit too, as best as possible. Also spread some herbs around the inside cavities. Use: > 2 fryers, preferably organic

4. Roast chickens in an iron skillet or two, if possible, or a baking pan. Allow enough space around the two birds, so they don’t steam. They should cook for a long time on a low temperature, for extra flavorful, moist meat, and crunchy skin. Roast at 225 degrees for 3-4 hours, and serve.

5. Extra meat can be pulled from the bones, for future meals; the bones can be used to make a delicious stock.


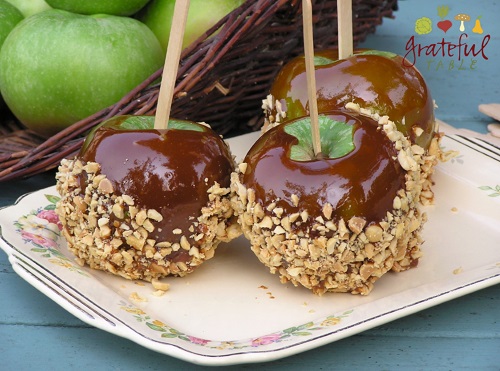
Caramel Apples: Homemade is Easy (Skip the Kraft Stuff!)

There’s nothing like home-made caramel. It might seem intimidating to make, but it’s actually quite simple. Until mastering the technique of caramelizing sugar, some might get wasted, but sugar’s cheap! Once mastered, one can easily make caramelized walnuts (mix nuts into the sugar, spreading on a sheet to cool), or caramel sauce (slowly adding cream to the caramelized sugar, after removing it from heat).

Granny Smith and Pippin Apples work well for this; the tart crunchiness goes with the gooey sweetness of the caramel. Otherwise, whatever’s available will do well enough. Get more creative by rolling the fresh-dipped apples in mini-chocolate chips and other toppings. A friend says she rolls them in cinnamon-sugar. Yumm. Makes 6 to 12 apples, depending on size.

Homemade Caramel for Dipped Apples

INGREDIENTS

• 2 c. roasted, salted, skinless peanuts (or substitute nuts/toppings of choice)
• 6 large apples, or more if smaller
• 1 1/2 c. white sugar
• 1/2 c. heavy cream

PREPARATION

1. Lightly oil a sheet of wax paper, to use for setting dipped apples on. Chop finely: > 2 c. roasted, salted, skinless peanuts (or substitute nuts or toppings of your choice)

2. Push popsicle sticks firmly into stem end of apples, using: > 6 large apples, or more if smaller

3. Get medium skillet (preferable iron or enamel) quite hot, then pour sugar over its surface, shaking the pan to get sugar dispersed over any hot spots, using: > 1 1/2 c. white sugar

4. Let sugar “melt” completely, turning into a golden brown syrup. Remove from heat, and slowly stir in (a bit at a time): > 1/2 c. heavy cream

5. Let caramel cool a few minutes to get a thicker coat onto the apples. Pour into a small bowl to dip apples into, or leave in pan, spooning caramel over apples to coat. Roll dipped apples into chopped nuts (and any other toppings you choose), if desired. Set on wax paper to firm up. Will keep several days. (Around our house, they last a few hours max.)

Proverbs 15:17- Better to Eat Simple Veggies with Love

“Better a small serving of vegetables with love than a fattened calf with hatred.”

Proverbs 15:17

To apply that verse to modern times, we might say, “a small amount of organic veggies, raised and served with love, is better that a huge steak or fatty chicken, pumped up on steroids and chemicals to make it gain weight.”

I realize this verse is comparing humble foods served with love, to fancy foosd served by someone who perhaps doesn’t even like us that much, or who covets what we have or despises our personality, etc. But hatred might even stem from the selfishness seen in profit-mongers, eager to make a few extra bucks. They might think it’s OK to sacrifice quality, to end up with something that looks more impressive to the eye, even if it’s less healthy.

But enough lecturing for now. I don’t think the big, unscrupulous companies are listening!

For me personally, I do know that I enjoy simple meals served at home in the peace of our dining room, with a few people I love, more than when I’m served fancier fare that comes with chaos, angry words, and/or bitter attitudes. Plus, I really like veggies 🙂

Proverbs-15-17-Pinterest

Wallpaper: Desktop Backgrounds w/Verses

I made a little poster of that verse (above). We put a copy of it in one of our frames in a New Deli collage of food pics.

I also made up some desktop wallpaper to go with the verse too. Feel free to click on the link to the full-sized pictures (below), to use for your own computer, if you like!

To use for desktop wallpaper, left click on appropriate monitor size, then right click and choose “select :

Click here for Background for wider monitors

Click here for Background for shorter monitors

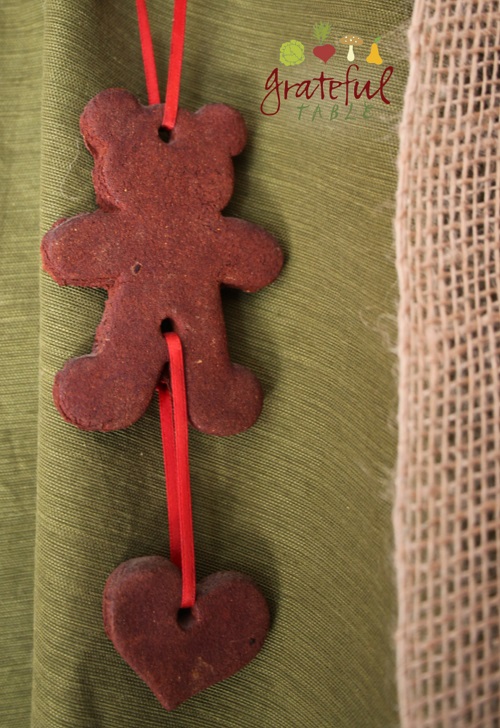
Christmas Crafts for Small Kids: Cinnamon Ornaments

For more homemade Christmas gift ideas, check out my post on “Homemade Spa Gifts“!

Our son, now over thirty years old, gave us this darling Christmas ornament he had made with his Kindergarten teacher. She explained the recipe to me years ago; a simple blend of glue, cinnamon, and water. At the time, I didn’t realize this ornament would become such a keepsake, lasting for years. (Yes, the cute cinnamon bear in the photo was made over twenty-five years ago!)

There are other popular ornament recipes out there. Many of them include applesauce in the ingredients. I can’t vouch for how long such ornaments will last, but I know this recipe will for sure. The gift from my son wasn’t painted with acrylic, but it still kept well. This is a sweet craft idea that can hold memories for years to come.

Holiday Cookie Craft for KidsINGREDIENTS

  • 1 c. ground cinnamon
  • 1/4 c. white glue
  • 3/4 to 1 c. water

PREPARATION

1. Stir the cinnamon, glue, and water together, mixing into a thick dough.

2. Roll out to 1/4 inch thickness, on cinnamon-dusted work surface.

3. Cut into shapes with cookie cutters. Make holes for hanging the ornaments, using a straw.

4. Lay the ornaments on wax paper to dry, turning once or twice a day. Let dry for several days at room temperature. (To speed process, one might leave them on a rack in a very low-heat oven.)

5. Paint with an acrylic coating, if desired

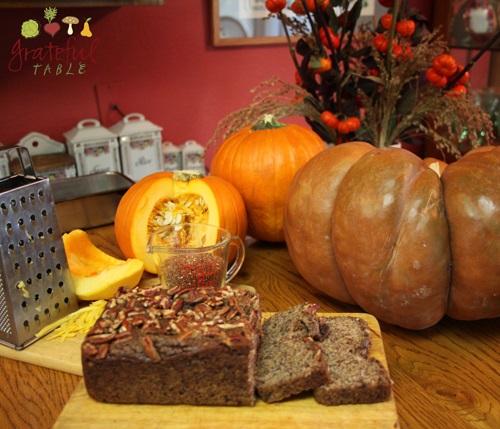
Quinoa Pumpkin Bread- W/Fresh-Grated Pumpkin, Gluten-free

This nut bread is made gluten-free by substituting quinoa (soaked overnight, drained, and processed) for flour. Using grated fresh pumpkin is convenient, as there’s no need to precook and process a pumpkin or buy it canned. Grate the leftover uncooked pumpkin and add to pasta dishes; it cooks in no time, but adds color and nutrition.

Serves 8 or so.

Gluten-free Holiday Bread

INGREDIENTS

  • 1 c. grated raw pumpkin (or butternut squash)
  • 1/2 c. olive oil (or coconut oil)
  • 2 eggs
  • 1 c. almond meal (or 2/3 c. whole almonds, ground into meal in blender or processor)
  • 1/2 c. brown sugar (or palm sugar)
  • 2/3 c. quinoa (Or substitute all-purpose flour *)
  • 2 tsp. cinnamon
  • 1 tsp. ginger
  • 1/2 tsp. nutmeg
  • 1/8 tsp. clove
  • 1 tsp. baking soda
  • 1/2 tsp. salt
  • 1 c. chopped pecans (or walnuts), divided (half is for topping)

PREPARATION

1. Soak quinoa overnight. Drain well before using, processing finely before adding to remaining ingredients. Use: > 2/3 c. quinoa

2. Line an 8 or 9-inch loaf pan with parchment; oil lightly. Preheat oven to 350 degrees.

2. Prepare grated raw pumpkin by cutting off a chunk of baking pumpkin (or butternut squash). Carefully slice peel off, then grate enough to equal one cup, fairly packed. To a bowl, add the ingredients in this order: > 1 c. grated raw pumpkin (peel removed before grating) > 1/2 c. olive oil > 2 eggs > 1 c. almond meal > 1/2 c. brown sugar > 2 tsp. cinnamon > 1 tsp. ginger > 1/2 tsp. nutmeg > 1/8 tsp. clove > 1 tsp. baking soda > 1/2 tsp. salt > 1/2 c. chopped pecans (reserve other half for top of nut bread)

3. Stir ingredients just until blended. Spread the batter into the prepared loaf pan and top with the extra pecans. Bake at 350 degrees for 55 minutes or so, until toothpick comes out dry. Let set for 15 minutes or so, then run knife along edges and remove from pan and serve.

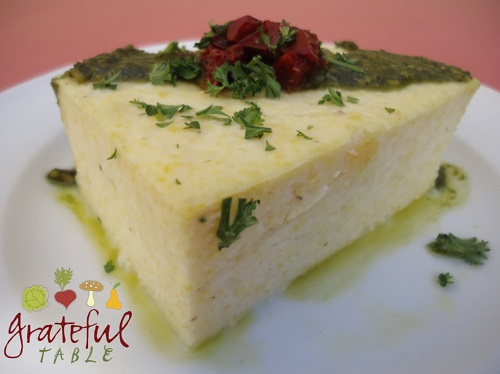
Easy Polenta, Garnished w/ Pesto & Sundried Tomato

 For traditional polenta, one slowly pours corn meal into boiling water, stirring vigorously to insure smoothness and no lumps. One proceeds to stir quite often, to insure that the bottom of the pan doesn’t scorch.

An easier approach: Slowly stir boiling water into the corn meal (vice-versa of the traditional way). Finish cooking in the microwave, stirring every few minutes, or bake (stirring once, half-way through). The remaining ingredients are stirred into the cooked polenta and poured into a serving dish. It firms up more within an hour or so, or serve immediately for softer polenta.

For maximum nutrition, find an organic, non-degerminated whole-grain corn meal at the health food store. A fine corn meal will give a softer texture; some will prefer the coarser grind. Serves 8-10, or 15 or so as an appetizer.

Easy Polenta- Just Add Boiling Water

INGREDIENTS

  • 4 c. boiling water
  • 1 c. fine corn meal, yellow or white
  • 1 tsp. salt
  • 1/2 c. parmesan
  • 2 TBS. butter (or olive oil)
  • 1/4 c. cream
  • 1/2 c. sour cream

PREPARATION

1. Using a large ceramic bowl, slowly add the boiling water to the corn meal, stirring constantly. When smooth, cook in microwave for 20 minutes, stirring once every minute or two. If baking, pour the corn meal mix into a 13 x 9″ pan; bake at 375 degrees in an oiled baking dish. Bake for 20 minutes, stir, and finish baking for 20 minutes more. Use: > 1 c. fine corn meal > 1 tsp. salt > 4 c. boiling water

2. When polenta is finishing cooking/baking, add the parmesan, mixing until it is smooth and melted into the polenta: > 1/2 c. parmesan

3. Also add: > 2 TBS. butter (or olive oil) > 1/4 c. cream > 1/2 c. sour cream

4. Serve immediately, or make ahead of time and reheat before serving time. Garnish with fresh chopped herbs, sun-dried tomatoes, or other toppings for variety.

5. To serve as an appetizer, make the polenta a day or two ahead. Pour the finished polenta into a 13 x 9” pan and chill. Before serving, spread the top with pesto and cut into squares. Put the firm polenta squares onto foil, slightly separated from each other. Sprinkle with parmesan and bake for ten minutes or so to warm, then broil just until the parmesan is golden. Serve garnished with a bit of sundried tomato.

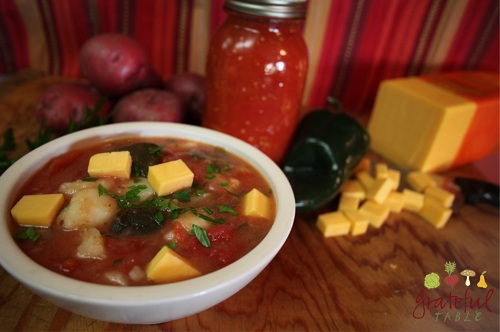
Green Chili Cheese Soup

A friend of mine told me about a green chili soup soup her grandma used to make. She explained what was in it, and suggested we try to make it at the deli.

So we did! It did not turn out like grandma’s, but all of us at the deli loved it.

This is a quick, easy soup recipe, with a light tomato broth, thickened a bit with potatoes, flavored with toasted cumin seeds. One might even roast the peppers from scratch. Anaheim (or Poblano or Pasilla) chilies can be broiled (about 8 minutes or so per side); after each side is blackened, set them aside in a bowl until cool enough to work with. Remove peel and seeds.

Serves 6 or so.

Vegetarian Soup w. Roasted PeppersINGREDIENTS

  • 4-5 med. potatoes, peeled and diced (about 1 1/2 lb.)*
  • 1/2 TBS. cumin seed
  • 1 28-oz.can tomato pieces (about 3 c.)
  • 1/2 c. diced green chilies, or to taste (4 oz. can or roasted from scratch)
  • 1 tsp. salt
  • 2 TBS. chopped fresh parsley
  • 2 TBS. olive oil
  • 10 oz. diced cheddar cheese
  • Chopped fresh cilantro, if desired

PREPARATION

1. In soup pot, cook the following until tender, in water to cover: > 4 med. potatoes, peeled and diced*

2. In toaster oven, toast for 2 minutes, until golden: > 1/2 TBS. cumin seed

3. To pot of cooked potatoes, add: > 1 28-oz.can tomato pieces > 1/2 c. diced, roasted green chilies > 1 tsp. salt > 2 TBS. chopped fresh parsley > 2 TBS. olive oil

4. Heat again to serve and garnish with: > 10 oz. diced cheddar cheese > Chopped fresh cilantro, if desired

*For a variation on this recipe, use hominy in place of the potatoes

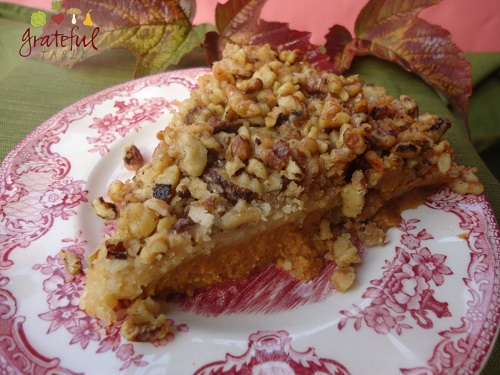
Pumpkin Streusel: Easy Holiday Dessert, Healthy Style

I’ll admit it: I’m not big on pie crust. Not only is it challenging to make, but it will often get soggy anyway. I don’t mind saving my ration of flour and butter for something possibly more delectable- like this pumpkin “pie” with streusel topping. Perfect for Thanksgiving!

This particular holiday recipe works for the busy cook. We were able to make two-hundred and fifty-plus servings of this for our church’s annual Women’s Christmas Dinner, since it’s easy to make, with the “crust” on top. It’s a streusel of sorts, sprinkled on top of a delicious, custard-like pumpkin filling. (Leave a comment if you need an easy, extra large dessert recipe that will serve a crowd of almost 300, because I’ve got this recipe written up in those quantities too! )Easy Pumpkin Pie- Custard w. ToppingThis recipe is more “healthy-style”, with a homemade box cake mix substituting for the typical box mix. Those ingredients have an asterisk, and can be replaced with box mix if desired, though I personally don’t like box mixes. There’s something funny about the “natural flavoring” in them that doesn’t taste natural to me at all!

Makes 2- 9″ pie dishes (or one rectangle); 15 servings.

INGREDIENTS

  • 29 oz. can (3 1/2 c.) Pumpkin
  • 1- 13 oz. can evaporated milk
  • 1 1/2 c. sugar
  • 4 eggs
  • 1 tsp. ginger
  • 2 tsp. cinnamon
  • 1/2 tsp. nutmeg
  • 1 tsp. salt
  • 1 c. flour*
  • 3/4 c. sugar*
  • 1/4 c. non-fat dry milk*
  • 1/2 TBS. baking powder*
  • 1/2 tsp. salt*
  • 2 c. chopped nuts (pecans or walnuts)
  • 12 TBS. butter (1 1/2 sticks), melted
  • 1/2 TBS. vanilla

PREPARATION

1. Mix and pour into two 9-inch pie dishes, or one 13×9-inch pan: > 29 oz. can (3 1/2 c.) Pumpkin > 1- 13 oz. can evaporated milk > 1 1/2 c. sugar > 4 eggs > 1 tsp. ginger > 1/2 tsp. nutmeg > 2 tsp. cinnamon > 1 tsp. salt

2. In separate bowl, mix: > 1 c. flour* > 3/4 c. sugar* > 1/4 c. non-fat dry milk* > 1/2 TBS. baking powder* > 1/2 tsp. salt*

3. Mix the dry ingredients and sprinkle over pumpkin; top with: > 2 c. chopped pecans

4. Drizzle on top: > 3/4 c. butter (1 1/2 sticks), melted > 1/2 TBS. vanilla

5. Bake at 325 for 55-60 minutes, until well-browned. Chill 4 hours or overnight. Serve with whipped cream; caramel sauce optional.

* Or substitute: Half of 18.25 oz. box yellow cake mix for the dry ingredients)