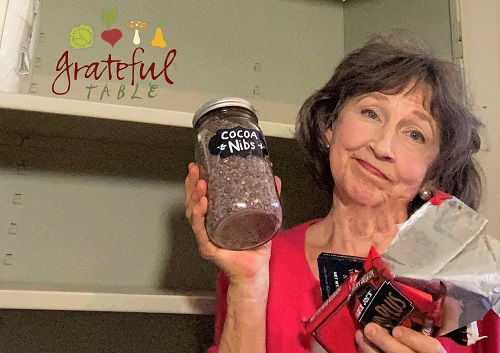
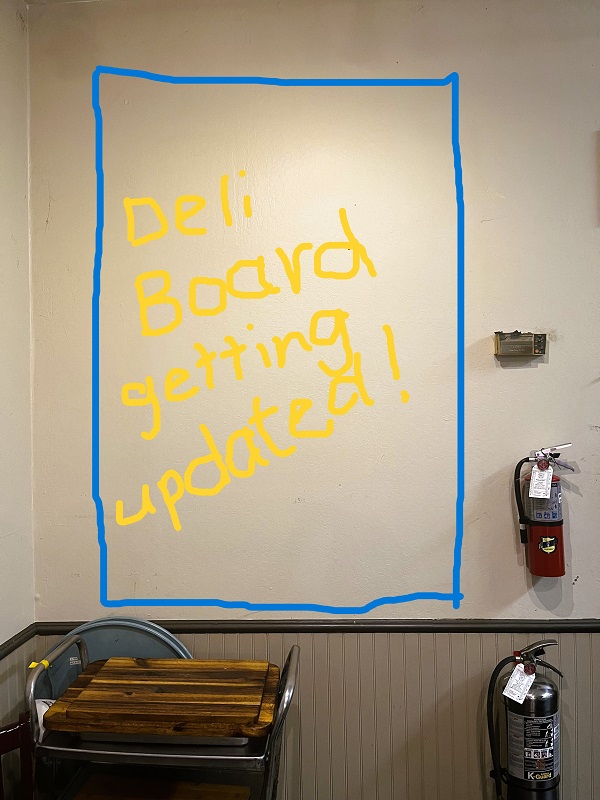
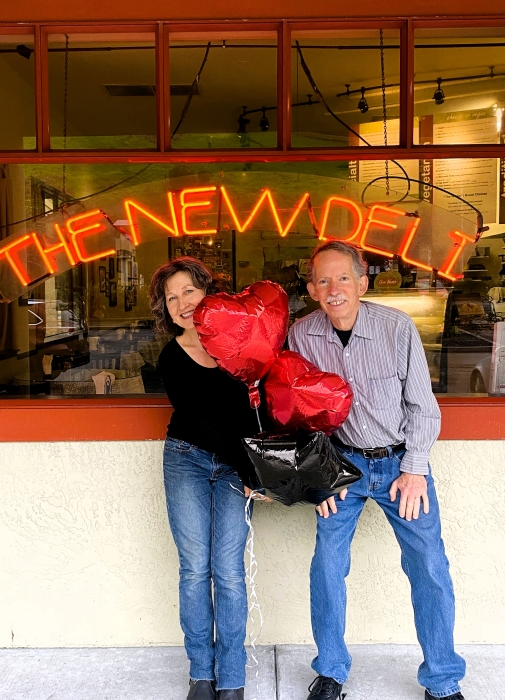
Chickening Out!

New Blogging Partner

Thought I’d post some pictures from the past nine months, of one of my Covid projects: chickens! I told Tom in April: If this thing lasts ’till summer, I want chickens. At least we’ll eventually get some eggs out of the deal, and maybe some home entertainment on the side.

Automatic Waterer & Feeder, & “Deep Litter Method”

We are still pretty busy with the deli, so it took a bit of research into how this could be easy. I needed to convince my hesitant husband. I discovered I could use the “deep litter method” in the coop, to make bedding cleanup an annual task (instead of more often). I put an 8″ layer of leaves and such into the coop; it has kept the area virtually stink-free. The slowly-composting floor heats the coop a bit too- perfect with our cool Bay Area weather. AND, after six months or so, I end up with an excellent compost to add to our garden. (I’ll let it finish composting completely after I remove it, but it’s practically finished.)

Gotta Start Somewhere (My Makeshift Mockup)

I also found automatic watering and feed containers, AND an automatic door for the coop, which would open and close with the sunrise and sunset.

Using Random Things on Hand…

Tom approved of my plans, in theory, so I moved forward, setting up random items in a coop mockup. My friend at church let me repurpose some chalkboards previously used for the drama team. Between that, and a neighbor letting me take an old, ten-foot beam off his hands, we had a vision for an actual structure. And Tom made it happen! (A true act of love.)

Our Friend Called This “Pinterest Worthy”. COOL.
Posers Say “Eat My Dust”
Making the Dust Box

In the process, our grandson helped Tom build the chickens a dust bath. (They love to groom themselves in it, and they actually need some sand in their diet to help them digest their other foods.)

After dropping said grandson off at home, I almost got caught up in one of this summer’s fires. The traffic had stopped and the fire leaped the freeway in front of me. But the prayer in my car was thicker than the smoke, and Jesus got me out of that!

Thought I Might Be Walking Home… Or, Running…

So, our baby chicks are growing up. I “spoil” them with ground, fermented organic grains and such, plus some sprouted grains and seeds. Grubs (black soldier fly larvae, AKA BSFL) are their special treat. (Yes, Tom even built me a Grub Hub, to keep the grubs happy through the winter.)

This is Not Your Usual “Grub Hub”

Now we have a new lockdown hobby (besides playing Ticket to Ride with a few friends, and seeing close family when we can): Watching the chickens. It’s been a blast.

The New Deli’s Covid-19 Chronicles

Open for Take-Out

The New Deli has been open during this Covid-19 crisis- we’re an “essential business”, and that works for us. (Tom says, “I guess if some people had to prepare their own food, they might starve, so we’re helping them out!”)

6 Feet Apart, Easy- Not Much Staff

6 Feet Apart, Easy- Not Much Staff

We had finished off 2019 with a staff of ten (plus Tom and me), but by early March, most of those folks had given notice. It was a perfect employee situation for this crisis. For the first six weeks of SIP (shelter-in-place), we had a meager staff of three (plus us). We’ve been able to add a few of our old crew members back on, and have been able to continue to provide lunches all along. Thankfully!

Cleaning Like Crazy

But what a strange new world. We’d already thoroughly cleaned the deeper recesses at the deli, the first week in. We even freshened up the paint here and there. But business was about a third of what it had been; barely enough to cover rent and payroll. Gone were the lines during lunch rush. Gone were the morning catering orders for office business meetings. Gone, most of the staff except the few of us needed to keep it going…

Some Mornings, No Traffic, More Shelter in Place

No Rush Hour- Everyone’s Home

Safe and Cello-Wrapped Sandwiches

Thankfully, so many folks working from home have been keeping our phone line busy, as we prepare orders for quick pickups. And there’s still an few calls for occasional business meetings, or special orders for other essential staff. Our cello-wrapped half sandwiches have been perfect in those cases.

Here’s a quick timeline from our New Deli Covid-19 Experience:

  • We got a case of napkins and toiletries early on, since those were not easily found during general shopping trips
  • We got face masks right away too, despite shortages, since one of our deli girls is quite a survivalist. She had face masks left over from last summer’s fires, and we were grateful for that!
  • Sanitize All Pens!

    Sanitize All Pens!

    We started sterilizing pens. And door handles. And other surfaces. (Is “germaphobe” even a thing anymore?) We realized it’s good to be aware of the many ways people might get exposed, even to simple common cold germs and such. I haven’t had a cold all season- I’m sure these protocols have helped in that way.

  • CV19, Phase 2- Leave on speaker phone- not to mouth!

    Leave on Speaker Phone- Not Mouth

    We started putting the phone on speaker only, so no one had to put their face up close to the phone to take orders. We’ve decided we actually like this approach- it’s been working well!

W/Grandson. Mask-free for Pic!

And now, as Memorial Day Weekend approaches, we hope we’re heading out of this crisis soon. We know it will change us. And it has been a challenge. But good will come from the ashes, right?


A Life Well-Lived, A Man Well Loved

I was in the process of compiling my notes, to post a recipe for Liposomal Turmeric/C, wrought from studying medical papers and other online info. I’ve been taking this concoction for the last year, and it appears to have improved my thyroid health. The doctor said my annual lab test indicates that I need to lower my OTC thyroid gland dosage, because apparently, my thyroid is now functioning better. Fourteen years on that dose, and now it can be reduced?! The only dietary/lifestyle change I made in the last year was in taking this new liposomal turmeric mix daily. Yes, it’s just anecdotal evidence, but I’m thinking it was thanks to that Liposomal stuff.

Doc also said, “Good job- your cholesterol levels are better too.” Didn’t want to get into it with him that I hadn’t made any other changes (except the liposomal). Maybe I’ll tell him someday!

In any case, I was about to post that latest recipe. But something else came up…


One of dad’s many patents

My dad chuckled when I told him about my latest findings on my improved thyroid and cholesterol. I think he was proud of me! He was an innovator, a researcher, a creative thinker at heart (AKA Gerry Klees, engineer at GM).

He had many patents (like the one shared here), and other innovations as well. At one point, in his retirement years, he created a doggie door that opened by a remote on the dog’s collar, whenever said dog (Honeybell) came expectantly to the sliding glass wall. He even began the patent process to produce more such doors for other dog lovers.

Mom & Dad, 1956- Prom

He passed away peacefully in his sleep, May 1st. So I will postpone the Liposomal Turmeric article, and create this post first, in honor of my dad. After all, I’m pretty sure I got my geekiness from him. Thank you, dad, for that, and for the many other gifts you shared with family and loved ones.

The Klees Family, 1967- Jean, Dad, Mom, John, Jennifer

He approached sainthood in his later years. He won a battle with rectal cancer over ten years ago, eventually battling bladder cancer as well. Quite relentlessly. But that wasn’t his biggest feat.

For the last ten years, he’d also been mom’s caretaker in their home, as she’s gradually succumbed to Alzheimer’s. Perhaps mercifully, she is hardly able to comprehend that the love of her life, her soulmate and husband of sixty-plus years, is now gone.

This past year, mom’s moments of clarity grew more seldom. But dad continued on, bathing and feeding her, helping her up to sleep, down again to the kitchen for a meal or some espresso, or maybe to the family room to rest on the couch. How did he do that? He had his own battles to fight as well. Yet he did.

1991, at brother John’s Wedding

It’s funny how God uses situations. Before mom’s dementia, she seemed to be the glue that held the family in place. Over the phone, I talked mostly to her. Dad might pop on for a moment now and then, when he wasn’t out playing tennis, or golfing, or doing a project in his shop. Mom even worried about that- “How’s dad going to survive, if I’m ever not here? Will he even call to talk to any of you?”

But in the past ten years, dad did start talking and calling. It was him we called. It was with him that we could share all the latest news, insights, observations, thoughts… I so enjoyed those talks.

And then the time came. I believe God told him- it’s OK to go now. Mom is in God’s hands now, and my father’s work here is done.

2002- One of Many Christmases Spent with Family

2002- One of Many Christmases Spent with Family

The morning before his passing, he made the two cups of espresso as he always did. We spent holidays and other occasions in that house for the last thirty-three years, and dad always made us our espressos. He would pull out the ceramic cups matching the everyday dining ware. Creature of habit maybe. But those were always the cups he used.

That last morning, he pulled out the special espresso cups two of his grandchildren had made years ago. The two little cups tucked away in the corner of another cupboard. He didn’t use the regular cups. I believe he was showing us in this small, but very significant way, that he knew his time had come, he was going in peace, and he was using those special little cups to tell us: He loved his family. A life well-lived, a man so very well loved.

Dad’s Last Christmas, 2019


PS Another thought hit me this morning. For the last week or two in April, the song “I Can Only Imagine” kept rolling around in my head. I wasn’t sure why. We listen to all kinds of worship music, but this was more of a special-occasion song. Husband Tom sang it a while back at our church for its 50th anniversary.

Well, once more, God was going before me. I believe He put that song on my heart to prepare me, because that is what my dad is doing now. (Well, I can only imagine what it’s like, but it’s good to know that he is with Jesus.)

French Toast, Fancier Shower Style, Easy!

This year’s shower plans were already lining up…Um- until Covid-19 hit.

I had this post ready to share, but it seems a bit untimely now. Except that some friends are finding time, during shelter-in-place, for some special family breakfasts. So I’ll share this anyway- maybe give this one a try!

Easy, Fancy French Toast for Showers, Special Occasions

Use baguettes to make mini French Toast; an upscale brunch addition that’s perfect for special events like showers. It turns out a bit like cinnamon rolls, only way easier!
Much of this can be prepped the day before, making it easy when entertaining.
Serves 8 or so, as part of brunch
INGREDIENTS
  • One sweet baguette, 8 oz. (24“)
  • 8 eggs (my orig. was 10 eggs)
  • 1 c. cream (OR ½ c. cream, 1 c. milk- not sure)
  • 1/4 tsp. salt
  • 1/4 c. (half stick) butter
  • 2/3 c. sugar
  • 1 tsp. nutmeg
  • 2 tsp. cinnamon
Early the day before, cut the baguette into 18 pieces, about 1 1/4” thick. Let sit out to dry some.
The night before, make a mixture of the following: > 8 eggs > 1 c. cream (try that. Later try w/milk if nec.) > 1/4 tsp. salt
Butter a 13 x 9” baking dish; add bread to mixture to the baking dish. Pour egg/cream mix on top and refrigerate, letting the bread soak in egg mix overnight.
To prepare for brunch or breakfast, preheat oven to 350 degrees. Let egg dish sit out while oven preheats.
Sprinkle top of bread pieces with a mix of: > 1/4 c. butter, room-temperature > 2/3 c. sugar > 1 tsp. nutmeg > 1 TBS. cinnamon
Bake for 20 minutes or so. (Bake for just 10 minutes if it will be holding in warm oven for 30 minutes or longer.)
Broil for about two minutes, until sugar is golden and bubbly (watch carefully). Turn oven off; keep French Toast in warm oven until serving time.


Eating Healthy- Weight Maintenance

Home-grown celery- eat local!

“Eat Local”, as in your backyard!

My head was about to explode over the immense wealth of world wide web info on being healthy and fit. So I thought I’d better take notes in a post, which you can join me in mulling over, if you’d like.

It started over half a year ago, when I realized I was going through another phase of not being able to shake a few pounds. This happens now and then, if my eating habits get more and more lax. Not that I want to get obsessive about this… But I do feel better at a certain weight, and I digest my food better, and my food-burning bank account stays flush. (We usually want to see our bank account grow, but not in this case.)

I thought I’d look into some of the THM (“Trim Healthy Momma”) products, which I’d seen at my daughter-in-law’s. I was curious about the approach of these two Christian sisters, who have a popular book out, and website to go with it. Michelle had tried THM’s Baobab powder*, which comes from the fruit of the Baobab tree, and is incredibly nutritious. I’ve already got my own theory that, as soil nutrients gradually get wiped out from over-farming, much of our food is less nutritious. So it only makes sense that foods from more ancient, more pristine and far-away soils would contain more nutrients than our run-of-the-mill produce. (Oops- I really do want to buy local, and I do actually grow bunches of our own foods, but…I buy bags of superfoods on Amazon too.)

Arugula & Other Garden Greens for Health

Arugula’s thriving in the garden

I felt a bit like Alice in Wonderland, like I’d fallen down a worm hole to another dimension, pondering talk of “S Meals”, “E Meals”, and “FP Meals” (as mentioned on the THM website). A lot of it makes sense, though I hadn’t considered or even heard of this approach before. Basically (super-streamlined version), if we want to be trim and healthy ourselves, we might follow three rules as much as we can (even if we do splurge on occasion).

#1- Always separate fats from carbs. Wait. What? I thought I could have that homemade artisan bread and butter as a snack. Oops. (Note to self: This would be a great weight-loss strategy for me, since I never really want bread without the butter. Maybe a little bread with my butter… I hardly even want carbs if I can’t load ’em up with some yummy fats!)

#2- Always include protein; a good mate for carbs or for fats. Hold on. Again. I guess I need to include some protein in my meals and snacks?! Makes sense though. If I have a snack of a cup of blueberries, I might even get hungrier. (Weird, but true.) So then I might eat another cup of blueberries. Or something worse, because I’m still hungry. Humm…maybe this could work…

#3- Stay away from all forms of sugar (a weight-gainer). Well, that makes sense. Except for the nod to stevia. A lot of the THM recipes include stevia, which doesn’t totally make as much sense to me, since one of my goals is to NOT have a sweet tooth. A friend and I have noticed how we could retrain our tastebuds to the point where raspberries taste plenty sweet. So I would skip the stevia. Even if I have heard that stevia doesn’t raise insulin levels, there is this article to consider (about how we might get messed up because our bodies think we’ve just ingested a bunch of sugar calories, but actually didn’t).

Pomegranates- Healthy Winter Fruit

Pomegranates- A tart winter fruit loaded with nutrients

So… let’s see. Where did my head start exploding? I could actually wrap my mind around the three rules, and even the Meal Definitions didn’t seem too overwhelming. Those are, in a tidy nutshell, as follows:

“S Meals” = “Satisfying- These are meals of proteins and fats, which contain zero or very low carbs. (Think veggies, but not potatoes, which have too many carbs.)

“E Meals” = Energizing- These are meals of lean proteins and carbs (like, 45 grams or less of the carbs- no big starches here either). E meals are also low fat- only about 2 tsp. fat total. (The little bit of fat helps the body glean more nutrients from the meal.)

“FP Meals” = Fuel Pull-  These meals will help a body burn fat, and consist of lean proteins, with hardly any fat or carbs. Without those extra carb/fat calories, the body ends up using its own fat or energy stores to digest that lean protein.

So Now What?

Breville's the best orange juicer ever!

:When Life Gives You Lemons”, or, “When the Season’s Harvest is Blood Oranges…”

Our pastor likes to finish sermons with a “So What?” So, I’m stealing it. Since, after processing all this info, and beginning this quest (over six months ago) to reestablish a healthy, working system, what have I concluded? What now?

1. Don’t Just Buy Local- Eat Local, as in Your Backyard! OK, I’m veering away from the THM precepts here, but I think a lot of our health has to do with proper nutrition. We have a perfect Creator who supplied us with everything we should need for health. So- was it just coincidence that He gave us certain foods in certain seasons? Seems to me we most likely need many of the very things that are ripe and ready under our noses. With flu season underway, is it a coincidence that we have seasonal fruits that are loaded with vitamin C to fight off bugs? In my own yard, we had a plentiful harvest of persimmons, and are able to continue eating the extra ones I dried over the holidays. We also have lots of citrus ripening. Celery, parsley, and other greens are loving the cool weather- is this a hint that I need to make more soups and salads, to use all this stuff? YES, probably! Another perk of growing your own: you can avoid pesticides and irradiation, which may or may not be on purchased produce, imported or otherwise

Hope you & yours are blessed with health & love in the new year!

2. Do Include More Protein, Less Carbs, to Avoid Weight Gain- Am I jumping on the Keto Bandwagon, going gluten-free and low-carb and all? Well, the proof was in the pudding, which I couldn’t eat on a regular basis without gaining weight. I did follow the THM precepts for the last six months, and felt healthier, AND maintained my weight goals. Maybe it’s not for everyone. But there does seem to be an almost world-wide health crisis, as “food” companies continue to profit from producing “food” that is not nourishing. I don’t think it’s an issue of accepting a certain body image, if that body has been created from a diet of very addictive non-food! In that case, it seems to me the right thing is to stop accepting the “food” that leads to sickness.

OK, so I do sound like a party-pooper. But when we are able to break our food addictions, healthy food starts tasting so good. I can only hope more people will be encouraged to nourish their bodies, and enjoy health in the process!

Teaser for upcoming post: My latest favorite Smoothie, with a dry “will powder” blend mixed in- keeps me from craving other not-so-healthy foods!

Caramel Flan, Taste-of-Home Style (+ 200-serving Recipe)

My friend wanted me to share the flan recipe we served at our church’s annual Christmas Dinner. It’s actually straight from the Taste of Home website (see “Creamy Caramel Flan” recipe here). But I can embellish with my own story, for your amusement. And add a few tips. Otherwise though, yeah, not my recipe!

Flan for 200?!

But I can tell you: you can multiply this recipe by 24, making it in thirteen 13×9″ pans, cut into 16 servings each, for 208 servings total. IF you are truly serving a crowd, like we did last night. The dessert received good reviews (and some raves, but those were all my friends, right?).

But here’s the catch. Do not caramelize the sugar on one big batch. Do a quarter batch at a time- this cuts your losses, in case the first batch of sugar turns into a burning mass by mistake.


What? How does one turn the sugar into a burning mass, you ask? Well… turns out, caramelizing one pound of sugar at a time is usually no problem (we do it almost daily at The New Deli), BUT. In caramelizing a larger quantity, it could happen that once the sugar gets to just the right temperature, the sugar will keep on cooking, going right past that golden stage, to the stinky brown stage. Even with the heat off! It apparently reaches critical mass and you can hardly get it out of the pan quick enough.

So, my first tip: maybe don’t try to make 210 servings of this. But if you do, turn the heat off for the sugar before it’s the right color. Wait and see- it might get to the right color on its own, given a few extra minutes, even with the heat off.

Second tip: If you want this to become more of a cheesecake than a flan (but an easier cheesecake, since you don’t even need to make a crust for it), then just bake it a bit longer than called for. We apparently did, and that’s what happened!

The recipe’s listed below, with one or two tweaks, if you want to try a single batch of this.

Caramel Flan

Serves 8-9.

Ingredients

  • 3/4 c. sugar
  • 1/4 c. water
  • 8 oz. pkg. cream cheese, softened
  • 5 eggs, room temperature
  • 1 can (14 ounces) sweetened condensed milk
  • 1 can (12 ounces) evaporated milk
  • 1 tsp. vanilla

Cook the sugar and water over medium-low heat, in a heavy-bottomed pan, until melted and golden, about 15 minutes. Pour quickly into a 9×9″ dish (or the equivalent), tilting to coat the bottom; let cool 10 minutes or so. Use: > 3/4 c. sugar > 1/4 c. water

Beat the cream cheese until smooth: > 8 oz. cream cheese

Add eggs one at a time, until mixed: > 5 eggs

Then add: > 1 can sweetened condensed milk > 1 can evaporated milk > 1 tsp. vanilla

Mix well. Pour over caramelized sugar.

Put dish in a larger baking pan. Pour boiling water into the larger pan, 1″ deep.

Bake at 350° for 50-60 minutes or until center is just set (mixture will jiggle).

Remove dish from the larger pan, let cool for 1 hour on a wire rack. Then refrigerate overnight.

To unmold, run a knife around edges and invert onto a large rimmed serving platter; spoon sauce over the top.


Just for fun, here’s the recipe for 208 servings, below:

Caramel Flan for 200

13 pans cut in 16 pcs. ea. (.318 ea.)

Ingredients

  • 9.84 lb. sugar (2.45 lb. per batch)
  • 2.68 lb. water (.67 lb. per batch)
  • 24 8-oz. pkg. cream cheese, softened
  • 10 dozen eggs
  • 24 cans (14 ounces) sweetened condensed milk
  • 24 cans (12 ounces) evaporated milk
  • 4 oz. (.24) vanilla

In a heavy saucepan, cook sugar and water over medium-low heat until melted and golden, about 15 minutes. Use quarter-recipe amounts (do this four times): > 2.46 sugar > .67 water

Quickly pour into (FOUR + ¼ PAN/ea. batch) ungreased 13 x 9” dishes, tilting to coat the bottom; let stand for 10 minutes.

Beat the softened cream cheese until smooth. Add eggs, one at a time, until combined. Add remaining ingredients; mix well. Use quarter-recipe amounts as follows (do this four times). Use: > 3 lb. cream cheese > 30 eggs > 6 sweetened condensed milk > 6 evaporated milk > .24 vanilla

Pour over caramelized sugar, in FOUR + ¼ PANS/ea. batch.

Place dishes in larger pan (chafing pans?). Pour boiling water into larger pan, 1″ deep. Bake at 350° for 50-60 minutes or until center is just set (mixture will jiggle).

Remove dish from a larger pan to a wire rack; cool for 1 hour. Refrigerate overnight.

To unmold, run a knife around edges and invert, to serve.


Blueberry Pie, Jean’s Recipe

This recipe is adapted from the June, 1989 issue of Bon Appetit, with a few tweaks from my mom, sister, and me. But it’s more than a recipe—it’s a sweet memory of my summer visit to Michigan. My sister was getting chemo, so I was helping by bringing dinner. I did not expect to see a beautiful blueberry pie on the counter when I arrived, which Jean had made, despite any struggles she was having. This was a family-favorite recipe she’d made many times, and I sure was glad I finally got to try it myself.

Any recipes originating with Bon Appetit are also a precious reminder of my mom’s legacy—creating beautiful desserts and meals inspired by that magazine, which she subscribed to for decades. She saved and marked up stacks of them, dating from the seventies through the early 2000’s. Mom has passed along some of the very best recipes to my sister and me. The memories live on, and more get made!

I recently brought this to a church picnic for the pie contest. It won a few fans, even if it didn’t win first place. (My friends, who also try to limit their sugar intake, figured that that was the fault of judging team’s composition: four guys who love sugar.)

This is the best blueberry pie my friends and I have ever had. The cooked blueberry sauce gets mixed with raw blueberries, which gives the pie fresh texture (no pie crust full of gooey jam here…). I personally like to use unsweetened (or barely sweetened) whipped cream on top, but… that’s just me!

BonAppetit-Style Blueberry Pie w/Fresh Blueberries, Less SugarMakes one 10” pie, serving 8-10

PIE CRUST INGREDIENTS

  • 1/2 stick butter, cold, cut in pieces (1/4 c.)
  • 1 c. + 1 TBS. flour
  • 2 TBS. cold water (.06)

Process in food processor just until butter is coarsely mixed in throughout (not pureed smooth): > .19 butter, cold > .33 flour
Pulse in food processor again, adding cold water slowly through top: > 2 TBS. cold water
Turn dough out onto plastic wrap; press into flattened blob; let rest ten minutes or so.
Roll dough out between two pieces of plastic wrap. Press into pie shell. Floured hands make forming the crust easier.
Freeze shell for 20 minutes or so, or overnight (wrapped up).
Preheat oven to 450 degrees.
Bake chilled shell at 400 degrees for 12-20 minutes, until golden.
Let pie shell cool.

PIE FILLING INGREDIENTS

  • One baked pie shell
  • 1 1/2 c. frozen blueberries
  • 3/4 c. sugar
  • 1/4 c. corn starch
  • 1 TBS. butter
  • 1/8 tsp. salt
  • 3 c. fresh blueberries
  • 1 1/2 c. cream

In a small pan, mix together: > 1 1/2 c. frozen blueberries > 3/4 c. sugar > 1/4 c. corn starch > 1 TBS. butter > 1/8 tsp. salt

Heat mixture on medium heat until bubbly, then simmer for two minutes to finish cooking. Let cool.

To cooked mix, add: > 3 c. fresh blueberries

Spread mixture into cooked pie shell; top with whipped cream. Use: > 1 1/2 c. cream

Refrigerate or serve immediately.

Chia Pudding, Healthy, Super-fast, Eco-Friendly

I recently posted this recipe for Coconut Honey Butter, which is the base for an easy Chia Pudding. I call this pudding “eco-friendly”, because its made with a concentrated mix you’ve prepared, that doesn’t use boxes of watered-down (and possibly rancid) nut milk as the base. Therefore, it’s not promoting the production, packaging, and transport of what’s essentially a product that’s 85% water! Why use all that gas to truck boxes of water to stores where we buy it, and throw out the extra packaging?!

Sorry, did that sound like a rant? Back to the subject: Chia Pudding…

Fast Easy Chia Pudding w/OUTBoxed Almond Milk!

Chia Pudding

This is an easy recipe to whip up. Just do it six or more hours ahead of time (or overnight for a morning treat). The chia seeds will firm up this way.

Serves 3-4

INGREDIENTS

  • 1/2 c. coconut honey butter (see recipe)
  • 1/2 c. boiling water
  • 3/8 tsp. salt
  • 1/4 tsp. almond extract
  • 1/3 c. + 1 TBS. chia seeds
  • 1/2 c. cold water

Blend first four ingredients until smooth: > 1/2 c. coconut honey butter > 1/2 c. boiling water > 3/8 tsp. salt > 1/4 tsp. almond extract

Pulse in chia seeds and cold water just until blended: > 1/3 c. + 1 TBS. chia seeds > 1/2 c. cold water

Let mixture rest at 5-minute intervals, pulsing to mix lightly every 5 minutes. Do this three times, then refrigerate pudding in serving dishes, or glass container.

Serve after it sets up, at least six hours later.

Coconut Honey Butter- For Smoothies, Chia Pudding, Etc.

This is a bit like a concentrated “nut milk”, made with coconut butter. I add some grass-fed butter to it too, since it’s synergistic with the cod liver oil we have every day (butter increases the absorption of the CLO’s nutrients).

Oh wait—I add the butter ‘cause it tastes so good! (OK, maybe for both reasons.)

The beauty of a concentrated mix like this is: it keeps much better than the average nut milk. I did try making my own nut milk… alas, I couldn’t make a big batch, as it would spoil before we consumed all of it. But this recipe keeps for a month or two!

Just a note as to why I make this particular recipe: because that concentrated coconut manna stuff I get is pretty tough to get out of the jar. (It’s almost always cool in my Bay Area kitchen.) By melting that jar of solid paste, and mixing it with some honey, butter, and vanilla, it becomes a semi-solid. Then I can easily take a hunk of it out for various purposes. Perfect!

Nut Milk Concentrate- Greener than Cartons!Add a couple tablespoons of to this Turmeric Golden Milk Drink. Or use for smoothies–I blend with a splash of warm water to make it creamy, then add other ingredients.

OR, make easy Chia Pudding out of it!

Makes 1 1/2 qt. or so

INGREDIENTS

  • 1 jar (15 oz.) coconut manna (AKA “coconut spread”, “coconut butter”, “coconut cream concentrate”)
  • 1 c. butter
  • Scant 1 c. honey (.65 lb.)
  • 1/4 c. vanilla
  • Optional: 1/2 c. macadamias or Brazil nuts (or other favorites)

Melt the coconut manna by setting the jar in a pot of simmering water (with a towel at the bottom of the pot to keep the jar from breaking). Use: > 1 jar (15 oz.) coconut manna

When the manna’s melted enough to remove from jar, add to small pot along with: > 1 c. butter > Scant 1 c. honey > 1/4 c. vanilla

Gently warm the mix until butter’s melted, then stir until blended.

Pour into glass container and store in refrigerator.

Chocolate Fountain: Easy Dip + Fixings

We had a chocolate fountain at our women’s retreat this spring. I’m thinking, if it can be pulled off there, where we had no access to a kitchen, it could be pulled off just about anywhere. Being that we were setting up in a building out in the woods, with running water being about our only kitchen convenience, I streamlined the goodies used- it was easy to rinse strawberries and set out boxes of this and that, and it worked. Minimal fussing, maximum enjoyment!

Previously, I had used another pretty easy approach, letting the oven warm some of the chocolate mix, which helped me to avoid having to babysit the stuff (stirring it regularly in a double boiler and all that). I added the remaining ingredients after 30 minutes, giving it another 30 minutes in the oven. It just took one good stir, and it was ready to pour into the machine.

This most recent time, I used a crockpot to warm the ingredients. No extra stirring really (except at the end). After an hour or so, it was ready to pour into the fountain. And get eaten up. Yum! (See bottom of page for that recipe.)

Warm ingredients in low-heat oven first, for easy chocolate fountain

Chocolate Fountain for 50

Use more or less dark chocolate, according to taste. Serves around 50.

INGREDIENTS

  • 1/2 c. + 1 TBS. coconut oil
  • 3.6 lb. chocolate chips (part dark, broken into pieces, if desired)
  • Optional:.2 TBS. cocoa butter, chopped

Add coconut oil and about half of the chocolate in a big bowl and warm in a 170° oven*for 30 minutes, until melted. .Use: > 1/2 c. + 1 TBS. coconut oil > About 5 c. (1.80 lb.) chocolate chips > Optional: 2  TBS. cocoa butter, chopped

Stir well. Add the remaining chocolate chips (about 4 1/2 c.) and warm in oven again for another 30 minutes.

Pour into machine, according to directions. Make sure it’s very, very level.

Serve with pineapple, angel food cake, strawberries, pretzels, marshmallows, etc. If using bananas, add lemon juice to protect from browning.


Easy Chocolate Fountain for 70, Crockpot-Style

It’s suggested that 4 lb. should serve 50 or so. For our event, 5 lb. served 70 ladies.

INGREDIENTS

  • .62 coconut oil
  • 5 lb. chocolate chips (part 70% dark, broken into pieces, if desired)
  • Optional: .15 lb. cocoa butter, chopped
  • Five 2-lb. pkg. fresh strawberries
  • 1 lb. pretzel sticks
  • 1 box graham crackers
  • 1 bag marshmallows
  • 1-2 angel food cakes

Melt all ingredients in crockpot; on high, it may take an hour or so, with some stirring, and supervision to be sure it doesn’t get too hot. On low, it may take two hours. Use: .> .62 coconut oil > 5 lb. chocolate chips (part darker chocolate if desired) > 15 lb. cocoa butter, chopped

Pour into machine, according to directions. Make sure it’s very, very level. The machine will hold 4 lb. of chocolate (or a bit more), so leave some of the chocolate in the crockpot, to replenish later, if necessary.

Serve with favorite accompaniments.