The New Deli will be closed for the long weekend, but we’ll be back Tuesday! Looking forward to a Monday off, gathering with friends and loved ones; celebrating the sacrifices made for freedom…
I’ve only known of one person who’d given his life for freedom. My dad was relatively safe as an engineer at Chrysler’s Missile Division, back during the Cold War. And my father-in-law survived serving in Egypt during World War 2, also as an engineer.
Meanwhile, most of our family has known freedom at relatively little personal cost. No one’s asked us to give that much, even though John 15:13 says, “Greater love has no one than this: to lay down one’s life for one’s friends.”
Jesus is the only one I know that’s gone that far. I love the verse that Martin Luther King referenced, from John 8:36- “So if the Son sets you free, you will be free indeed.” I can really rejoice, that Jesus died for my sins, rose again (conquering death), and gives eternal life to all who believe in Him.
Going green is a big deal these days. I guess I should be proud to say we’ve been going green for a long time… recycling and composting deli scrap buckets since 1985, growing our own organic produce- that kind of thing. But such actions still won’t ever actually redeem us.
Now what does that have to do with St. Patrick’s Day? Well- March 17th was my grandpa’s birthday. The family always had great fun celebrating this wonderful, humble, godly man. When I was ten years old, modeling my new two-piece bathing suit (back in the sixties), he shook his head. I heard him say, “Jennifer should not be wearing that.” It was probably the beginning of much upcoming teenage eye-rolling on my part. But I still loved my grandpa.
He was right though! Even when “everyone else is doing it”, it doesn’t make it right. Mine was a rebellious generation (as many can be when going through puberty?). But the negative effects might’ve been diminished if more parents had said no to so many things. Even now, colors, appearance and styles may change, but of the underlying root causes, some things never change. Man has a “want” to sin…
Just to wrap up this post about my grandpa and St. Patrick’s Day… The last memory I have of my grandpa was actually after his death to cancer in the late seventies. I would often have a dream of him standing at the bottom of some steps, with something like the glory of heavenly light surrounding him. He would be crying and holding out his arms to me. Before getting saved in 1996, I would discount the dreams by assuming it was about him, and that he was sad he’d died, and he wanted to come back. Never thought it was about me. But the dreams would continue, sometimes a year or two apart. But always poignant, always leaving my heart a little sore.
In the mid-nineties, I came to know Jesus as my Lord and Savior. A few years passed after that…And then it hit me: I hadn’t had any more of those recurring dreams of grandpa! I came to realize, the dream was about my grandpa calling out for me to be saved. I’m not claiming that “spirts” can talk to us from the dead, in some Ouija-board type of fortune-telling. But I thought of the verse from Luke 16:22-23: “The time came when the beggar died and the angels carried him to Abraham’s side. The rich man also died and was buried. In Hades, where he was in torment, he looked up and saw Abraham far away, with Lazarus by his side.” My grandpa never wanted me to be like that rich man. It just took awhile for me to figure that out!
I’m so happy I will see my grandpa some day in heaven. Thank you Lord, for those you’ve put in our lives, who pray for us even before we know we need the prayers.
Oh, for starters, The New Deli will be closed for President’s Day, Monday, February 20. But we’ll be back Tuesday, business as usual!
Now, on to more interesting thoughts, provoked by that Daniel and the Lions’ Den story. You know the story- some of the higher-ups didn’t like Daniel, and were able to incriminate him by having the king outlaw prayers to anyone but King Darius. Of course Daniel got busted, cuz he had to pray to his God.
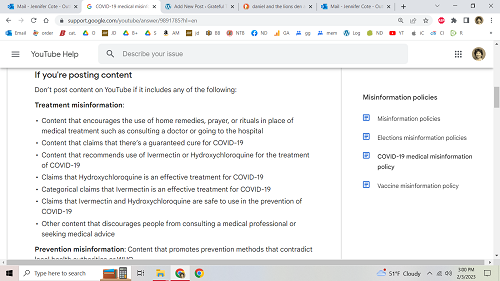
That was in the old days, right? Yet, here in 2023, I was surprised to read the YouTube guidelines…”Don’t post content on YouTube if it includes any of the following: Treatment misinformation: content that encourages the use of home remedies, prayer, or rituals in place of medical treatment such as consulting a doctor or going to the hospital.”
Wow! You know me- I’ve always encouraged the use of home remedies. And prayer. I have not actually said, “do this and avoid the medical community”… BUT… is that why Google shadow-banned me?!
These past three years, I’ve been apprehensive about posting “home remedies” that worked for me. Tom and I did have a short bout with Covid over the holidays in 2021, when I had a bad headache over the weekend, but that was about it. I wanted to post the recipe I used for getting optimal amounts of Vitamin C and other nutrients (through a liposomal recipe I tweaked), but I didn’t want to get shut down. So I just mentioned it among friends. I made quite a few extra batches of the stuff during that season. I took the liposomal mix (plus another “tonic” using organic grapefruit peel and such) whenever I felt run down. Thank the Lord He’s kept us so healthy through it all.
So, as for the lion’s den, even if things look bleak, those lions won’t be opening their mouths for God’s people. He does protect us, even when we keep praying. I suspect it might seem like “misinformation” these days, to suggest that Liposomal C and other “home remedies” may yield positive results. And my own personal experience is only anecdotal, but for now, I think I can still share that much!
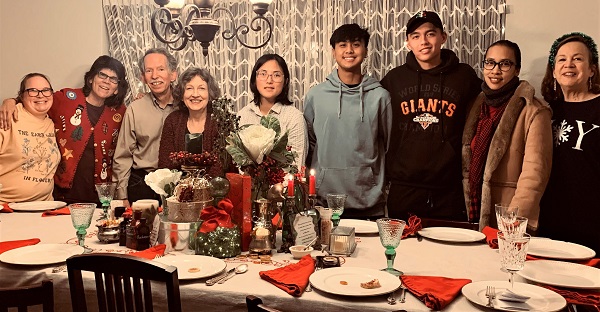
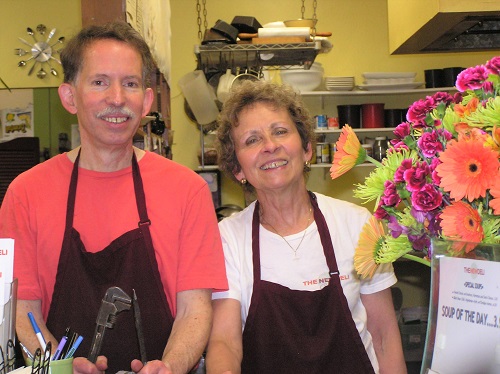
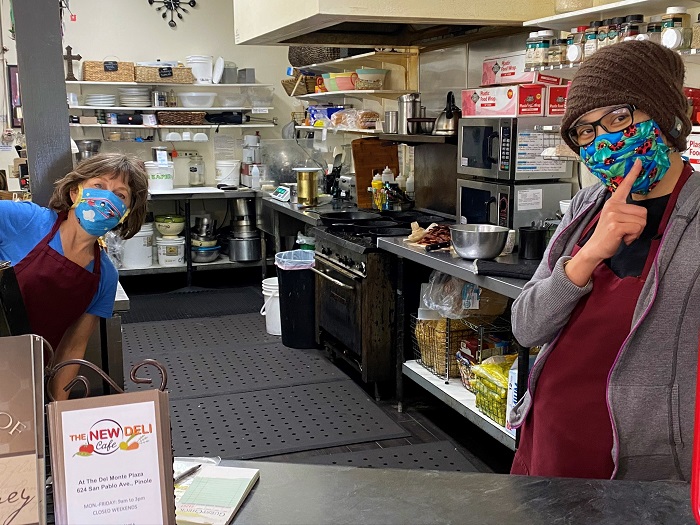
Posting a quick note for any customers wondering if we’ll be open for Martin Luther King Jr. Day: We will not! But I’ll throw in a picture of the team, from our New Deli Christmas Party this past year.
In other news… so weird- can you be “ghosted” on Google?! It looked like something very strange had happened- like that no one was stopping by the website. Suddenly. After over ten years of three thousand plus visitors to the site monthly, it flatlined to zero visits from November on. Well, we can’t always go by appearances. We have to walk by faith, right? As it turned out, I mentioned it to a friend, who said, “Well, that’s a lie. I was just on your website the other day, checking out a bunch of pages. For a long time.” (Another friend confirmed as well.) Moral of the story: we might sometimes get discouraged, if we choose to look at the surface. But we can be encouraged, if we remember: “God works for the good of those who love him, who have been called according to his purpose.” (Romans 8:28).
I was looking at appearances for a bit though. My Twitter account had already been suspended. I guess because you couldn’t voice an opinion that might lead to violent acts of outrage? I had asked some questions about masking on Facebook, which automatically got forwarded to my Twitter account… I would delete the post on Facebook, since it did seem to be too controversial. But I never deleted it from Twitter. So maybe that took me down? Wild times… Grandma got banned on Twitter… (Elon’s reinstated me, but with none of my previous followers now, and none of my old posts. So, whoopeee…)
I have to say, I took the Google website stats seriously too. For a minute. I decided to not post on the site anymore, since apparently no one was going to it anyway. (And I hadn’t posted much during the Covid pandemic anyway.) But. I’m back! And I’ll try to post a little more often. It’s time to move on!
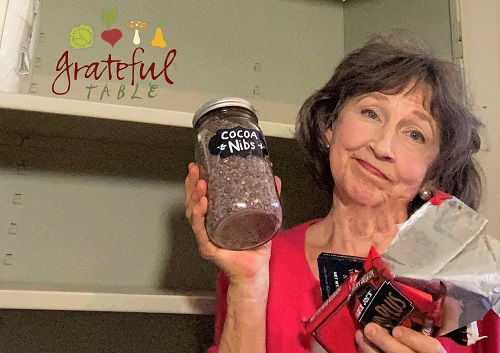
I’ll admit- I had my last jar of cocoa nibs on the shelf for over a year. OK, maybe a year after the expiration date. Hey, we got busy, right? Covid happened… The deli managed to stay open (by the grace of God), but we had other things to deal with besides me making Cocoa Nib Fudge in my spare time.
And then the other shoe dropped. Supply chain shortages! I could no longer get my Montezuma Pure Cocoa-Nib Chocolate Bar at Trader Joe’s (and I’m not paying $10 per bar for it on Amazon). My secret stash had run out. But no worries, right? I’d relent and start eating Tom’s Extra Dark Pound Plus Chocolate Bar (only $1/ounce on Amazon, a third the price of Montezuma’s, but still). Tom’s only had a little sugar, right? BUT THEN THEY RAN OUT OF THAT! First world problems! What would I do?
First World Problems- No Chocolate!
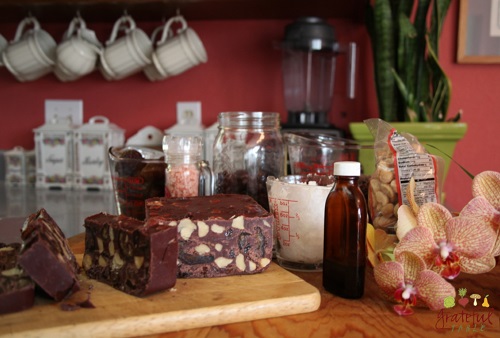
Well, I busted into my more recent cocoa nibs, and threw together a new version of Cocoa Nib Chocolate. (I’ve got, like, four other versions of this recipe, here, here, here, and here…)
DIY Chocolate Fix
Below is the latest recipe. I put the recipe in weight (easier that way). But customize as needed or preferred (omit cocoa butter if you don’t have that, etc.) But all I said in previous posts about the Champion juicer still holds true.
#1- The Champion’s the best way to “grind” cocoa nibs into a puree (barring the use of a professional stone chocolate-grinding wheel)
#2 You probably have to resort to eBay to find the Champion juicer (not on Amazon)
#3- You can’t grind cocoa nibs in your other fancy juicer that you bought on Amazon
I don’t have a crystal ball, but I do have my Bible… Chocolate shortages are really small potatoes in so very many ways- more to come, I’m sure. But meanwhile, we will make the most of the time we have, yes? May all your chocolate cravings be filled, even if you don’t want to bother with the recipe below!
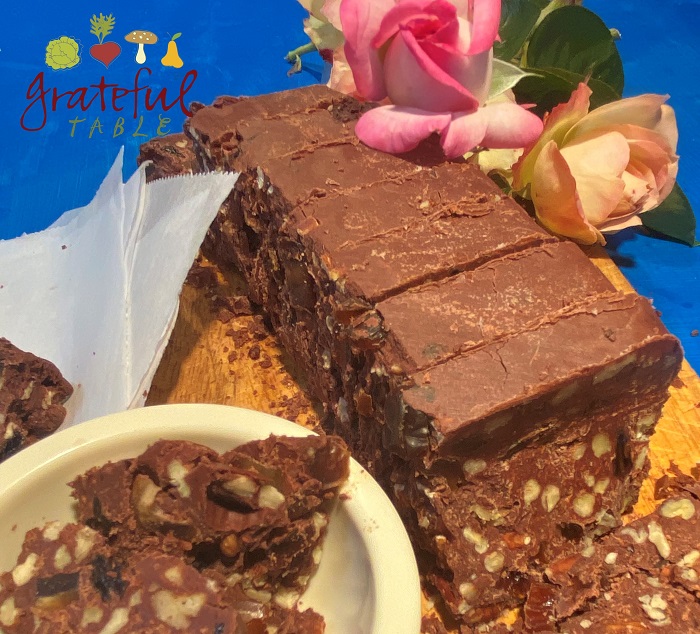
“Unsweetened” Chocolate (except for those dried fruits…)
1. Toast in oven at 375 degrees for 10 minutes in iron pan; stir once. Turn oven off and let finish toasting for 10-15 minutes more: > .50 raw cacao nibs
2. Process toasted cacao nibs until quite smooth a Champion juicer. Use: > .50 toasted cacao nibs
3. Add to Champion juicer (this will melt these ingredients): > .09 cocoa butter (or coconut oil) > .25 each coconut spread & butter
4. Add: > 1/4 tsp. salt > 1 tsp. vanilla > .25 each raisins & dates > .25 macadamias
5. Spread in loaf pan, then refrigerate overnight.
6. Turn the solid fudge mixture out onto cutting board (run upside-down pan under hot water if necessary). Cut into slice; will last in refrigerator for a month or two.
I found some pictures we took when mom Nancy helped us out back in 2011. It was par for the course- for decades, she came out several times a year every year, to visit from Michigan. She helped with the work load at the deli, which left us more time afterward to go on exciting field trips with the kids. She spent much of her own spare time developing a great relationship with her grandkids, and with Tom and me.
Mom, right at home in The New Deli kitchen
She wasn’t a typical guest- she got in the trenches with us at the deli, waiting on and serving customers, and cleaning. Always cleaning! (She endeared herself to the staff, for sure.)
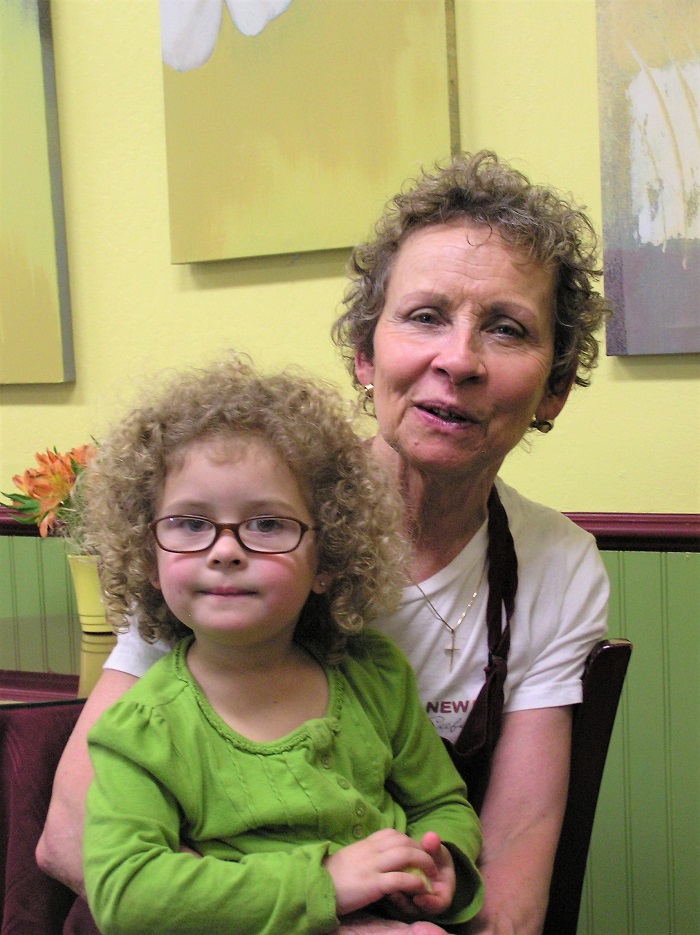
Precious, curls- with granddaughter Elizabeth
We didn’t realize that mom’s 2011 visit would be her last. But we made the most of it, creating more memories with the whole family. She had a special spot in many hearts- even for customers who got to know her over the years. Time was not wasted. But as mom gradually succumbed to the ravages of Alzheimer’s, memories disappeared, not to be held by her again this side of eternity. But we still have the memories, treasured so dearly.
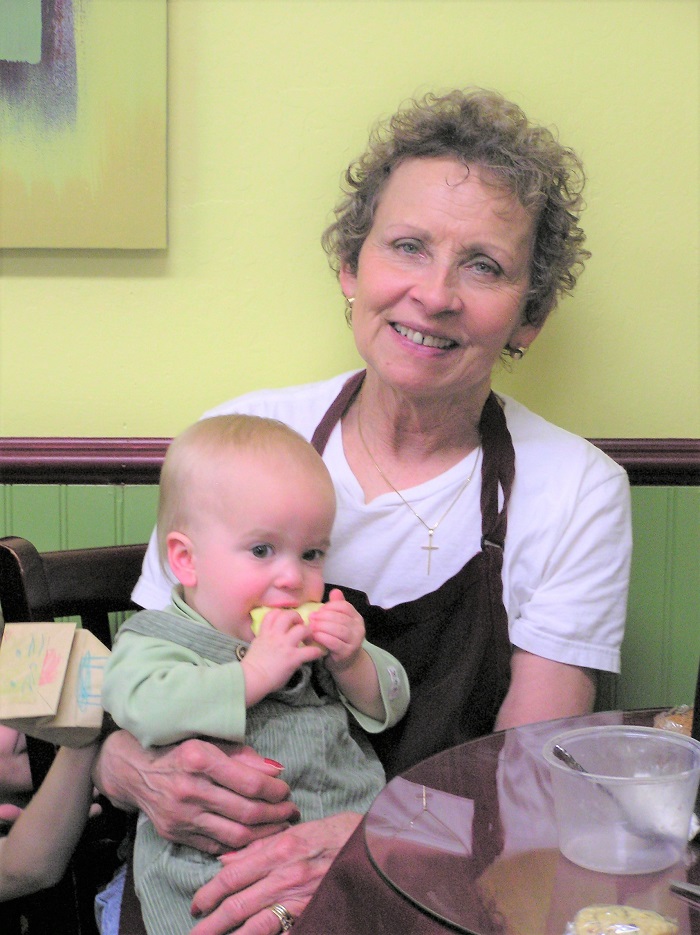
Grammie with her great grandson Benjamin
This June, we celebrate her life, and that of my dad, who passed two years ago (a post on him here). Like many, we couldn’t have a memorial service for him for some time, due to Covid restrictions. It made sense to celebrate them both, with a great group of family and friends who were so impacted by them both through the years. We have been more than blessed by these two beautiful souls.
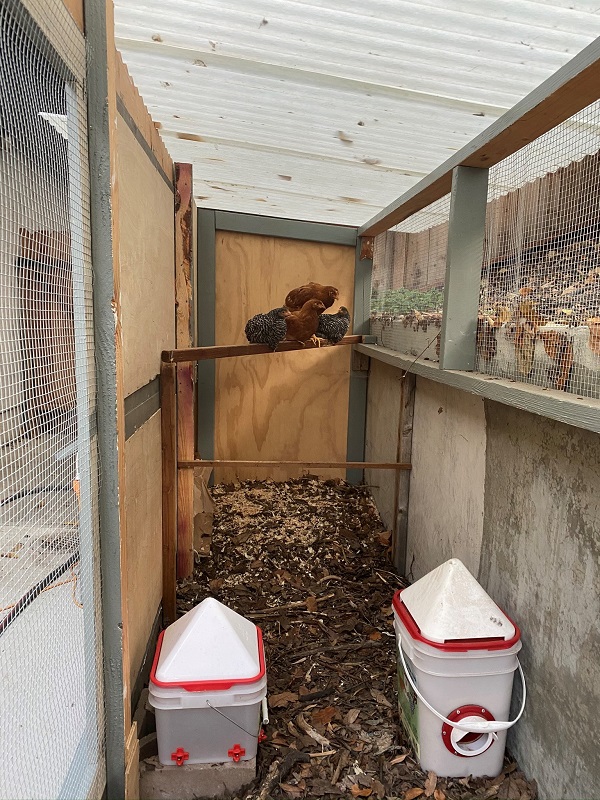
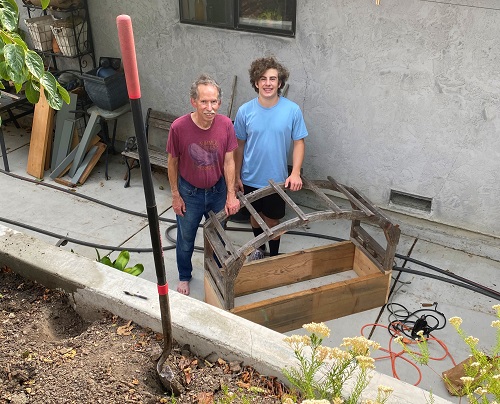
Thought I’d post some pictures from the past nine months, of one of my Covid projects: chickens! I told Tom in April: If this thing lasts ’till summer, I want chickens. At least we’ll eventually get some eggs out of the deal, and maybe some home entertainment on the side.
We are still pretty busy with the deli, so it took a bit of research into how this could be easy. I needed to convince my hesitant husband. I discovered I could use the “deep litter method” in the coop, to make bedding cleanup an annual task (instead of more often). I put an 8″ layer of leaves and such into the coop; it has kept the area virtually stink-free. The slowly-composting floor heats the coop a bit too- perfect with our cool Bay Area weather. AND, after six months or so, I end up with an excellent compost to add to our garden. (I’ll let it finish composting completely after I remove it, but it’s practically finished.)
Gotta Start Somewhere (My Makeshift Mockup)
I also found automatic watering and feed containers, AND an automatic door for the coop, which would open and close with the sunrise and sunset.
Using Random Things on Hand…
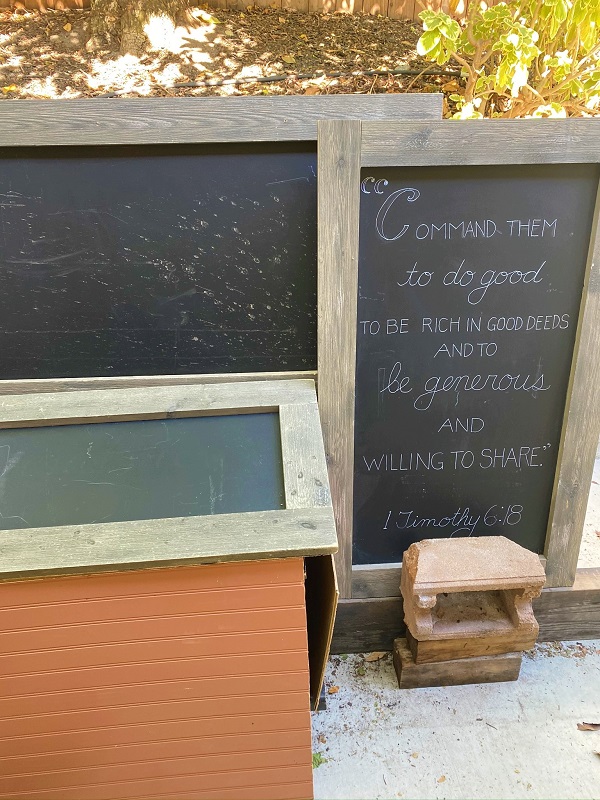
Tom approved of my plans, in theory, so I moved forward, setting up random items in a coop mockup. My friend at church let me repurpose some chalkboards previously used for the drama team. Between that, and a neighbor letting me take an old, ten-foot beam off his hands, we had a vision for an actual structure. And Tom made it happen! (A true act of love.)
Our Friend Called This “Pinterest Worthy”. COOL.
Posers Say “Eat My Dust”
Making the Dust Box
In the process, our grandson helped Tom build the chickens a dust bath. (They love to groom themselves in it, and they actually need some sand in their diet to help them digest their other foods.)
After dropping said grandson off at home, I almost got caught up in one of this summer’s fires. The traffic had stopped and the fire leaped the freeway in front of me. But the prayer in my car was thicker than the smoke, and Jesus got me out of that!
Thought I Might Be Walking Home… Or, Running…
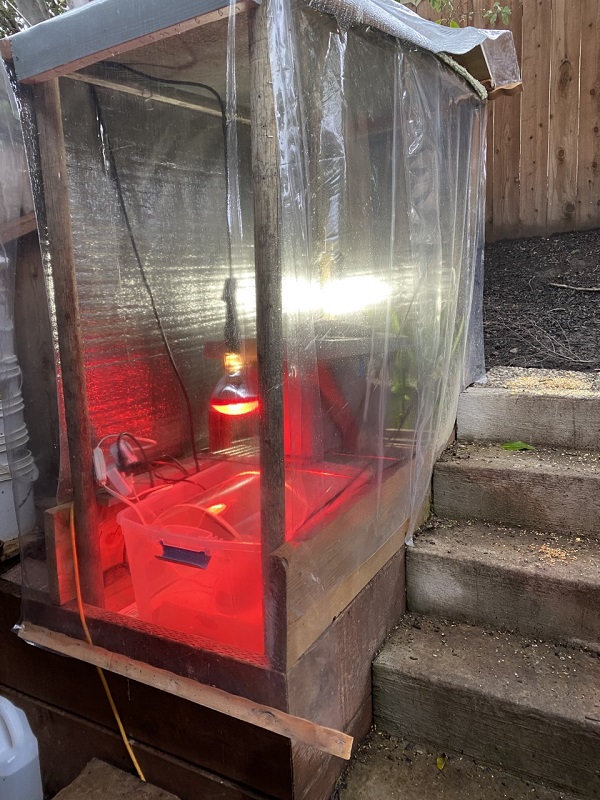
So, our baby chicks are growing up. I “spoil” them with ground, fermented organic grains and such, plus some sprouted grains and seeds. Grubs (black soldier fly larvae, AKA BSFL) are their special treat. (Yes, Tom even built me a Grub Hub, to keep the grubs happy through the winter.)
This is Not Your Usual “Grub Hub”
Now we have a new lockdown hobby (besides playing Ticket to Ride with a few friends, and seeing close family when we can): Watching the chickens. It’s been a blast.
The New Deli has been open during this Covid-19 crisis- we’re an “essential business”, and that works for us. (Tom says, “I guess if some people had to prepare their own food, they might starve, so we’re helping them out!”)
6 Feet Apart, Easy- Not Much Staff
We had finished off 2019 with a staff of ten (plus Tom and me), but by early March, most of those folks had given notice. It was a perfect employee situation for this crisis. For the first six weeks of SIP (shelter-in-place), we had a meager staff of three (plus us). We’ve been able to add a few of our old crew members back on, and have been able to continue to provide lunches all along. Thankfully!
Cleaning Like Crazy
But what a strange new world. We’d already thoroughly cleaned the deeper recesses at the deli, the first week in. We even freshened up the paint here and there. But business was about a third of what it had been; barely enough to cover rent and payroll. Gone were the lines during lunch rush. Gone were the morning catering orders for office business meetings. Gone, most of the staff except the few of us needed to keep it going…
No Rush Hour- Everyone’s Home
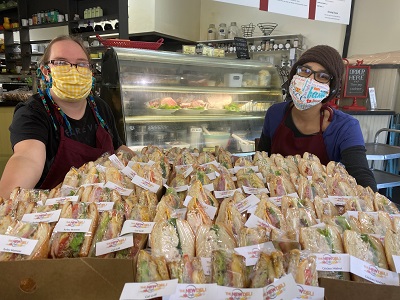
Safe and Cello-Wrapped Sandwiches
Thankfully, so many folks working from home have been keeping our phone line busy, as we prepare orders for quick pickups. And there’s still an few calls for occasional business meetings, or special orders for other essential staff. Our cello-wrapped half sandwiches have been perfect in those cases.
Here’s a quick timeline from our New Deli Covid-19 Experience:
We got a case of napkins and toiletries early on, since those were not easily found during general shopping trips
We got face masks right away too, despite shortages, since one of our deli girls is quite a survivalist. She had face masks left over from last summer’s fires, and we were grateful for that!
Sanitize All Pens!
We started sterilizing pens. And door handles. And other surfaces. (Is “germaphobe” even a thing anymore?) We realized it’s good to be aware of the many ways people might get exposed, even to simple common cold germs and such. I haven’t had a cold all season- I’m sure these protocols have helped in that way.
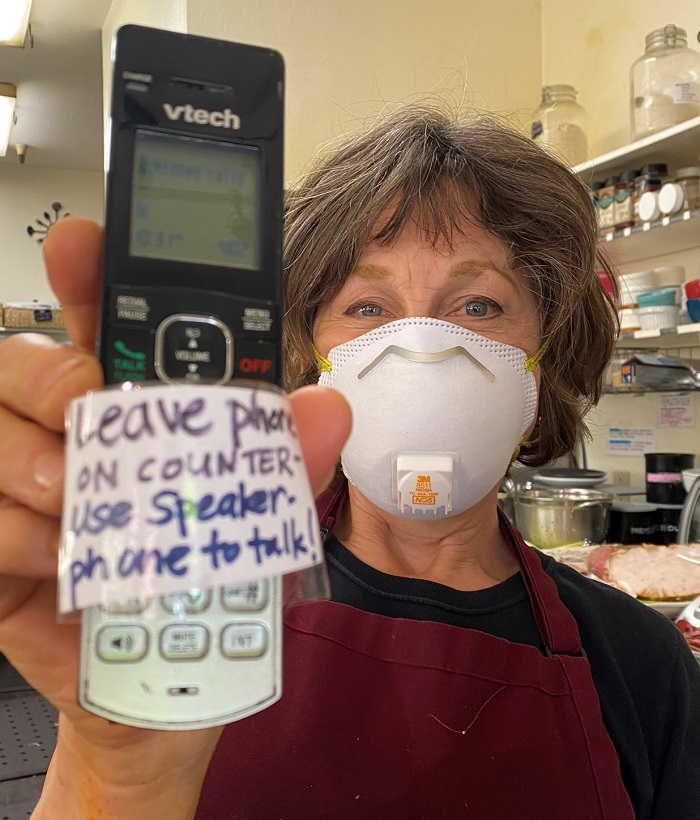
Leave on Speaker Phone- Not Mouth
We started putting the phone on speaker only, so no one had to put their face up close to the phone to take orders. We’ve decided we actually like this approach- it’s been working well!
W/Grandson. Mask-free for Pic!
And now, as Memorial Day Weekend approaches, we hope we’re heading out of this crisis soon. We know it will change us. And it has been a challenge. But good will come from the ashes, right?
I was in the process of compiling my notes, to post a recipe for Liposomal Turmeric/C, wrought from studying medical papers and other online info. I’ve been taking this concoction for the last year, and it appears to have improved my thyroid health. The doctor said my annual lab test indicates that I need to lower my OTC thyroid gland dosage, because apparently, my thyroid is now functioning better. Fourteen years on that dose, and now it can be reduced?! The only dietary/lifestyle change I made in the last year was in taking this new liposomal turmeric mix daily. Yes, it’s just anecdotal evidence, but I’m thinking it was thanks to that Liposomal stuff.
Doc also said, “Good job- your cholesterol levels are better too.” Didn’t want to get into it with him that I hadn’t made any other changes (except the liposomal). Maybe I’ll tell him someday!
In any case, I was about to post that latest recipe. But something else came up…
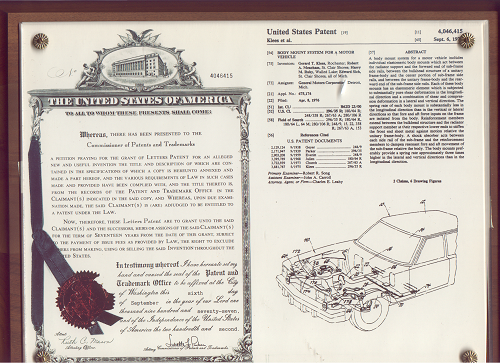
One of dad’s many patents
My dad chuckled when I told him about my latest findings on my improved thyroid and cholesterol. I think he was proud of me! He was an innovator, a researcher, a creative thinker at heart (AKA Gerry Klees, engineer at GM).
He had many patents (like the one shared here), and other innovations as well. At one point, in his retirement years, he created a doggie door that opened by a remote on the dog’s collar, whenever said dog (Honeybell) came expectantly to the sliding glass wall. He even began the patent process to produce more such doors for other dog lovers.
Mom & Dad, 1956- Prom
He passed away peacefully in his sleep, May 1st. So I will postpone the Liposomal Turmeric article, and create this post first, in honor of my dad. After all, I’m pretty sure I got my geekiness from him. Thank you, dad, for that, and for the many other gifts you shared with family and loved ones.
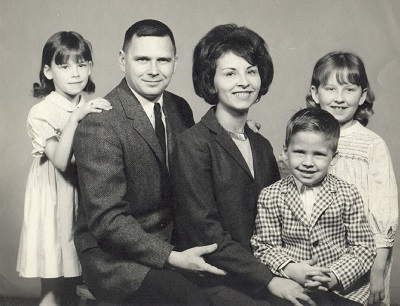
The Klees Family, 1967- Jean, Dad, Mom, John, Jennifer
He approached sainthood in his later years. He won a battle with rectal cancer over ten years ago, eventually battling bladder cancer as well. Quite relentlessly. But that wasn’t his biggest feat.
For the last ten years, he’d also been mom’s caretaker in their home, as she’s gradually succumbed to Alzheimer’s. Perhaps mercifully, she is hardly able to comprehend that the love of her life, her soulmate and husband of sixty-plus years, is now gone.
This past year, mom’s moments of clarity grew more seldom. But dad continued on, bathing and feeding her, helping her up to sleep, down again to the kitchen for a meal or some espresso, or maybe to the family room to rest on the couch. How did he do that? He had his own battles to fight as well. Yet he did.
1991, at brother John’s Wedding
It’s funny how God uses situations. Before mom’s dementia, she seemed to be the glue that held the family in place. Over the phone, I talked mostly to her. Dad might pop on for a moment now and then, when he wasn’t out playing tennis, or golfing, or doing a project in his shop. Mom even worried about that- “How’s dad going to survive, if I’m ever not here? Will he even call to talk to any of you?”
But in the past ten years, dad did start talking and calling. It was him we called. It was with him that we could share all the latest news, insights, observations, thoughts… I so enjoyed those talks.
And then the time came. I believe God told him- it’s OK to go now. Mom is in God’s hands now, and my father’s work here is done.
2002- One of Many Christmases Spent with Family
The morning before his passing, he made the two cups of espresso as he always did. We spent holidays and other occasions in that house for the last thirty-three years, and dad always made us our espressos. He would pull out the ceramic cups matching the everyday dining ware. Creature of habit maybe. But those were always the cups he used.
That last morning, he pulled out the special espresso cups two of his grandchildren had made years ago. The two little cups tucked away in the corner of another cupboard. He didn’t use the regular cups. I believe he was showing us in this small, but very significant way, that he knew his time had come, he was going in peace, and he was using those special little cups to tell us: He loved his family. A life well-lived, a man so very well loved.
Dad’s Last Christmas, 2019
PS Another thought hit me this morning. For the last week or two in April, the song “I Can Only Imagine” kept rolling around in my head. I wasn’t sure why. We listen to all kinds of worship music, but this was more of a special-occasion song. Husband Tom sang it a while back at our church for its 50th anniversary.
Well, once more, God was going before me. I believe He put that song on my heart to prepare me, because that is what my dad is doing now. (Well, I can only imagine what it’s like, but it’s good to know that he is with Jesus.)
This year’s shower plans were already lining up…Um- until Covid-19 hit.
I had this post ready to share, but it seems a bit untimely now. Except that some friends are finding time, during shelter-in-place, for some special family breakfasts. So I’ll share this anyway- maybe give this one a try!
Use baguettes to make mini French Toast; an upscale brunch addition that’s perfect for special events like showers. It turns out a bit like cinnamon rolls, only way easier! Much of this can be prepped the day before, making it easy when entertaining. Serves 8 or so, as part of brunch
INGREDIENTS
One sweet baguette, 8 oz. (24“)
8 eggs (my orig. was 10 eggs)
1 c. cream (OR ½ c. cream, 1 c. milk- not sure)
1/4 tsp. salt
1/4 c. (half stick) butter
2/3 c. sugar
1 tsp. nutmeg
2 tsp. cinnamon
Early the day before, cut the baguette into 18 pieces, about 1 1/4” thick. Let sit out to dry some.
The night before, make a mixture of the following: > 8 eggs > 1 c. cream (try that. Later try w/milk if nec.) > 1/4 tsp. salt
Butter a 13 x 9” baking dish; add bread to mixture to the baking dish. Pour egg/cream mix on top and refrigerate, letting the bread soak in egg mix overnight.
To prepare for brunch or breakfast, preheat oven to 350 degrees. Let egg dish sit out while oven preheats.
Sprinkle top of bread pieces with a mix of: > 1/4 c. butter, room-temperature > 2/3 c. sugar > 1 tsp. nutmeg > 1 TBS. cinnamon
Bake for 20 minutes or so. (Bake for just 10 minutes if it will be holding in warm oven for 30 minutes or longer.)
Broil for about two minutes, until sugar is golden and bubbly (watch carefully). Turn oven off; keep French Toast in warm oven until serving time.


