Fun Kid’s Birthday Party: “Spaghetti and Meatballs” Cupcakes

My friend loaned me her “Hello Cupcake” cookbook. What fun that was! I browsed through the whole thing, but realized that most of the cupcakes were far too elaborate to meet my time constraints.

So I narrowed down the list, and settled on making the Meatball Cupcakes for my son’s birthday. He was turning 21, but his favorite candy is Ferrero Rocher, so it just seemed so right!

I made a few changes in the book’s recipe. Homemade frosting would be way cooler (for a number of reasons), right? I used some olive oil in the cake too (although it could be made with all butter). One thing I didn’t change: Using low-sugar raspberry jam for the “tomato sauce” (it has more color than other jams).

Enjoy making this for your next kids’ party- young or old! Makes 2 dozen cupcakes, with some extra frosting left over.
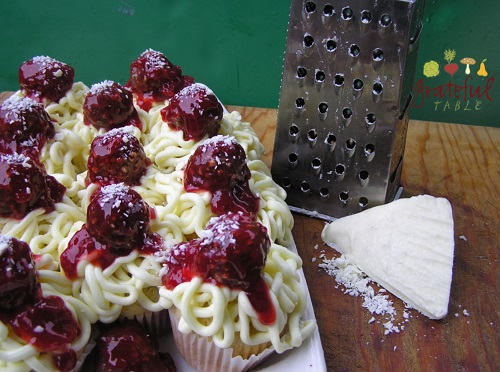
Fun Kids Cupcakes

INGREDIENTS

  • 1 stick (1/2 c.) soft butter, plus 2 sticks (1 c.) for frosting
  • 1 c. sugar
  • 3 eggs
  • 1/2 c. milk
  • 1/2 c. olive oil
  • 1 tsp. vanilla (plus 1 tsp. for frosting)
  • 2 1/2 c. flour
  • 2 tsp. baking powder
  • 1/2 tsp. baking soda
  • 1/2 tsp. salt
  • 8 oz. cream cheese, room temperature
  • 2 1/2 lb. confectioner’s sugar (8 1/2 c. or so)
  • Yellow food coloring
  • 15 oz. jar low-sugar strawberry jam (better color in low-sugar jam)
  • 1 bar white chocolate (3 oz. or so)
  • 24 pieces Ferrero Rocher candy
  • 2 zip-lock bags (large, freezer-quality)

PREPARATION

1. Prepare muffin tins using cupcake liners (or butter tins). Beat on high until light: > 1 stick room temp. butter (1/2 c.) > 1 c. sugar

2. To creamed butter/sugar, add, mixing after each egg: > 3 eggs

3. In separate bowl, mix dry ingredients:  > 2 1/2 c. flour > 2 tsp. baking powder > 1/2 tsp. baking soda > 1/2 tsp. salt

4. Using whisk attachment (or hand-folding), gently mix dry ingredients into the creamed sugar/butter/egg mixture. Add just some of the dry ingredients at a time, alternating with the milk/oil/vanilla mixture.

5. When mixed together, spoon the batter into a large (freezer quality) zip-lock bag. Snip a small corner off (1/2″ or so), and squeeze the batter into the muffin liners. Bake at 350 degrees for 15-20 minutes, until a toothpick comes out clean and cupcakes are set. Let cool on a rack. Arrange on platters, ready to frost.

6. Ahead of time (even a day early), melt white chocolate 1 minute or so in microwave, pouring into the corner of a loaf pan (or similar), lined with plastic wrap, in order to make a little “wedge” of parmesan cheese. Use: > 1 bar white chocolate (3 oz. or so)

7. (You can forego the above “parmesan” instructions if you can find a chunk of white chocolate.)

8. Meanwhile, make frosting. Microwave 1 minute or so: > 2 sticks (1 c.) butter

9. To melted butter, add and microwave 1 minute more, to get soft: > 8 oz. room temperature cream cheese > 1 tsp. vanilla > several drops yellow food coloring

10. To a mixing bowl, add: > 2 1/2 lb. (about 8 1/2 c.) confectioner’s sugar

11. Add to the confectioner’s sugar in bowl: > The melted butter/softened cream cheese/vanilla/yellow food coloring

12. Beat all frosting ingredients, slowly at first, then on higher speed until creamy and smooth. If necessary, add a bit more yellow, to make a “noodle” color frosting. Spoon the frosting into a zip-lock bag. Cut a small hole out of one corner, and start piping the frosting out onto the cupcakes, piling it on each cupcake like a small pile of noodles. Refrigerate some to firm up frosting.

13. For “tomato sauce”, warm jar 1 minute or so: > 1- 15 oz. jar low-sugar strawberry jam

14. Roll in some of the melted jam, to coat: > 24 Ferrero Rocher Hazelnut Candies

15. To the tops of cupcakes, add one “meatball”, spooning extra jam on as needed for “sauce”. Sprinkle with a touch of grated white chocolate (for “parmesan”). And enjoy!


Sourdough Bread Recipes: Whole Grain Raisin Rye Bread

This whole-grain bread recipe is somewhat dense, and full of flavor. A hearty addition to a meal! Use it with a sourdough starter, for a more wholesome food that’s easy on the digestive system. (Some celiacs even claim they can eat homemade sourdough bread.)

Use more whole wheat flour for better rising, or more rye flour for a denser loaf. Fresh flour from whole grains is the best, easily ground in a minute and a half in a Vitamix (though other grinders are fine). If that’s not an option, store-bought “whole wheat” will do. It is often just all-purpose flour with bran in it; it won’t be quite the same, but it will still pretty good!
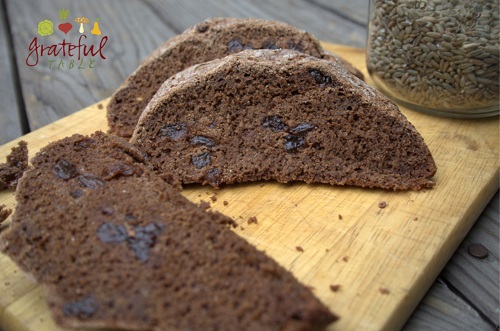
Makes one small loaf, for 6 or so.

Grateful-Table-Sourdough-Raisin-Rye-BreadINGREDIENTS

  • 3/4 c. or so starter
  • 1c. water
  • 1 c. whole wheat flour
  • 1 c. rye flour
  • 1 1/2 tsp. salt
  • 1 1/2 tsp. caraway seeds
  • 2 TBS. molasses
  • 2 TBS. cocoa powder
  • 2/3 c. raisins

PREPARATION

1. To 3/4 c. or so starter, add: > 1c. water > 1 c. whole wheat flour > 1 c. rye flour

2. Let double (up to half a day or so), then add: > 1 1/2 tsp. salt > 1 1/2 tsp. caraway seeds > 2 TBS. molasses > 2 TBS. cocoa powder

3. Knead 9 minutes, adding flour as necessary , then roll (or pat) into a rectangle, about 1/4-1/2 inch thick.

4. Sprinkle with: > 2/3 c. raisins

5. Roll up like a jelly roll, shaping some into a round. Let rise overnight, or several hours, until doubled.

6. Bake in an iron pan (or pan of choice) at 375 degrees for 20 minutes or so.

Special Deals: Great Price on Coconut Oil (Act NOW!)

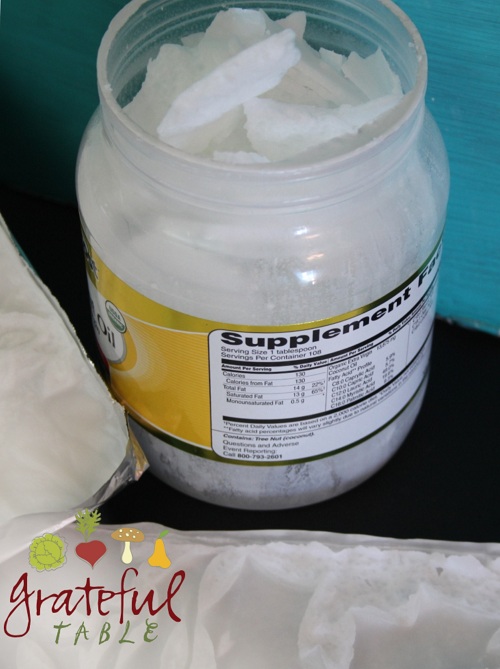
Jar of coconut oil, handy broken pieces to useI run low on coconut oil every now and then, even though I do buy it in large quantities. It’s cheaper that way. It has a long shelf life, so why not?! It’ll keep up to five years (way longer than polyunsaturates).

But I hadn’t been able to buy my usual  organic, extra virgin coconut oil (54 fl oz. size) for the last week or two. Out of stock, apparently, at Costco, and on Amazon.
I checked today though, and Amazon was offering that great price of $25.01 (plus free shipping on orders over $25). I snagged some right away. Thought I’d mention it to my readers in this post, just in case you happened to be needing to restock as well.

By this evening, that same coconut oil is now on special for $24.99. Yes, two cents cheaper than this morning. But that can be a problem, if you’re only buying that one item. You’ll only get free shipping if your order’s over $25, so you have to come up with another Nutiva item to add. Unless you have Amazon Prime, with all its perks (free shipping whether you meet the minimum or not, in most cases).

In any case, click on the link if you’re needing to restock. If you act fast, they’ll hopefully still have this special deal. (When I’d checked last week, it was at least ten dollars more- not what this bargain-hunting gal was hoping for!)

Adventures in Sourdough: How & Why Make it from Scratch?!

Grateful-Table-Sourdough-Bread-Making

When I found out that even those with gluten intolerance can often partake of homemade sourdough bread, I was intrigued. Apparently, the sourdough fermentation process renders the gluten more harmless. A friend of a friend (who has celiac disease) can eat the sourdough bread she’s been baking. Awesome!

When I found out that the VitaMix could grind whole grains into flour, I was even more intrigued. My husband loves bread, and doesn’t seem to suffer any ill effects from it. But I figured, if I could feed him freshly-ground, whole grain, sourdough bread, he’d have the best of all worlds. What could be wrong with that?!

I had been disillusioned with store-bought whole wheat flour for some time, ever since finding out that it’s usually just all-purpose flour with a bit of bran mixed into it. If it was actual fresh-ground whole wheat berries, it would have a shelf-life of four days or so, and you know the stuff at the grocery stores sits around longer than that.

Not that I’m complaining. White flour (or “whole wheat” that’s just white flour with bran in is) has the benefit of not being rancid. Better that than some old 100% ground wheat berry flour that’s gone bad.

But back to this sourdough project. I got a Vitamix, partly so I could grind fresh flours. The Vitamix is pretty versatile, and I was due for a new blender anyway. (Most blenders don’t last all that long…) I love my Vitamix! I CAN grind my whole wheat berries in it!

So the next step was to brew up some sourdough starter. It would take a week before the starter would be ready to use for bread making, and it would be like a pet, taking some attention two or three times a day, so I waited until after vacation.

My first batch was a dud. After two full days, nothing had happened, but I waited a bit longer, just in case. After four days, I realized it really wasn’t going to work. So I tried a slightly different method.

There are two great sites full of details on how to go about this; I tried  “Sourdough Home” first. Mike gives some great tips, but he didn’t mention stirring the brew several times a day. Is that why mine failed? I had left the first batch alone the whole time; I suspect it would’ve rather that I’d stirred it up a bit.

My second attempt was a hybrid of the first method and a method shown on “Breadtopia“. Eric also has some great tips and info, but I always want to streamline. I didn’t want to measure 2 TBS. of this, then 5 1/4 TBS. of that. It made it seem too complicated.

For my streamlined directions on how to make sourdough starter, check out this page!

Easy Sourdough Starter Recipe: Pineapple Juice, Wheat, Water

Sourdough Starter Using Pineapple JuiceThis is the sourdough starter recipe that worked for me I love making this bread with my starter. (Or use it for any fave recipe, like this whole wheat bread or this wheat/rye raisin bread). My friend Joanna didn’t have to resort to using pineapple juice for her original sourdough starter, but then, she lives ten minutes closer to San Francisco. Could that be why hers was easier to come by?

My first batch had failed, so for my second attempt, I took ideas from several places (like, here and here), and combined them into what I thought was an easy recipe for success. It worked.

I had liked the idea of 100% whole wheat, but in that first week, while the starter is still maturing, one has to dispose of half the starter each time it gets fed. So I mainly used quality all-purpose flour for that, from the health food store. It saved me time and resources, as I didn’t have to fresh-grind my wheat berries into flour, for a mix that would (partly) be thrown out.

What was the reason for using half whole wheat flour and half all-purpose flour for the initial mix? Because, the whole grain flour actually has more wild yeasts in it (and other things too). So there’s a better chance of introducing those wild yeasts, when starting out. But switching to white flour afterward makes sense too, as the white flour provides all the necessary starch for “feeding” the wild yeasts that have been cultivated.

Some experts claim that by using whole wheat flour the whole time one is cultivating the initial starter, other organisms will continue to be introduced too, as whole grains are a source for many different microorganisms. But we’re aiming for the culture of the yeast and lactobacillus bacteria, so we don’t want to introduce too many others along with that. Hence, the white flour feedings.

The whole sourdough starter process will take a week to mature. The initial mix may take 1-3 days to begin bubbling. If the starter does nothing by the third day, throw it out and start over.  Be aware that certain grinders make the flour too hot, killing the yeasts. My Vitamix  grinds 3 cups of wheat berries in a minute and a half, but the flour became quite warm to the touch. So I use frozen wheat berries, to resolve that issue. 

After culturing this starter for a week, it will make a scant cup or so of starter. After it gets “fed”, half is refrigerated for the next project, and half is used to make a loaf of bread.

INGREDIENTS

1/4 c. pineapple juice (canned or from concentrate is fine)

1/4 c. all-purpose flour (organic, if possible)

1/4 c. fresh, home-ground whole wheat flour (or from a reputable supplier)

1-2 lb. more all-purpose flour, for follow-up feedings

Spring water (non-chlorinated), for follow-up feedings

PREPARATION

1. In a glass measuring cup (2-4 cup), or other bowl, mix together: > 1/4 c. pineapple juice (room temperature or slightly warm) > 1/4 c. all-purpose flour (organic, if possible) > 1/4 c. fresh, home-ground whole wheat flour (or from a reputable supplier)

2. Cover the container with plastic wrap and let sit. A warmish spot, at anywhere between 65-80 degrees should work.

3. Stir the mixture several times daily.

4. Note when the mixture starts to get a bit bubbly. It’s working! This should happen at some point in the first three days.*

5. When the mixture has gotten bubbly, and has doubled in size, it is ready for its “feedings” to begin. First, mix in the water: > 1/4 c. spring water (non-chlorinated)

6. To the water/starter mixture, add: > 1/2 c. all-purpose flour

7. Cover the container with plastic wrap and let the mixture double in size.

8. When it’s doubled in size again, start throwing half of it out. Even if it hurts. I hate to “waste”, but the starter is gaining in momentum. It’s still not matured, but if you kept all the premature mix, you would have too much.

9. After throwing half the starter out, feed again. Mix in: > 1/4 c. spring water

10. To the water/starter mixture, add: > 1/2 c. all-purpose flour

11. Keep repeating this process of letting it double, throwing half out, and feeding again, for one week.

12. After a week, you can start feeding it with freshly-ground whole wheat flour, if desired. Begin making bread with it, reserving half the starter in a jar in the refrigerator, and using the other half.

Note: I use red winter wheat berries (found here on Amazon for a good deal), for my whole-grain bread making. Delicious, and healthy!


Zucchini Soup Recipe (Putting that Garden Produce to Work!)

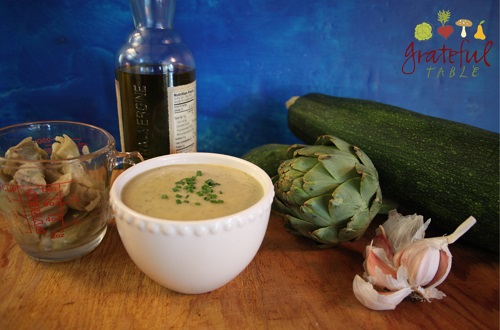
You’re practically looking at my latest Zucchini Soup recipe, in the picture below. It was SO EASY to make, using some of the garden surplus I got from a friend. (We all get extra zucchinis from “friends” this time of year, right?)

Grateful-Table-Artichoke-Garden-Soup

And I had some frozen artichoke hearts from Trader Joe’s. You did know about those, didn’t you? They’re reasonable priced, and their texture is much better than that of their canned friends. Plus, the canned ones usually have extra ingredients (salt, and sometimes a weird marinade). Such a product might substitute in this soup, but I prefer the unadulterated, frozen ones.

If you want to go to the extra work, you could use fresh artichokes. I didn’t, but I’m still taking the last few photos for the Soups’ On cookbook, so I had to throw an actual fresh artichoke into the picture for aesthetics’ sake. But I really didn’t want to go to that much work.Sneak-Preview-Jens-Soup-E-cookbook

So this recipe was perfect!

I had gotten inspired by a recent trip to the Stinking Rose. And even though we WERE the stinking roses, for a day or two afterward (garlic fumes emanated from our pores for a good while), I was inspired to roast some garlic of my own. And put it into a recipe.

I didn’t want to go to too much bother though. Some folks roast the whole head of garlic, skins on and all. Then they squeeze the soft, roasty garlic “meat” out onto bread and such. But I just peeled several cloves and stuck ’em in the slow cooker with a large zucchini, and let them roast/stew/cook for 30 minutes or so.

Then I just pureed all that with some thawed, frozen artichoke hearts, some olive oil, and some salt. I added a bit of my homemade chicken stock too– it was awesome!

Artichoke Garden Soup

Zucchini is elevated to new heights with the addition of artichokes and garlic. It adds body to the soup, allowing the other flavors to come through. It’s an easy soup; serves 4-6.

INGREDIENTS

  • 4 c. zucchini, in chunks (about 3-4 standard sized)
  • 3 cloves fresh garlic
  • 1 c. chicken stock or water
  • 1 1/2 c. frozen artichoke hearts (about half of a 12-oz. bag)
  • 1/4 c. virgin olive oil
  • 1/2 tsp. salt
  • Optional: green onion or chopped herbs for garnish

PREPARATION

1. Use slow-cooker or other favorite pot to steam zucchini and garlic until tender, about 30 minutes. Use: > Approx. 4 c. zucchini, in big chunks > 3 cloves fresh garlic > 1 c. chicken stock or water

2. When zucchini and garlic are cooked, add: > 1 1/2 c. frozen artichoke hearts, thawed > 1/4 c. virgin olive oil > 1 tsp. salt

3. Let all the ingredients heat up, then process them in a blender, food processor, or with an immersion blender, until smooth. Add enough boiling water (or extra stock) to make it the right consistency.

4. To serve, add chopped green onion or other herbs for garnish.

PS I’ve linked this post to Diana’s page for “Simple Lives Thursday“. (Diana of “My Humble Kitchen“)

Sesame Noodles w/Buckwheat Soba: Gluten-Free, Or Close to it

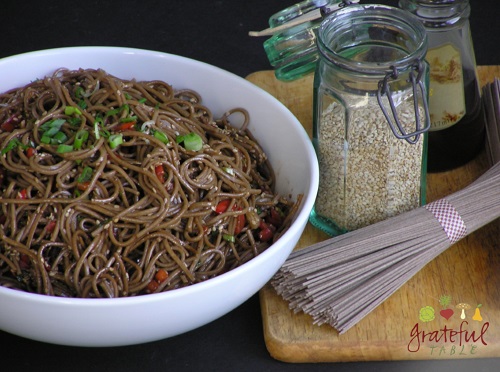
The following recipe uses whole-grain buckwheat noodles that have a great texture (not too heavy, as some whole grain pastas can be). Eden makes a 100% buckwheat soba noodle, which would even be gluten-free (some other brands include wheat flour as well). The sesame seeds can be white or brown (unhusked are healthier than white though); the black ones are nice for a change too.

The recipe will be higher in salt content if you use the prescribed amount of soy sauce. If salt’s a problem, just use less. It will still be quite flavorful.

With its Asian flavors, this pasta goes well with Ginger Chicken, or a Spinach Salad with sweet n’ sour dressing. Serve cold or at room temperature. Double or triple this recipe for a large group–it’s a great party food. Serves 3-4.

Grateful-Table-Sesame-NoodlesINGREDIENTS

  • 8 oz. buckwheat noodles (“Soba Noodles”, in Asian section of the grocery store)
  • 1/4 c. sesame seeds
  • 1 small red pepper, diced fine
  • 1/3 c. soy sauce
  • 1/4 c. white vinegar
  • 1/4 tsp. cayenne
  • 1/4 c. toasted sesame oil
  • Optional: 2 TBS. fine-diced green onion
  • 1/4 c. honey

 PREPARATION

1. Cook, then drain, rinsing in cold water to cool: > 8 oz. buckwheat noodles

2. Toast, then set aside: > 1/4 c. sesame seeds

3. Grill in iron pan, in a touch of olive oil; then set aside: > 1 small red pepper, diced fine

4. Reduce liquid to approx. 1/4 c., boiling in saucepan until it’s half-evaporated: > 1/3 c. soy sauce > 1/4 c. white vinegar

5. To the reduced mix, add and mix in: > 1/4 tsp. cayenne

6. To cooked noodles, add, mixing well: > 1/4 c. toasted sesame oil > Optional: 2 TBS. fine-diced green onion

7. Once oil’s been mixed into noodles, add: > 1/4 c. honey > the toasted sesame seeds > grilled red peppers

8. Finally, toss back into pan of reduced soy sauce/vinegar, to coat noodles.

Omega 6 Takeover Battles Healthy Omega 3- Shoot for Balance!

There’s a lot of info below, but the main point is: Omega Six is Nix! Contrary to all we’ve heard, the overload of polyunsaturates in the modern diet leads to inflammation. I’ve experienced this first-hand. After balancing my diet with more Omega 3s (from salmon, cod liver oil, meats, butter and such, mainly), I had a huge change in my inflammatory conditions. My “thermometer” was my knees, which had become ridiculously swollen most of the time. That disappeared. The only time it came back was when our avocado crop came in. I unwittingly ate way too many avos (whoops!). I won’t do that again. The results are too amazing…

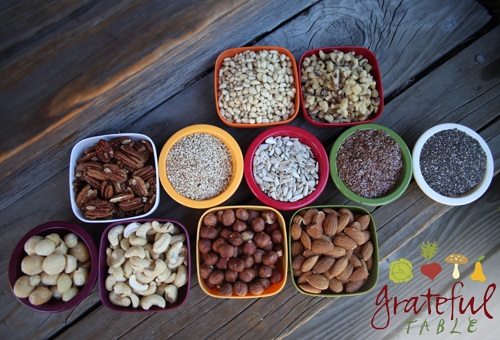
Below is a picture of foods with a lot of polyunsaturates in them. Which means they are high in Omega 6’s (but less so that the oils derived from them). I posted here on the dangers of PUFAs, and here about how you don’t want to cook with most of them. But at least the ones pictured today are in whole-food form! I set them up in order of their PUFA content per hundred grams (as listed here, at  the US National Library of Medicine National Institutes of Health). Macadamias are the winner, with only 1.5 grams of PUFAs. From there we have cashews (7.8), hazelnuts (7.9), almonds (12), and pistachios (13). The next row are all in the 20-something range: pecans, brazil nuts, pumpkin, sesame seeds, hemp, sunflower, flax, and chia seeds. Top row is more extreme: pine nuts clock in at 34, and walnuts at 47.

Grateful-Table-Omega-3-6-Nuts-Seeds-PUFA

Did I mention that we don’t want to obsess?! Stressing out about the exact amount of PUFAs in any given handful of nuts is not the answer. But I have become a bit more careful about making a meal of those nuts. Yes, I was kind of a nut freak- I could eat almost a half cup of them instead of a meal. I ate a lot of vegetarian meals, and figured nuts were a great source of calories, in whole-food form.

Now I use nuts more as a garnish on top of something, sprinkling chopped nuts or toasted seeds on top of soups or salads for extra texture. I’ve starting using macadamias more often than pine nuts and walnuts, since they’re about the lowest in polyunsaturated fatty acids. My inflammatory symptoms have simmered down; I suspect this dietary change had a lot to do with it.

Dr. Weil’s website is loaded with info. This page on “balancing Omega 3 and Omega 6 tells you more. Chris Kresser, M.S., L.Ac has a good article too (…”Not Enough Omega 3 is Making Us Sick!“). To sum it up: Our bodies need both Omega-3 and Omega-6, but they need balanced amounts. There are tons of sources of Omega 6 in our diets (thanks, junk food). But Omega 3’s  are harder to come by, coming mainly from the fat of cold water fish (salmon, sardines, herring, mackerel, black cod, bluefish). Walnuts and flax seeds contain a form of omega-3 that we don’t readily convert into the form we need, so they can’t really resolve an Omega 3 deficit very effectively.

Not that Omega 6’s are useless. We make hormones from them. But the hormones we make with omega-6 fatty acids typically increase inflammation. This is a good thing in small quantities–it helps our immune response, blood clotting, and cell proliferation. Omega-3 fatty acids, on the other hand, help us make hormones that decrease those functions. When the two oils are in balance, we have the best of both worlds.

There’s been all kinds of talk about inflammation in our house this past year. My dad’s research revealed that the cholesterol deposits accumulating in the wrong places in my mom’s brain were not the actual problem, but a symptom. The cholesterol proliferates when there is inflammation. It’s a response to the inflammation. So let’s go after the real bad guy! Cholesterol just happened to be there–it doesn’t mean it committed the crime.

I even found out that my hypothyroidism was related to inflammation. OK, now I’m listening!

In any case, as mentioned on Dr. Weil’s website, the dietary imbalance between the two Omegas might explain the increase we’ve seen in a lot of diseases: asthma, heart disease, cancers, autoimmunity, and neurodegenerative.

That imbalance might also increase obesity, depression, dyslexia, hyperactivity and even violence. In one study, taken in a British prison, violence dropped by 37 percent after omega-3 oils and vitamins were added to the prisoners’ diets. That’s some powerful Omega!

It’s not just affecting us. Commercially raised animals are pumped full of corn and soy (yipes- totally GMO), so they get too much omega 6 (and not enough omega 3). The resulting meat reflects that unbalance. Get free-range, grass-fed, organic meat to avoid that.

If you are going to cook with nuts and seeds, the following make good choices: Cashews, macadamia, filberts, almonds, and pistachios; be more careful with sunflower, sesame, pumpkin seeds and walnuts, as they can’t take much heat.

Like I said, we don’t want to get too obsessed. But I am eating more Omega 3s from healthy sources (salmon, grass-fed beef and free-range chicken). The American Institute for Cancer Research has noted that Omega-3s may decrease the onslaught of heart disease, dementia, arthritis, diabetes, and cancer. I’m down with that!

And I’m eating a few less nuts now. Working to keep the omega 3/6 balance in check. My inflammatory conditions seem to have lightened up. Yay!


Kefir: Non-dairy Water Kefir- Easy, Simple Directions

My absolute favorite �soda� recipe for water kefir is this Orange Kefir Recipe. Though I�ve tried all kinds of flavors/juices/etc., the orange kefir recipe is the most successful for extra fizz and deliciousness. Oh, plus there are extra nutrients in orange rind, so� yeah!

Update, April, 2024: My kefir�s been going strong for almost ten years now! At one point, I had given some to a friend, and she had to give me some of hers when mine died. I hadn�t realized my Berkey filter needed replacing (the resulting chlorine killed mine off that time). Pure, filtered water can make all the difference for delicate probiotic critters.

Also, partway into this kefir venture, I discovered another helpful tip: Add an 1/8 tsp. baking soda every other time, and your grains will be extra happy.

I found they also get depressed when I�ve fed them regular �Grandma�s Molasses�, as it�s not organic, and doesn�t contain nearly as many nutrients as organic blackstrap. My grains had started getting tinier and tinier; when I switched back to the organic, they resumed their bouncy, fluffy-big demeanor. I think this says something to us about how nutrient-dense foods can really impact our health for the good as well.

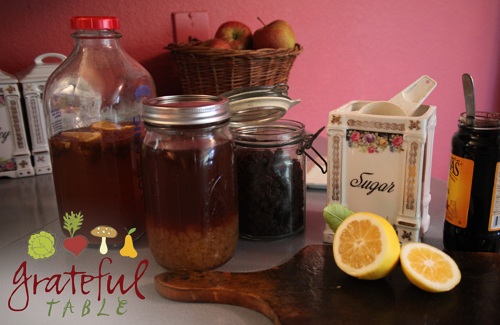
Grateful-Table-Probiotic-BrewGet some grains from a friend, or buy some water kefir grains from Amazon. Just don�t use milk-kefir grains. These are NOT the same thing!

Spring water is best- chlorine will slow down (or kill) your grains. Also, don�t use honey. It is anti-bacterial, so it can slow the culture down (or stop it dead in its tracks).

I tried organic raw sugar, but after a month of that, my grains died. Coincidence? Not sure, but now I like to use a blend of half refined white sugar and half palm sugar (100% palm sugar seemed to turn out weird).

Oh, and never add fresh pineapple to the first ferment; one woman posted that her grains got irreparably damaged. Maybe it�s the extra enzymes in the pineapple? I�m not going to use pineapple.

Making water kefir is a fairly easy process, with just a little daily maintenance. After the kefir grains convert their food supply to probiotics (within a day or two), add them to a fresh jar of sugar/molasses water. You can tell by tasting the brew after the first 24-48 hours- if still sweet, you can let it ferment for another day or two, before bottling it for the second ferment.

Kefir Management (Buying Yourself Some Time)

Give yourself (and the grains) a vacation- the grains appreciate a little bath now and then anyway. Just drain off the sugar/water into a bottle, and add the grains back into their fermenting jar; cover with filtered water (unsweetened). Store these water-bath kefir grains in the fridge for a week or two, to the benefit of all.

Another trick: When getting bogged down with extra kefir, throw out all but two tablespoons of the grains. It takes longer for fewer grains to eat through the sugar water. (The more grains you have, the more quickly they eat through a new batch of sugar water.)

A friend tried refrigerating her grains in a strong sugar syrup so she could (hopefully) ignore them for months. The grains gradually multiplied to practically fill the whole jar. But they ate through every last bit o� sugar/molasses that the water contained. And then� they died. They looked all right, but they had essentially gotten preserved in that jar like pickled brains or something. Looking prolific, but� dead!

The grains multiply; put the extras in the compost pile, or give to a friend (or even eat them?), or just throw �em out. More will be created! Note: I discovered that our son�s dogs LOVE kefir grains, so they�re the clean-up crew for any extra grains when they�re around.

INGREDIENTS

  • 1/4 c. sugar (not raw, but refined white sugar, or half white/half palm sugar)
  • 2 tsp. molasses (organic blackstrap makes the grains so happy)
  • 1 slice lemon (optional)
  • 4 c. Spring water (filtered, non-chlorinated)
  • Kefir grains (1/4 to 1/2 c., more or less)

PREPARATION

1. Fill a quart jar with: > 1/4 c. white sugar > 2 tsp. molasses > 1 slice lemon (Optional) > 3-4 c. spring water (leaving space at the top for adding the grains)

2. Add lid and shake jar vigorously until sugar and molasses are mixed in.

3. Add rinsed kefir grains, cover with a lid.

4. Let mixture brew for 1-3 days, until not-so-sweet, but fermented.

5. For a second ferment, where carbonation will build up, making it like soda, drain brew into bottles with ceramic stoppers. See below for �Preparation for 2nd Ferment�.

6. Add the strained-out grains to fresh jar of sugar/molasses water, repeat steps. (As grains multiply, discard some as necessary, or give to friends.)

INGREDIENTS FOR 2ND FERMENT

  • Handful of dried fruit (raisins or other), or fresh fruits or juices
  • Other spices if desired (fresh sliced ginger, organic orange peel, vanilla, tamarind, etc.)
  • Optional: Favorite fruit juices or concentrates (fresh-juiced make the ferment go bonkers- super bubbly!)

PREPARATION FOR 2ND FERMENT

1. Into a clean 32-oz. bottle (or jar), decant the brewed kefir water, straining out the kefir grains, leaving space for other ingredients.

2. Add a small handful of favorite dried fruits (or experiment with fresh fruits), or use a cup or so of juice.

3. Optional: Add other flavorings if desired ( fresh ginger, organic orange peel, etc.),

4. Optional: If you add non-sweet flavorings like ginger, vanilla, or orange peel, you can actually add honey (or sugar) to this mix to give the kefir something to feed on, to make the brew extra tasty and extra fizzy. Although I don�t add honey to the kefir grains in the first ferment, it seems to work in the second ferment. Use organic honey if possible!

4. Let ferment another day or two, with lid or cap on. Check the bottle after a day or so (if you have the Grolsch-type bottle with resealable cap), to see if it�s fizzy enough. Refrigerate after about one or two days. Will keep for a couple weeks, refrigerated. Remove lid with care (over the sink, with hand over it, as it may become quite bubbly)!

5. Certain glass bottles can be reused (if they�re the kind you use a bottle-opener on); just get this to hold in the fizz. Or buy something like Grolsch beer, with its ceramic/rubber seal stopper, and reuse that. My fave are these Cobalt Blue 32 oz. Bottles; they�re sturdy, and are �family-size�, which is nice! (Some note that the blue glass protects against fluorescent rays also, which may/may not be an issue�)

I�ve linked this post to Kelly the Kitchen Kop�s �Real Food Wednesdays�; check out the other great links she�s listed, HERE!

I�ve also linked this post to My Humble Kitchen. Check out Diana�s page, �Simple Lives Thursday�, for more great ideas.

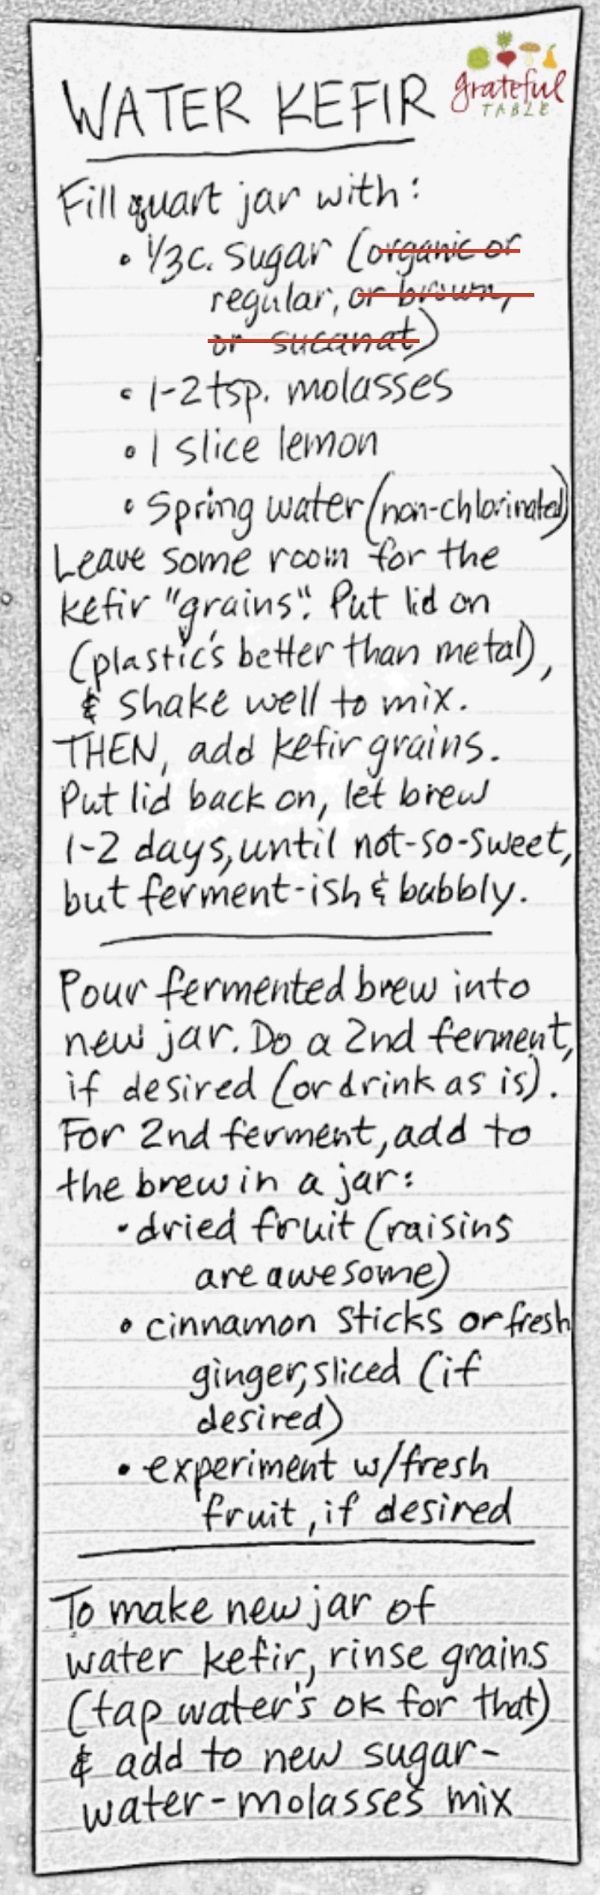
PS You might want to print up this simplified copy of the directions, below.

Grateful-Table-Directions-Kefir-Water-Probiotics

Cookbook Frenzy! Coming Out September-ISH, Jen’s Latest Book

Sneak-Preview-Jens-Soup-E-cookbookSo… my soup ebook is coming together. Whoot! Expected release? Hopefully September. Exciting!

(Update: OK, it took a bit longer than I’d said. The book is finally “in review” this Cyber Monday, December 2, 2013. Which means, it will available within twelve hours or so…)

I have to get excited. I have to talk about it. That way, maybe you’ll keep me accountable. Just ask me, OK? (“So, Jen, when IS that book coming out?!”)

I like to think that I’m orchestrating some grand stew, which will all come together in its time. But meanwhile, the cow’s still grazing in the pasture, the carrots are in the ground, the bell peppers are ripening, and the spices are getting dried.

Uh, in other words, I have been fine-tuning the thirty-plus soup recipes. (Is that the cow, grazing?) And I have been researching digital requirements, how to format, etc. (Is that the carrot in the ground?) And I’ve been taking the last few photographs, since every soup needs an inspiring picture. (Is that the pepper ripening?) As for the spices, I’ve selected just a few favorite verses, which will add a dash of “seasoning” to the book.

And then it’ll all come together, right?!

That’s just the behind-the-scenes stuff. Meanwhile, it can’t all be behind the scenes, or you might forget about “Grateful Table”. We can’t have that!

So. Besides the behind-the-scenes book work I’m doing, I’ll continue to post some of those recipes folks are still looking for. Back when I had my old website (pccuisine.com), I’d posted over two hundred recipes, and people are still looking for some of ’em. (If YOU are looking for any of them, just ask, and I’ll get ’em posted here for you 😀 )

I just posted the Chicken Salad with Caramelized Walnuts recipe, and its sister recipe, Caramel Sauce (posted here). Why? Because, everyone needs to know how to caramelize sugar, don’t they? It really is pretty easy. Really. We do it all the time at The New Deli.

But, enough for today. Back to the book!