It’s easy to take abundance for granted in our land of plenty. I can only imagine how bittersweet it was for Job to remember the days when God had so blessed him. What a trial Job went through–such a contrast to his previous days!
But it’s a good reminder for us. If we briefly considered how very tough life could be (if “X” happened, or maybe even “Y”), then we can “look back” on our current days in a new light. Perhaps then we can appreciate all that we have, right here, right now.
Job got a bit sentimental, saying, wow, my cows had tons of milk, and my olive trees produced massive quantities of olive oil. But we can almost say that ourselves, today! I guess it’s good to appreciate what we have 😀
Wallpaper: Desktop Backgrounds w/Verses
The following are a couple of backgrounds you might enjoy, using a verse from Job 29:6.
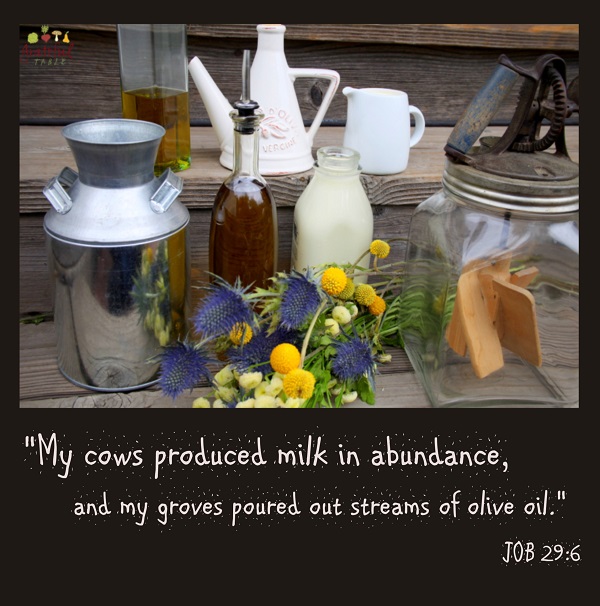
“My cows produced milk in abundance, and my groves poured out streams of olive oil.” Job 29:6
(To use for desktop wallpaper, left click on appropriate monitor size, then right click and choose “select :
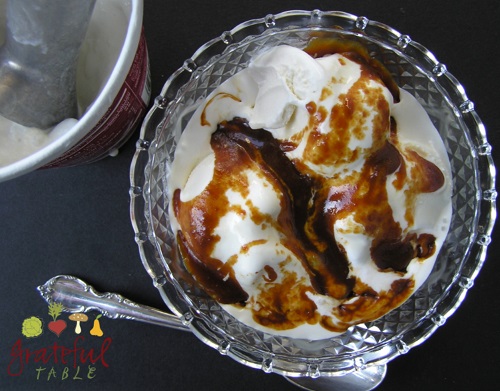
With some ice-cream, sugar, and cream on hand, one can pull together an awesome dessert in no time! This is one of those quick and easy recipes; a perfect dessert choice for special occasions when time runs out. For a larger amount, increase quantities and use a larger pan.
For a variation, substitute butter for the cream, adding a touch of salt, and some water too, if necessary, to thin it out. Butterscotch!
Serves 4 or so.
INGREDIENTS
1/2 c. sugar
Approx. 1/4 c. cream
PREPARATION
1. To caramelize sugar, get med.-small heavy skillet smoking hot. Turn pan off and sprinkle sugar in (enough sugar for a layer to cover the bottom of the pan): > 1/2 c. sugar
2. Tilt the pan to let unmelted sugar fall into “hot spots”. Turn pan back on if necessary, until sugar becomes a golden brown syrup
3. Remove pan from burner and very slowly add cream, stirring a bit in to incorporate it before adding the rest: > Approx. 1/4 c. cream, heated
3. Pour into a creamer or pitcher, dish up the ice cream, and enjoy!
If you’re cooking for a crowd, multiply this recipe. It’s definitely a crowd pleaser; we serve it regularly at The New Deli.
Part of the secret to using raisins: they get soaked overnight in red wine vinegar. It gives them the perfect sweet/sour flavor, plus, it keeps the raisins from soaking up mayonnaise (which doesn’t look as appetizing!).
Serves 8 (or more, for appetizers).
INGREDIENTS
1/2 c. raisins
1 1/2 TBS. red wine vinegar
1/3 c. white sugar
1 1/2 to 2 c. walnuts
1 1/2 lb. raw, boneless, skinless chicken breast (or use 2 c. leftover chicken)
1 c. mayo
1/2 tsp. salt
1/4 tsp. pepper
PREPARATION
1. A day before, soak together: > 1/2 c. raisins > 1 1/2 TBS. red wine vinegar
2. Also ahead of time, caramelize walnuts. For smaller amounts, as in this recipe, use a medium-small skillet; for best results, use a heavy skillet, such as iron. Preheat until quite hot, even smoking. Turn heat off, turning back on as needed to finish “melting” the sugar. Sprinkle the sugar in the hot pan across the whole surface, and let melt on its own, without stirring. Tilt the pan to encourage the melting process; the melted parts will help dissolve any remaining white parts. Use: > 1/3 c. white sugar
3. To pan of caramelized sugar, which should soon appear translucent and golden, add: > 1 1/2 to 2 c. walnuts
4. Pour walnuts into the heated pan, stirring until mixed well with caramelized sugar. Turn into large bowl to cool.
5. For the chicken, bake some boneless, skinless chicken breasts at 375 degrees for one hour (or use already-cooked chicken): > 1 1/2 lb. raw, boneless, skinless chicken breast (or 2 c. leftover chicken)
6. Chop (or process) the cooked chicken, add to a big bowl. Also chop: > The cooled, caramelized walnuts
7. Mix all ingredients together in the bowl: > 2 c. fine-chopped celery > 1 c. mayo > 1/2 tsp. salt > 1/4 tsp. pepper > Soaked raisin/vinegar mix > Caramelized walnuts > Chopped chicken
8. Mix all the above together. To serve for lunch or a light dinner, scoop onto lettuce leaves or make into sandwiches. For appetizers, put onto thin-sliced sweet baguettes.
The garbanzo beans add protein, plus a sort of buttery richness. Also, after roasting the cauliflower (to develop flavor), “steeping” it in some hot water creates a creamier texture and flavors the broth. Chicken stock and other seasonings aren’t necessary, although one might play with the ingredients according to what’s on hand.
On the nutritional front, cauliflower’s a “white veggie”, full of special nutrients (see more about that on this page). The recipe is adapted from Yelena Strokin’s (using different methods).
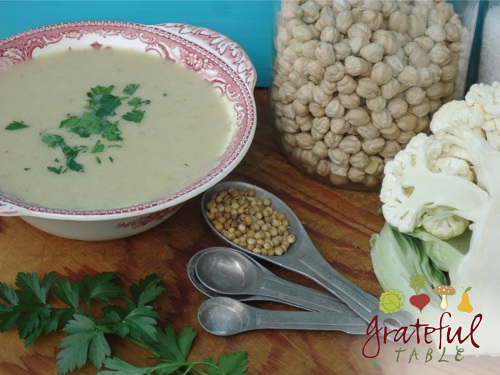
The sum can be greater than the parts: the buttery creaminess of the garbanzo beans complements the cauliflower, and the toasted, ground coriander seeds season it perfectly. Roasting the cauliflower first also enhances its flavor. Make this big batch and freeze some for later. Serves 6 or so, depending on size of cauliflower.
INGREDIENTS
1 c. dry garbanzo beans (3 c. or so, cooked)
1 head cauliflower
1/3 c. virgin olive oil
1 1/2 tsp. salt
1 TBS. toasted coriander seed
Pine nuts and green onions (or chives) for garnish
PREPARATION
Cook until tender: > 1 c. garbanzo beans (or use 1-2 cans cooked beans, drained)
Set aside the cooked beans when done. Meanwhile, halve the cauliflower head, wrapping loosely in heavy-duty foil. Bake at 375 degrees for 1 hour, using: > 1 head cauliflower
Set roasted cauliflower in a large pressure cooker (or pot). Add boiling water just to cover; bring up to pressure, cooking again for 10 minutes or so. The cauliflower will soften in texture this way and make for a smoother soup.
Meanwhile, toast the coriander seeds for 2-3 minutes in a toaster oven or under broiler (or in a dry, hot pan, stirring constantly): > 1 TBS. coriander seed
Process the coriander seed in a small electric coffee grinder (or a blender, or with a mortar and pestle). Set aside.
Next, strain off and reserve the cooking broth. The core and outer leaves of the cauliflower will pull away easily; discard these. Process the cauliflower tops with the cooked garbanzos. To the processed beans and cauliflower, add: > 1/3 c. virgin olive oil > 1 1/2 tsp. salt > 1 TBS. toasted coriander seed
Add cooking broth back in and reheat, serving with chives or parsley as a garnish. You can also top with extra cauliflower, grilled until tender, and perhaps a sprinkling of pine nuts (toasted or raw).
I’d heard a lot of raves about Red Velvet–it’s been quite popular at The New Deli. But I had hoped to create a way around using all that Red Dye #4. Not that I have a problem ingesting an ingredient made from crushed beetle (where most red dye comes from). I’d never noticed any reaction to it, although a few folks might be allergic to it.
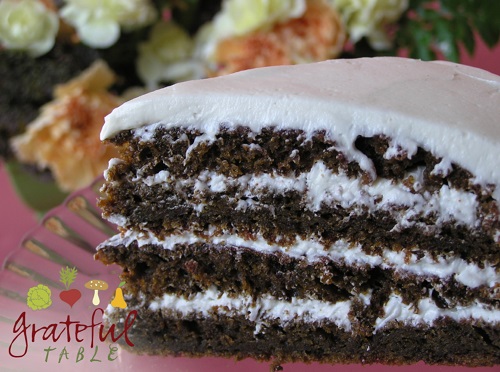
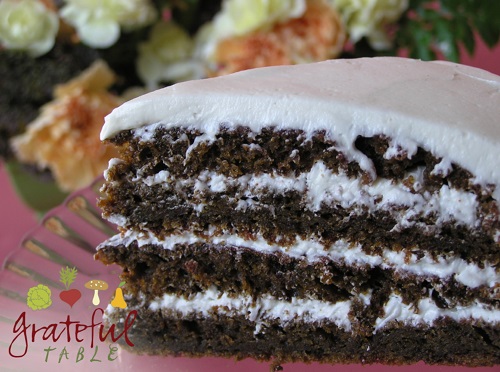
The “Red” Velvet Beet Cake wasn’t exactly red…
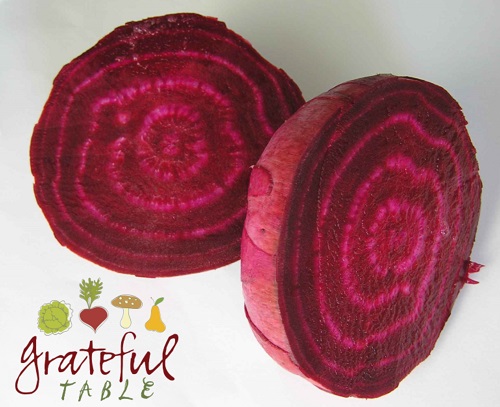
I just thought beets would work! So I tried a Tyler Florence recipe for Red Velvet Beet Cake, using beets for color instead of food coloring. Alas, the Red Velvet Beet Cake didn’t turn out red at all. It was a delicious chocolate cake though (with a secret side of veggies thrown in). I tweaked Florence’s original recipe and posted it here, if you wanted to try a good chocolate cake with beets in it!
Are you looking at Red Velvet Cake recipes? If so, you’ll notice there are quite a few versions. Some use butter, some use (eek!) shortening. I use olive oil, and it’s delicious (and more healthy). I also use unbleached all-purpose flour, and it works great. Some recipes call for cake flour, but it is typically even more processed than white flour, and isn’t necessary. Back when I was a nervous baker and followed every rule, I bought some cake flour. Most of the box sat on a back shelf for five or ten years–no bugs ever even got into it, if that tells you anything!
If you were hoping to find the Red Velvet Cake recipe I had posted years ago on my old website (pccuisine), it has moved to here. This recipe wouldn’t qualify to serve for a health food convention, but it’s still a great, traditional cake for a special occasion. Totally worth it. (What can beat a homemade cake?!)
One feature of the traditional Red Velvet Cake is the frosting, made with a roux of sorts. There are versions out there using cream cheese frosting, but it’s not quite the same. If you’re looking for authentic, go for the traditional recipe and skip the cream cheese.
I remember my aunt making this cake ages ago. She retold its tale, which supposedly started at the Waldorf-Astoria Hotel. Legend has it that a guest at the restaurant asked for the recipe for the wonderful dessert she’d just had, and was given the recipe, plus a huge bill for it. So she decided to give the recipe to every person she could think of, since she’d paid such a price for it. It’s just urban legend, but it makes a good story. Maybe that’s why you can find so many versions of the recipe out there?
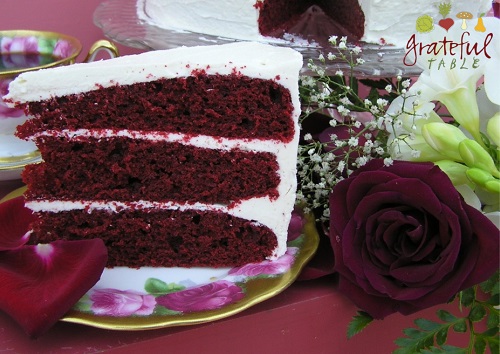
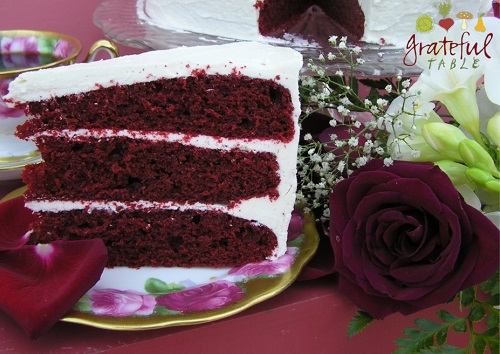
Traditional Red Velvet Cake (looks so GOOD!)
More details about this cake: Before the age of Dutch-processed cocoa powder, unsweetened cocoa was more acidic (not so alkaline). Theory has it that vinegar was added to the recipe; it reacted to the more acidic, old-style cocoa powder, giving it a reddish color. (This probably prompted the name of “Devil’s Food Cake” as well.) Thanks to modern science, our modern cocoa powder is not affected by the vinegar anymore, but we do love that red color, and that name, don’t we? Hence, the red food coloring to the rescue! Ah, modern science…
If you decide to make the Red Velvet Cake, don’t underestimate the quantity of red food coloring you’ll need: Two big bottles. (You don’t want to have to rename the cake, “Sort-of-Red Velvet Cake”.) I personally like using the gel paste food colorings found at craft/baking supply stores. I get mine at Michael’s, for a fraction of the cost of the grocery store’s bottles of liquid coloring. And, it only takes a teaspoon of the gel paste to get the same color a quarter cup of the liquid would give you. It’s the way to go!
This is a beautiful cake for special occasions. If using liquid red food coloring, it takes two small bottles, but one can use just a teaspoon of gel paste food coloring to get the same effect.
This is a classic Red Velvet Cake recipe, using the traditional cooked butter cream frosting, but with a shortcut, using microwave. Serves 8 or so.
CAKE INGREDIENTS
2 1/4 c. all-purpose flour
1 1/2 c. sugar
1 tsp. baking soda
1 tsp. fine salt
2 TBS. cocoa powder
1 1/3 c. olive oil
1 c. buttermilk, at room temperature
2 large eggs, room temperature
1/4 c. red food coloring (2 ounces), OR 1 tsp. red gel paste (found at craft or baking shops)
1 tsp. white distilled vinegar
1 tsp. vanilla extract
FROSTING INGREDIENTS
3 TBS. flour
1 c. milk
1 c. sugar
1 tsp. vanilla
1 c. butter, room temperature
CAKE PREPARATION
1. For cake, preheat the oven to 350 degrees. Oil and flour three 9″ round cake pans.
2. In a large bowl, mix the following well (breaking up any clumps of cocoa powder), then set aside on wax paper: > 2 1/4 c. flour > 1 1/2 c. sugar > 1 tsp. baking soda > 1 tsp. salt > 2 TBS. cocoa powder
3. In another large bowl, mix together: > 1 1/3 c. olive oil > 1 c. buttermilk > 2 eggs > 1/4 c. food coloring, OR 1 tsp. red gel paste (found at craft or baking shops) > 1 tsp. vinegar > 1 tsp. vanilla.
4. With mixer on low, slowly pour the wax paper-full of dry ingredients into the wet ingredients until just combined and smooth.
5. Pour cake batter into the prepared cake pans. Bake until the cake pulls away from the side of the pans, and a toothpick inserted in the center of the cakes comes out clean, about 30 minutes.
6. Run a knife around the edges of cakes to loosen them, and invert the cakes onto a plate, re-inverting them onto a cooling rack, with rounded-sides up. Let cool completely.
FROSTING PREPARATION
1. Make roux using small saucepan on the stove, or use the following microwave method: Choose a larger, microwaveable bowl (quart-size or larger) to mix flour and sugar in, as mixture might bubble up some- this will reduce chances of spills in the microwave. To the large, microwaveable bowl, mix together: > 1 c. sugar > 3 TBS. flour
2. In separate, smaller bowl, microwave 1 minute or so, until hot: > 1 c. milk
3. Add hot milk to flour/sugar mix slowly, to avoid lumps. Microwave 2 minute more, stir. Return to microwave for 30 more seconds, if necessary, until mixture’s bubbly hot. (Watch to make sure it doesn’t bubble over.) Add to hot milk/flour/sugar mix: > 1 tsp. vanilla
4. Cover bowl with plastic; cool completely in refrigerator.
5. To a standing mixer, add: > The sugar/flour/milk mix > 1 c. butter, room temperature
6.Cream until light, on high speed, until very fluffy. Split cakes to make four layers; frost the layers and outside of cake.
A search for a naturally-colored “Red Velvet” cake led to this delicious dessert. Alas, experiments using beets to recreate the beautiful, rich red color of the classic Red Velvet Cake proved futile, but a wonderful “Chocolate” cake was discovered in the process.
For homemakers looking for ways to incorporate more healthy ingredients into the family’s diet, this recipe may help. It has very little actual chocolate in it, and spices can be added to change it up some. But the beets, which are added raw (and processed until finely chopped) add moisture and body. Not to mention, they do give this cake a rich, dark color, and bring a few extra nutrients to the table as well. Serves 8 or so.
CAKE INGREDIENTS
1 1/4 c. peeled, chopped red beets, processed fine
1 1/4 c. all-purpose flour
2 TBS. cocoa powder
1/2 tsp. baking powder
1/2 tsp. baking soda
1/2 tsp. salt
2 large eggs, room temp.
1/2 c. buttermilk, room temp.
3/4 c. sugar
1/3 c. olive oil
1/2 tsp. white distilled vinegar
1/2 tsp. vanilla extract
FROSTING INGREDIENTS
3 TBS. flour
1 c. sugar
1 c. milk
1 tsp. vanilla
1 c. butter
CAKE PREPARATION
1. Preheat oven to 350 degrees. Butter two 8″ pans.
2. Process dry ingredients together, or hand mix well, being sure to break up any clumps of cocoa powder: > 1 1/4 c. flour > 1/2 tsp. baking powder > 1/2 tsp. baking soda > 1/2 tsp. salt > 3/4 c. sugar > 2 TBS. cocoa powder
3. Peel beets, cut into small pieces: > 1 1/4 c. peeled, chopped red beets
4. Process beets until finely chopped. Set aside in medium bowl.
5. In a separate bowl (or in a glass measuring cup), mix: > 1/3 c. buttermilk > 1/3 c. olive oil > 2 eggs > 1/2 tsp. vanilla extract > 1/2 tsp. white distilled vinegar
6. Stir dry ingredients into the processed beets. Slowly stir wet ingredients in as well, mixing until smooth.
7. Bake in the oven for 25-35 minutes, until puffed and a toothpick in center comes out clean.
8. Cool, split each cake in half (to make four layers), and frost.
FROSTING PREPARATION
1. Make roux using small saucepan on the stove, or use the following microwave method: Choose a larger, microwaveable bowl (quart-size or larger) to mix flour and sugar in, as mixture might bubble up some- this will reduce chances of spills in the microwave. To the large, microwaveable bowl, mix together: > 1 c. sugar > 3 TBS. flour
2. In separate, smaller bowl, microwave 1 minute or so, until hot: > 1 cup milk
3. Add hot milk to flour/sugar mix slowly, to avoid lumps. Microwave 2 minute more, stir. Return to microwave for 30 more seconds, if necessary, until mixture’s bubbly hot. (Watch to make sure it doesn’t bubble over.) Add to hot milk/flour/sugar mix: > 1 tsp. vanilla
4. Cover bowl with plastic; cool completely in refrigerator.
5. To a standing mixer, add: > The sugar/flour/milk mix > 1 c. butter, room temperature
6.Cream until light, on high speed, until very fluffy. Split cakes to make four layers; frost the layers and outside of cake.
Thai foods can seem fairly complex, with unique herbs and spices lending a distinct taste. But substituting a few common pantry items for more exotic ingredients still yields a tasty soup. Although not ideal from the purist’s view, fresh or ground ginger works in this particular soup, if the aromatic ginger known as “galangal” is unavailable. Galangal is quite unique from regular ginger and can usually be purchased at international markets; it produces a fiery, “woody”, almost piney flavor.
The crushed leaves of the Kaffir lime also have a distinct taste; substituting zest of lime or lemon can still add a note of refreshing citrus if access to Kaffir leaves is limited. Substituting lemon leaves also works, for a next-best option.
The bright purple Japanese eggplant traditionally found in many Thai dishes is delicious, but retaining the bright purple color is tricky. Restaurants often deep-fry it, as oxidation turns it brown. An alternative to deep-frying is to use the method below, which allows the eggplant to cook with minimal exposure to air. The more common globe eggplant can substitute for the long purple ones, if necessary.
To achieve a beautifully green colored broth (as seen in traditional green curry dishes), fresh spinach, basil, parsley and cilantro can be juiced or blended; it can then be frozen in an ice cube tray, handy to add to many batches of such dishes.
This recipe will serve 6 or so.
INGREDIENTS
1/2 TBS. curry powder*
2” piece galangal (Asian aromatic ginger, or substitute regular ginger, or ginger powder)*
3 Kaffir leaves, crushed (or substitute zest of 1 lime or lemon)*
Boiling water (plus chicken stock, if desired)
1 c. brown rice (or white, if desired)
1/4 c. coconut oil (or substitute peanut, sesame, or other oil)
1 red pepper
1-2 eggplant (Japanese, bright purple, if available)
Large handful spinach
2 tsp. salt (or to taste)
Optional: fresh basil, cilantro, parsley (and spinach), either chopped or juiced (as mentioned above)
Optional: toasted, chopped peanuts or cashews
PREPARATION
1. To make a flavorful broth, simmer the following in soup pot. Add the boiling water slowly, mixing into curry powder to avoid lumps: > 1/2 TBS. curry powder > 2” piece galangal (or ginger), cut in thin strips > 2-3 Kaffir leaves, crumbled (or lemon or lime zest) > about 4 c. boiling water (part chicken stock if desired)
2. In separate pot, cook rice until done, 45 minutes (or 15 minutes for white rice): 1 c. brown rice > 2 c. boiling water
3. Prep the eggplant by cutting lengthwise, so that one side of the piece will have skin on it. The skin side will face down in the pan, to cook. (With rounder eggplants, some middle pieces won’t have any skin on them.) Use: > 1-2 eggplants
4. Preheat large iron skillet until quite hot. Have handy a piece of foil and another heavy pot or pan to set on top of the eggplant. Into hot skillet, add: > 1/4 c. coconut oil (or other) > the eggplant, skin-side down
5. Turn skillet off, letting eggplant remain in pan until tender and cooked through (about 10-20 minutes).
6. In another pan, grill peppers until browned some. Use: > 1 red pepper, cut into strips or chunks
7. Remove Kaffir leaves and the ginger strips from the stock pot, if desired. Bring the stock up to a boil, and add: > Large handful spinach > 2 tsp. salt (or to taste) > Optional greens (basil, cilantro, parsley) > the grilled red pepper > the grilled eggplant, cut into chunks
8. To serve, add the cooked rice to each soup bowl. Ladle the broth and veggies in, and garnish with chopped peanuts or cashews, if desired.
* Green curry paste is available at international markets; a mix of ingredients which typically includes galagal, Kaffir leaves, and cumin. If desired,substitute 1-2 TBS. or so green curry paste for the first 3 ingredients.
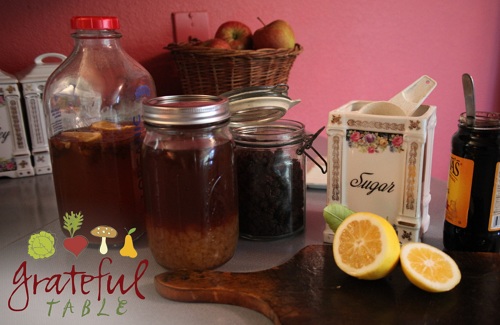
My sister-in-law’s on the cutting edge. She’s the one who told me about Water Kefir. I was kind of surprised that I didn’t even know that kefir has way (way) more probiotics than bottled supplements, or yogurt.
Michelle (daughter-in-law) gave me a few milk “grains” to culture my own milk kefir. I’m not much of a milk drinker, and I don’t like how commercial milk is treated. But, I didn’t want to spend the extra money to get fancy, organic milk either. Besides, it still wouldn’t be raw, and I can be such a purist sometimes. Plus, my husband is still not letting me get a little goat, much less a cow, so… my heart just wasn’t in the whole milk-kefir-brew thing.
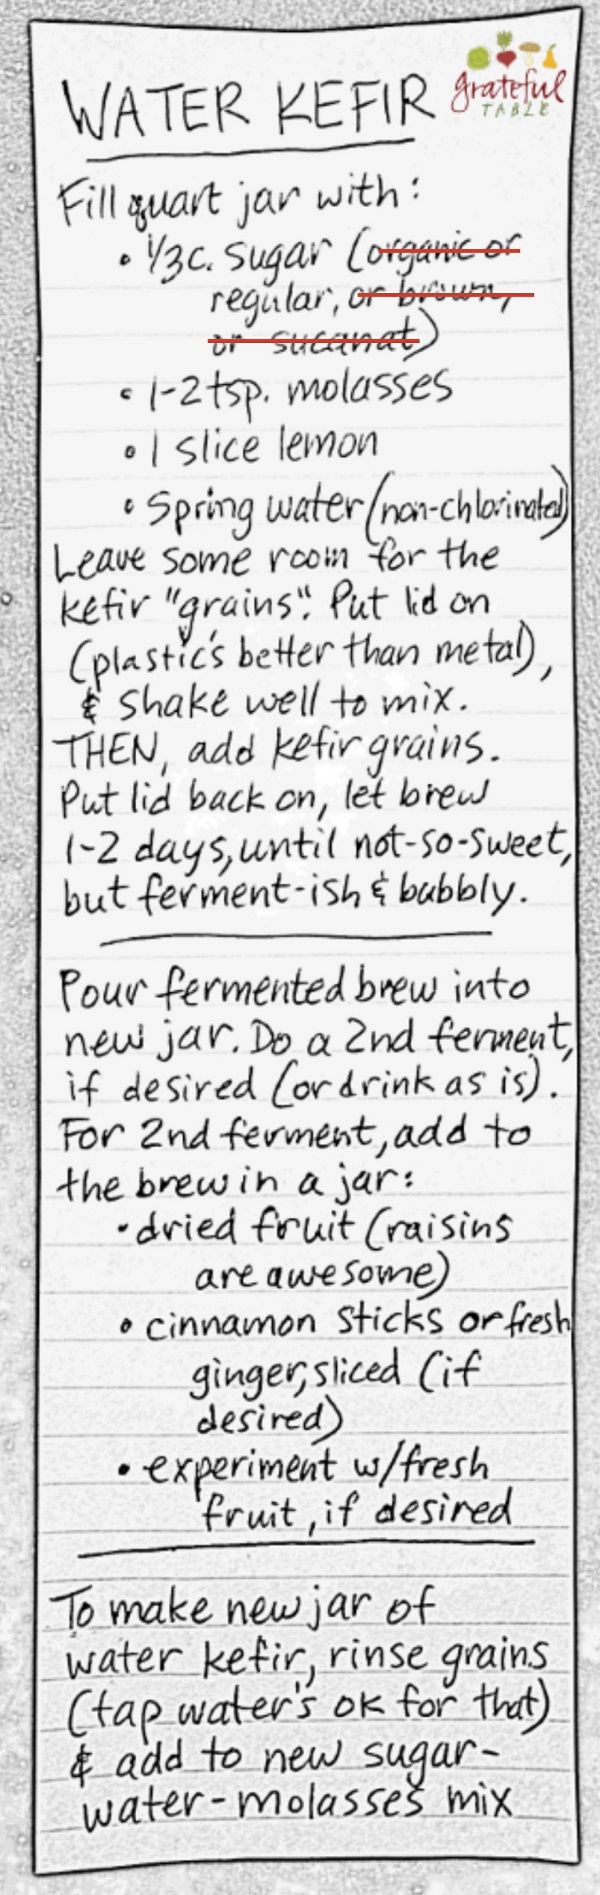
Then I started hearing about water kefir. (For my full recipe on how to make that, go here: Full Water Kefir Recipe.) Thank you, sis-in-law, for mentioning this to me! She’s one of my more health-conscious relatives, who introduced me to “Diet for a Small Planet” back in the 70’s. She had heard you could culture kefir with coconut water.
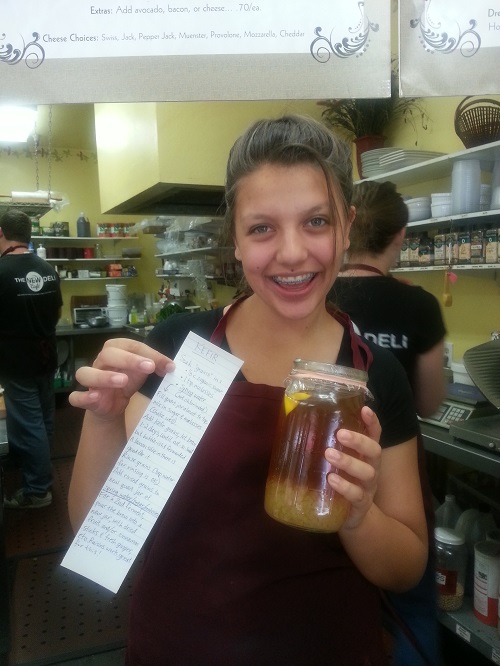
Well, what was stopping us?! I didn’t want to just talk about it. Why didn’t we already have some brewing?! What was slowing us down?! With Amazon at my fingertips, it was easy to order a small package of water kefir grains. It came with a nice little instruction sheet that answered most of my questions. Yay. (I took notes, as you can see on the scrap paper I gave to my friend Vanessa.)
Local friends and family don’t need to order their own grains, since the grains multiply. I’ve been able to get the girls at work started on this stuff, and some other folks too. Again, if you want the detailed directions, check out my simplified, easy water kefir recipe here.
But what’s all the excitement about? Kefir cleans the digestive tract, so no toxic contents in food go into your bloodstream. It’s enzyme-rich, full of electrolytes, amino acids and active live cultures, it’s loaded with vitamin B-12, vitamin K and biotin. And, it’s bubbly and rather delicious!
When you start drinking kefir regularly, you’ll probably notice that your digestion and metabolism improve. It might even help those battling leaky gut syndrome and colon cancer, yeast infections and general immune system issues. And, it helps regulate cholesterol and blood sugar levels. SIGN ME UP, right?
But… where do water kefir grains come from? Wikipedia says they have been found on a type of Mexican cactus; granules of the water kefir could be scraped off and cultured in sugar water. Other stories suggest that the grain was a gift from God. Maybe it’s both!
In this post on What’s So Bad About Polyunsaturates, I gave a rundown of why PUFAs are dangerous. They increase inflammation, for one! Plus, they can’t take the heat- it leads to rancidity, which leads to free radicals and other adversities.
If you’re looking to decrease your intake of PUFAs, here’s a little rundown of the PUFA content of a few common oils and fats (see a full list here):
Grapeseed oil- 71% PUFA
Safflower oil- 75% PUFA
Sunflower oil- 65% PUFA
Corn oil- 59% PUFA
Soybean oil- 58% PUFA
Walnut oil- 55-63% PUFA
Cottonseed oil- 50% PUFA
Sesame oil – 41-45% PUFA
Canola oil- 30-37% PUFA
Peanut oil- 29-32% PUFA
Almond oil- 17% PUFA
Duck fat- 13% PUFA
Lard- 12% PUFA
Avocado oil- 10% PUFA
Goose fat- 10% PUFA
Palm oil- 8% PUFA
Olive oil- 8% PUFA
Butter- 4% PUFA
Cocoa Butter- 3% PUFA
Coconut oil- 2-3% PUFA
Palm kernel oil- 2% PUFA
What does this mean? For one, cook with oils that have 10% PUFA or less. Anything that’s high in polyunsaturated fatty acids is prone to oxidize and deteriorate under heat. Ironically, the more saturated fats (coconut oil, palm oil, lard, tallow, poultry fat) hold up very well under fire. You can cook with them without creating toxic byproducts. A far cry than what they were saying in the 70’s…
Canola oil has been touted as being healthy, but it contains alpha-linolenic acid, which should never be heated. When cooking, note that the extraction processes can affect the quality of the oil. Organic, cold-pressed virgin oil is best.
Friends ask me questions. There are concerns. What?! Canola isn’t the best oil?! What oil’s safe to cook with?! For stove-top cooking, you can always use coconut oil or butter (or leftover fats from cooking a free-range chicken or grass-fed beef). For baking, or lower cooking temperatures, you can use almond, macadamia, virgin palm or olive oils. But you could also consider using some as “finishing oils”. This means you cook, sear, saute, grill (whatever) your foods, perhaps in a minimal amount of your preferred oil as needed, then before serving, drizzle a little virgin olive oil on top (or sesame oil, etc.). The flavors can be more pronounced this way, and it’s healthier too.
Some folks say, “but we don’t like the taste of coconut oil”. You might do what I do sometimes- I get an iron pan quite hot, adding the food I want to sear or brown. A good metal pan, once hot, is more “sealed”; in the process of heating, the molecules of the metal move around faster, closing up more “space” than a colder pan. With a cold pan, the metal molecules are moving slow, with more space between, and they kind of “grab”, making meat and veggies stick more. Weird, right? I saw a video of it once… very interesting!
In any case, if the pan’s hot, you can add your food to it, which will cool the pan down a bit. Then you can add olive oil, butter, coconut oil, or other favorites, and you won’t be subjecting it to as much heat. Olive oil can take some heat, and it is much healthier oil choice that other common “polyunsaturated” vegetable oils.
“Smoke point” is a “hot” issue here. Almond oil, hazelnut, macadamia, olive oil, palm oil, peanut, rice bran, sesame oil, and other monounsaturates or saturated fats can typically take the heat, with smoke points above 400 degrees: Avocado oil can withstand even up to 520 degrees- whew! Butter and coconut oil can’t quite take temperatures above 400 without burning/smoking, although if butter is rendered to remove the milk solids (making “ghee”), it can move to a smoke point of 475. Bring on the clarified butter!
Oh, and posted here is a breakdown of the PUFA content of some of my favorite whole foods: Seeds and nuts!