Scale to Size or Wait for Weight to Show? (Nip it in the Bud!)

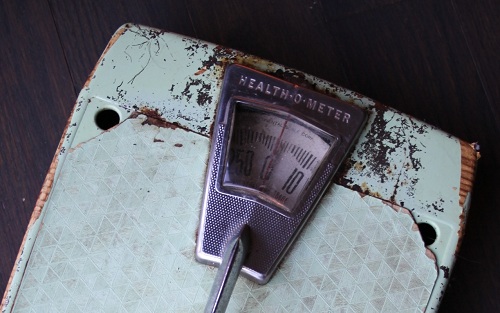
Weight-on-Scale-DenialI’ll admit, I was a little obsessed with the scale, most of my life. After all, if I didn’t weigh myself daily and aggressively nip any weight-gain trends in the bud, there’s no telling how large I might become, right?

But then, seven years ago, I discovered my low-thyroid condition. It seemed to explain my challenging war on weight. For years, I’d fought so hard to maintain a certain size. I had a positive self-image, but it meant a grueling diet/exercise program.

When I started taking a thyroid supplement, I was able to eat a bit more- like a “normal” thin person. And not gain weight. Yay- problem solved! I decided to throw my scale away.

Weight-Gain-No-ScaleFor seven years, I started eating “healthy” meals of whole foods, grains, beans, nuts, occasional meat, etc. I didn’t notice any gradual increase in size, and I didn’t have a scale to prove it, so all was well.

I should have noted that my weight at the doctor’s office once a year had been increasing. I had brushed that off (that’s just extra heavy clothing today, or that’s just water weight from all that salt yesterday)…

I finally got a new scale, and went back to weighing myself regularly. Realized I’d somehow gained an extra 8 lbs. or so in these past 7 years. Now, I don’t want to obsess about losing weight; ultimately, it’s about being as healthy as we can be. After all, God told us, “the body is the temple for the Holy Spirit”, right?

But I did start paying more attention to what I was eating. Mark of Mark’s Daily Apple has loads of dietary info. Entire websites are devoted to “Paleo This”, “Gluten-Free That”, and other health trends. Many bloggers who’ve suffered from ill health are quite enthusiastic about their new-found dietary solutions.

I learned that, apparently, the half-cup of nuts I had been eating daily contains lots of Omega 3’s, and could upset the Omega 6 to 3 ratio, leading to health issues. What? Could that explain the swollen, painful knee problems I’d been having? (I thought that was just because I was over fifty…)

So I cut down on the nuts (to maybe a tablespoon of macadamias daily, which are of a better Omega 3 to 6 ratio). My knee problem went away- wild!

I made some other fairly dramatic changes–I  went in with a few other families, on purchasing a grass-fed cow. I started finding organic, free-range chickens, making bone broth*, bartering for my neighbor’s duck eggs, eating less gluten, rice, and beans. Etc. A radical shift from the more vegetarian-style diet we’d eaten for years. The new Paleo trend in our house didn’t seem to foster any weight loss, but it did make me reconsider my previous habits. I had been eating soaked raw buckwheat groats for breakfast every morning. And while most raw fruits and veggies are awesome, the Paleo folk do not recommend raw groats at all. (They suggest cooking grains and beans after soaking, rinsing, even fermenting, to improve digestibility.)

How was I going to make the scale my friend again?! Well, a cleanse never hurt any. I had done them before. I liked the last one I did, a few years back, from Blessed Herbs. It had me juicing my organic apples, then adding back in psyllium powder (for fiber), plus a whole range of cleansing herbs and such at various times of the day.

But at this point, I was looking for a new routine that might adjust that tendency toward weight gain. Like, a new type of breakfast, not a temporary program.

So. I got a Vita-Mix. (Check this post for what I’ve been having for breakfast, and why.) So far, I’m not back to where I was, but I’m getting there!

*PS For more about how bone broth is good for you, see this article from Paleo Diet Lifestyle. You’ll want to make some tonight!

Soul Food Sunday: Let Crops Burst Out!

I’ve been looking up Bible verses with food themes, and putting them to pictures. The picture below was taken up in Yountville, across the street from The French Laundry. In a perfect world, we might all have such crops growing outside our windows, right?

Fields-Crops-Shout-Joy-PINTEREST

My own garden might not look quite as impressive, but I’m still excited to see the “crops” truly bursting out! With joy!

Wallpaper: Desktop Backgrounds w/Verses

“Let the sea and everything in it shout his praise! Let the fields and their crops burst out with joy!” 1 Chronicles 16:32

If you like the verse, you might want to select one of the links below, and use the photograph and scripture for your computer background.

To use for desktop wallpaper, left click on appropriate monitor size, then right click and choose “select as desktop background” :

Click here for Background for wider monitors

Click here for Background for shorter monitors

Moussaka: Greek Eggplant Recipe, Vegetarian (Or Add Lamb)

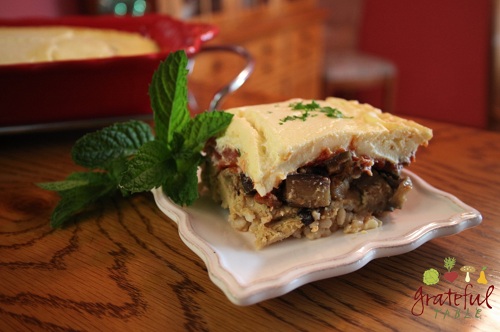
Looking for great eggplant recipes? This Greek recipe for Moussaka is well-seasoned, and is good as a vegetarian dinner choice. Hummus adds protein; brown rice rounds it out. Typically, it also has lamb in it; add grilled, ground lamb in with the eggplant if desired.

To simplify, approach this recipe in steps. Hummus can be made ahead in big batches; portions freeze well.  Brown rice can also be cooked ahead in larger quantities and frozen for future dinners. The seasoned tomato sauce can also be prepared ahead of time.

Serve this dish hot; traditionally, it might be served cold too, as part of an appetizer platter. It can be made ahead and allowed to chill, as the flavors blend this way, and the layers set up. Serves 4 to 6.

Grateful-Table-Moussaka-Eggplant-Casserole

INGREDIENTS

  • 3 c. hummus (about a third of this recipe)
  • 4 c. cooked brown rice ( or 1 c. uncooked rice, plus 2 1/4 c. water)
  • 2-3 eggplants (approx. 3 lb.)
  • 3 c. Tomato Sauce (homemade tomato sauce recipe here)
  • 1/4 tsp. cinnamon
  •  1/2 TBS. fennel seed, toasted, ground
  • 1 tsp. curry powder
  • 1/2 c. olive oil
  • 1/2 c. flour
  • 2 c. milk
  • 1 lb. ricotta
  • 4 eggs
  • 1/2 tsp. salt


PREPARATION

1. Set aside: > 3 c. hummus (about a third of this recipe)

2. Set aside: > 3-4 c. cooked brown rice

3. If you don’t have cooked rice on hand, prepare it as follows. Add to a pot: > 1 c. uncooked brown rice > 2 1/4 c. boiling water

4. Simmer the rice 40 minutes or so, with lid on, until tender. Set aside.

5. Saute in iron pan, on high heat for a few minutes, then reduced to a medium-low heat to finish cooking until tender: > 2 eggplants (approx. 2 1/2 lb.), cubed

6. Set cooked eggplant aside. Make the seasoned tomato sauce by mixing together: > 3 c. Tomato Sauce (recipe here) > 1/4 tsp. cinnamon > 1/2 TBS. fennel seed, toasted in dry pan, then crushed (or processed in a spice grinder) > 1 tsp. curry

7. Make and set aside White Sauce. For that, mix together in a sauce pan: > 1/2 c. olive oil > 1/2 c. flour

8. To that “roux”, add the milk slowly: > 2 c. milk (heated first by microwaving 2 minutes, to save time, if desired)

9. Bring the above to a boil, boiling 2 minutes. Then add the following, stirring until blended: > 1 lb. ricotta > 4 eggs > 1/2 tsp. salt

10. Finally, begin assembly. Oil bottom of 13×9″ pan. Add, pressing down well: > 4 c. cooked brown rice

11. Add the following ingredients, layering in this order: > 3 c. hummus > The cooked eggplant > The Seasoned Tomato Sauce > The White Sauce

12. Bake at 350 degrees for 45 minutes. Serve hot or refrigerate to serve as an appetizer or for quick lunches.

Tomato Sauce Recipe: Healthy Ingredients, Quick Easy Method

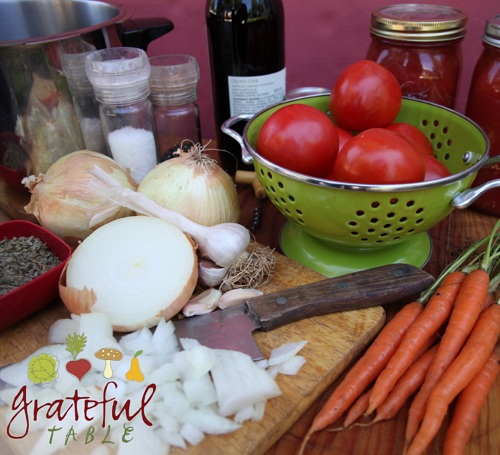
Use this in Mostaccioli, Lasagna, Moussaka, Tomato Bisque Soup, etc. One advantage of this recipe: it doesn’t easily scorch. Some recipes require a lot of stirring, but as the juicy tomatoes boil down, the sauce suddenly thickens, and the pan burns as well! This is avoided by adding tomato paste last. The onion-garlic mix still needs to be stirred occasionally, but burning or scorching the bottom of the pan is less likely with this method.

While sugar might be an ingredient in many tomato sauces, carrots give this recipe its sweetness. They add extra nutrition too. But leave the carrots out if desired; the sauce is still delicious! Makes 2-3 qts.

Grateful-Table-Tomato-Sauce

INGREDIENTS

  • 6 c. (2 lb.) fine-chopped onion
  • 8-10 garlic cloves (1/4 c.), minced
  • 1 1/2 lb. carrots, cut in chunks
  • 1/4 c. olive oil
  • 1 c. red wine (or 1/2 c. red wine vinegar)
  • 8 oz. can tomato paste
  • 2- 28 oz. cans chunk tomatoes (almost 2 quarts)
  • 1/2 TBS. salt
  • 1/2 TBS. pepper
  • 2 TBS. dry basil

PREPARATION

1. Saute’ in a med. skillet with lid on: > 6 c. (2 lb.) fine-chopped onion > 8-10 garlic cloves (1/4 c.), minced > 1/4 c. olive oil

2. Stir occasionally, over med. high heat. Turn burner down as the onions soften. Next add to the onion skillet: > 1 c. red wine (or 1/2 c. red wine vinegar)

3. While onion/garlic mix simmers, cook until tender in just a bit of water: > 1 1/2 lb. carrots, cut in chunks

4. Pour the cooking liquid off of the cooked carrots, into the onion mix. Process the cooked carrots in a food processor or blender until smooth.

5. Bring the onion mix up to a boil again, to let the liquids boil off some more, stirring occasionally.

6. Last of all, add the cooked, processed carrots to a large bowl or pot, mixing in the remaining ingredients: > 8 oz. can tomato paste > 2- 28 oz. cans chunk tomatoes (almost 2 quarts) > 1/2 TBS. salt > 1/2 TBS. pepper > 2 TBS. dry basil > the sautéed onion mixture

7. Freeze pint containers of this if not using within several weeks. Sauce will keep almost a month or so refrigerated, longer if frozen.

Grocery Shopping, Pioneer Style: Plan, Purchase, Be Prepared

Grateful-Table-Groceries-Supplies-OnlineSome folks live in the boonies. Relatively speaking. So my friend up in Snohomish, Washington thought I should let folks know where to get the foods that aren’t available at every grocery store.

After all, not everyone has their choice of which natural food stores to go to. I thought it was rough when the closest Trader Joe’s was 15 minutes away (gasp). Now we have one down the street, about 5 minutes away. There are at least a hundred Trader Joe’s in California; by comparison, Washington has eight. Total. Many states have even less, or none at all. We’re pretty spoiled in the Bay Area…

Whole Foods Market has 270 stores (in the U.S. and the U.K.). That’s still not enough to make it accessible for everyone. Small mom and pop style health food stores fill in some of the gaps, but aren’t an option for everyone.

What does the savvy shopper do? I’ll give you a run-down of what I get at what stores- maybe that’ll give you some ideas. I don’t shop all that often, but can usually pull a good meal together with what’s on hand. Every night of the week!

JEN’S EASY LIST: SIMPLE GROCERY SHOPPING

Grocery Store (or a farmer’s market for the produce)

  • Fruits & Veggies that keep well (onions, yams, potatoes, carrots, winter squash, cabbage, broccoli, apples) plus more perishable ones (lettuce, tomato, avocado, cucumber, summer squash, strawberries, etc.)
  • Fresh herbs (most of which I process right away, chopping and freezing the extra with oil in ice cube trays)
  • Pasta (we haven’t had much pasta on our latest paleo-kick, but it can be handy to have some on hand. Buckwheat Soba noodles are my fave, when I do splurge on pasta…)
  • Meats & Poultry, grass-fed or free-range, ideally (extra is stocked in freezer for later dates)
  • Fish: Frozen is good if freshness is questionable (again, extra’s kept in freezer)
  • Eggs & Dairy (many cheeses, plus kefir and yogurt, keep longer than milk, which is rarely even stocked in our fridge)

Health Food Store , Trader Joe’s, Whole Foods, etc. (or see links at bottom of page, to purchase on Amazon)

  • Bulk grains (last a long time, and are good for bread-making too, if you’ve got something like a Vita-Mix to grind the flour in)
  • Bulk beans (lots of protein, and they store well)
  • Bulk herbs (saves $$ buying in bulk)
  • 100% Virgin Olive Oil: it’s non-GMO, and more stable than other PUFA (polyunsaturated) oils
  • Coconut oil (good for cooking with, and very healthy)
  • Coconut manna (a pureed blend of the whole coconut- great for soups, sauces, smoothies and such)
  • Nuts, seeds, and dried fruits (some of these can be found at the grocery store, but stuff like raw sunflower seeds, chia seeds, and macadamias are best found at the specialty places)

If you just happen to live in the boonies, try Amazon

Here are a few links to a few products, competitively priced, that you can find (very conveniently) on Amazon:


Tried & True, Or Dried & True? Open Season for Dehydraters

Grateful-Table-Kale-Dehydrated

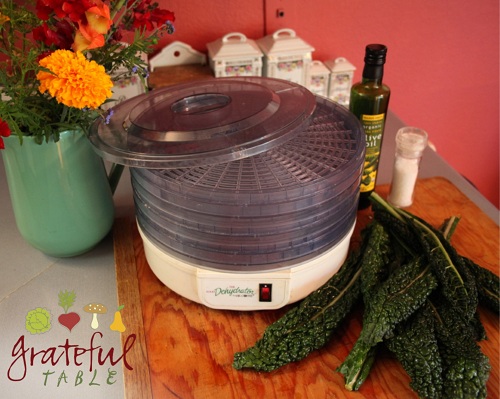
With twenty-some fruit and nut trees, we occasionally get bombarded with an overload of one crop or another. Not that I’m complaining! But it can get overwhelming. By fall, the sight of persimmons covering all my three-tier plates and taking up a shelf or two in the fridge starts scaring me a little. I know what I need to do at that point though: get out my dehydrator!

Apricot season just finished up, and before we could get tired of those, I dehydrated halves of them. Didn’t have to throw any extras into the compost pile.

My friend Joanna brought me some of her kale chips earlier this year, dehydrated in her dehydrator. It was a handy, healthy snack in the midst of the other fare offered during floor hockey season at our church. I’d much rather munch on those than on some nachos! They were great.

So when my other buddy Sarah gave me an overload of kale from her dad, I thought I’d make some kale chips too. I didn’t add anything to them, and they were pretty inedible. But after that, I learned to toss ’em with a little virgin olive oil first. For the next batch, I rubbed the oil onto each leaf. Sprinkled a little sea salt on too. They were dee-licious! Quick too- they were ready in about two hours. (At least twice as fast as most fruits, which have more moisture.)

If you have a mandolin slicer, you can give sweet potatoes the same treatment. Just slice ’em real thin, toss with olive oil, and dehydrate. If you don’t have one yet, you might want to get a mandolin slicer. The ones with a porcelain blade stay super sharp. We got a few porcelain knives for the deli, for when we needed to slice tomato wedges and didn’t have time to sharpen our other knives- it stays really sharp, pretty much forever.
For my next experiment, I’ll trying something more like the recipe posted on the “From Scratch Club” site. For Swiss chard, they suggest adding some lemon and honey too. I’ll skip the honey (as it would make for a stickier snack), and maybe try a dash of palm sugar instead. Maybe a spice or two.

The dehydrator’s so handy, when I’m tired of steaming or sauteeing. I guess it’s real great for raw food enthusiasts as well. If you love fruits and veggies, or have your own fruit trees, it’s a worthwhile investment.

Not that everything works in the dehydrator. I had hoped to produce a sugar-free plum fruit leather once our plum crop had come in, but the tartness of the original fruit seemed to multiply, far more than any sweetness did. It was deemed inedible by all.

I haven’t even begun to explore making beef jerky from the grass-fed beef I’ve got in the freezer. It’s on my list though. I hear you can make salmon jerkey too… More experiments lie ahead!

Rice Pudding: Honey-Sweetened, Whole Grain

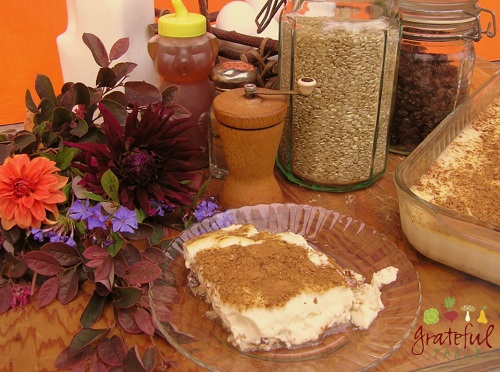
A gluten-free, whole grain option for dessert (or breakfast), this brown rice and custard dish is lightly sweetened with honey. Leftover rice from a previous meal can be used; white rice can also be substituted. Makes 8 servings.

Grateful-Table-Rice-Pudding

INGREDIENTS

  • 5 c. milk (your choice whether low-fat or regular)
  • Approx. 11/2 c. cooked brown rice
  • 1 or 2 handfuls raisins
  • 2/3 c. honey
  • 8 eggs
  • 1 TBS. vanilla
  • 1 tsp. salt
  • Cinnamon
  • Nutmeg

PREPARATION

1. Scald (or microwave for 10 min. or so), just until milk gets slightly foamy: > 5 c. milk (non-fat or your choice)

2. Prepare pan by sprinkling cooked rice and raisins over bottom of 12 x 8 ” pan: > approx. 1 1/2 c. cooked brown rice > 1 or 2 handfuls raisins

3. In a mixing bowl, stir well until blended: > 2/3 c. honey > 8 eggs > 1 TBS. vanilla > 1 tsp. salt

4. Add scalded milk to the bowl, blending until smooth. Pour over the pan of rice and raisins. Sprinkle  with nutmeg and cinnamon. Bake in a larger pan filled halfway up w/ water, at 350 degrees for 35 minutes. Serve warm or cold.

Tortellini Salad: A Cold Pasta Salad, Great for Parties

This is a colorful cold pasta recipe, with a refreshing dressing of orange, lemon, and lime zest. Use raw veggies instead of cooked, if desired- saves time!

Grateful-Table-Tortellini-Cold-Pasta-Salad

For variation, omit the citrus and Balsamic vinegar, adding some nutmeg, cream, and Parmesan to the dressing, to create a dish more like Pasta Primavera. Or sub extra veggies for pasta, to make a gluten-free side dish of veggies full of fresh, light flavors!

Perfect for parties; this pasta salad holds up well. Serves 8.

INGREDIENTS

  • 1 lb. dry cheese tortellini pasta
  • 3-4 peeled carrots
  • 1-2 red peppers
  • 2 or so broccoli crowns
  • 1/4 c. olive oil
  • 1 tsp. salt
  • 1/2 tsp. black pepper
  • one lime, zested
  • one lemon, zested
  • half an orange, zested
  • fresh herbs, if desired (basil or oregano, etc.)
  • 1 TBS. balsamic vinegar
  • 1/2 TBS. Dijon mustard

PREPARATION

1. Cook: > 1 lb. dry cheese tortellini pasta

2. Drain the pasta, rinse to cool. Set aside in a colander.

3. Grill carrots in a pan with a splash of water until tender: > 3-4 peeled carrots, diced into cubes or sliced into discs

4. After water evaporates and carrots are tender, continue to grill them just a bit longer to bring out their natural sweetness, browning them some. (Add a splash of olive oil when browning.) Set carrots aside in colander, along with the cooled pasta.

5. Grill in very hot pan, just enough to sear and brown: > 1-2 red peppers, diced into larger pieces

6. Add grilled peppers to the colander.

7. Cut broccoli into small flowerettes. Steam quickly in very hot skillet with a splash of water (and with the lid on), for just one minute, removing from pan to cool. Use: > 2-3  broccoli crowns

8. In a mixing bowl, mix dressing ingredients together: > 1/3 c. olive oil > 1 tsp. salt > zest from one lime, one lemon, and half of an orange > fresh herbs, if desired (basil or oregano, etc.) > 1 TBS. balsamic vinegar > 1/2 TBS. Dijon mustard

9. Toss the pasta and veggies in with the dressing. Serve cold; great for potlucks and parties.

Under Pressure? Cook Good Things Fast w/Pressure Cookers!

I’m pretty jazzed about my new pressure cooker(from Amazon). I had found another one at an Ace Hardware Store a few months ago, but it actually cost more than Amazon, and Amazon has free shipping on this item (even without “Amazon Prime”). My fingers have done the walking, and they can type pretty fast. So a new, stainless steel, 8-qt. pressure cooker is on its way to my house. Whoo hoo!
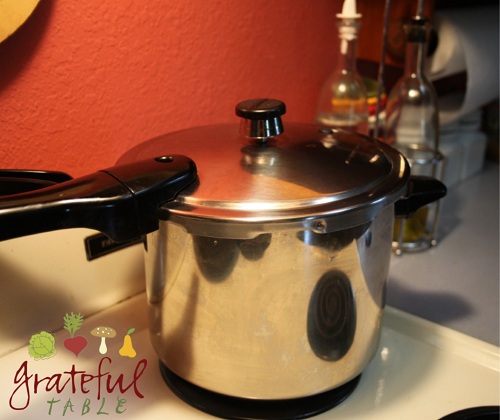

Stainless Steel Pressure Cooker

Most of the deli girls we hire are young and less experienced, but not for long. Soon they find out what all we can do with our pressure cookers. We cook up a lot of stuff quite efficiently. Like, fresh garbanzo beans for salads. No canned garbs for us- they can be a little slimy. Plus it’s a smaller carbon footprint to buy dry beans and cook your own. No one has to ship those puppies to the factory to get cooked, then truck ’em off in cans that include a bunch of water. (You know it’s way cooler to get dry beans, right?!)

But that’s just beans. We make awesome stock with the pressure cooker too. For a special treat, we get free-range chickens; after roasting ’em and eating the best parts, we put the carcass in the pressure cooker and end up with an excellent stock. Some might call it “bone broth”. Either way, the pressure cooker is the way to go.

We have a huge pressure cooker from our old catering days, when we cooked up a -5-gallon pressure cooker full of turkeys. Weekly! It made incredible stock. So when we invested recently in a quarter of a grass-fed cow, it was pretty easy to roast the bones, then throw ’em into the giant pressure cooker. Sweet.

It might take a little longer in a smaller pressure cooker, to process all those bones. But then, most people aren’t buying a quarter-cow at a time, right?

Have you considered investing in a pressure cooker? We got that giant one back in the eighties, and it’s still with us. We also bought a more new-fangled one, in the last ten years- it didn’t last as long. It had weird plastic parts that weren’t easily replaced. If you do get a pressure cooker, go with Presto- they’ve been around for years. My father-in-law had one he’d been using since the forties. We were still using it, some sixty years later! It was aluminum; we eventually replaced it with stainless steel. The aluminum pressure cooker is perfect for canning jars of garden goodies. But stainless steel is more ideal to cook in, especially acidic things like tomato. (Aluminum might leach out a bit, if acidic foods are cooked in the aluminum pot for too long.)

If you like to cook, or need to cook, and love to eat, you should get a pressure cooker. The one mentioned in the link above is the best price I’ve found, and I didn’t even have to drive around looking for it. It also comes in other sizes, but the 8-quart gives me a great value, more bang for the buck 🙂

Seafood Gumbo: Gluten-Free Option Too

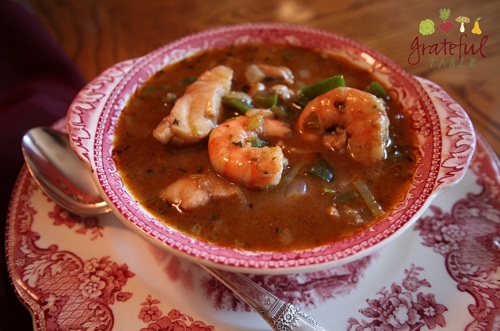
I was thrilled to discover that I could use millet flour in place of white flour in this, for a gluten-free recipe (just sub that for the flour in the recipe below). The roux for gumbo is unique, in keeping with other blackened Creole dishes. The flour/oil mixture is cooked until very dark. Not that it actually burns; it needs constant stirring to avoid a scorched flavor. But it does gradually turn a deep brown-to-black color before other ingredients are added.

Gluten-free Gumbo

This contains a rather unique ingredient: “file powder”, which is dried, ground sassafras leaves. The file powder adds an earthy flavor, and thickens the soup a bit too.

Vary this recipe by using different meats, sausages, seafood, even different vegetables. Serve with rice and bread to complete the meal. Serves 8.

INGREDIENTS

  • 2 c. onion
  • 1 c. celery
  • 1 c. green pepper
  • 2 tsp. salt
  • 2 bay leaves, crumbled
  • 1/2 tsp. cayenne
  • 1 tsp. pepper
  • 1/2 tsp. dried thyme
  • 1/4 tsp. oregano
  • 1 TBS. paprika
  • 1 TBS. minced fresh garlic
  • 2 1/2 TBS. file powder
  • 5 c. shrimp stock (or chicken stock)
  • 1/2 lb. crab meat
  • 1 dozen oysters
  • 1 lb. raw shrimp
  • 1 lb. raw fish, chopped in 1” pieces
  • 3/4 c. olive oil
  • 3/4 c. flour (sub millet flour, for gluten-free)
  • Cooked rice (added last, to soup bowls)

PREPARATION

1. Chop and set aside: > 2 c. onion > 1 c. celery > 1 c. green pepper

2. Mix “Seasoning” and set aside: > 2 tsp. salt > 2 bay leaves, crumbled > 1/2 tsp. cayenne > 1 tsp. pepper > 1/2 tsp. dried thyme > 1/4 tsp. oregano > 1 TBS. paprika > 1 TBS. minced fresh garlic > 2 1/2 TBS. file powder

3. Bring to a boil in 6-8-quart stock pot: > 5 c. shrimp stock (or chicken stock) (See recipe for Shrimp Stock)

4. Set aside: > 1/2 lb. crab meat > 1 dozen oysters > 1 lb. raw shrimp > 1 lb. raw fish, chopped in 1” pieces

5. For roux, get an iron pan (or other) quite hot. Add to heat some: > 3/4 c. olive oil

6. With a metal spatula, mix into hot oil: > 3/4 c. flour (or sub millet or other flour)

7. Stir constantly, 2 to 4 minutes, until dark red-brown to black. Don’t scorch, but lower heat as necessary, until flour turns nicely brown while stirring. With experience, one might dare to go past brown into the reddish-brown-to-black territory. (The darker the roux without scorching it, the more intense the flavor.)

8. Once the right color is achieved, immediately add: > Half of the chopped veggies

9. Add the following, cooking 1 or 2 minutes after each addition: > Remaining veggies > “Seasoning”

10. Last, stir stock slowly into roux until smooth, bringing to a boil. Ten minutes or so before serving, add: > The seafood

11. Heat just until fish loses its transparency, 5 to 10 minutes. Stir as needed. (Don’t overheat after adding seafood, as that will toughen it.) Add rice to bowls (or bread bowls); ladle the seafood gumbo in to serve.