I love being able to take my time making food. And I like supporting the local Farmer’s Market, small local businesses (but of course, what with us running The New Deli!), locally-sourced foods, etc. The whole Slow Food Movement thing is awesome. (BTW, it’s not a movement devoted to crock-pot cooking, in case you wondered!)
Today, I worked on seeding some of our many pomegranates. It’s that time of year. And although I enjoy the convenience of store-bought pomegranate juice (even this powder on Amazon), I don’t want to waste what God’s given us. So, having planted so many fruit and nut trees in our yard, I’m doing my best to eat, process, or give away the bounty we have.
So I was seeding pomegranates today. I don’t think there’s any real fast way to get the seeds out. Talk about a slow food movement!
I’ve tried a number of things. Someone said, “Just press and roll the pomegranate around on the counter, then stick a straw in it and suck the juice out. Wow- that sounded like a great idea! Alas, it was too good to be true. It really wasn’t all that effective.
For the last few years, I was still trying to save time, so I tried another approach. I put on the gloves, scored and broke apart all the fruits, added them to a 5 gallon bucket, and mashed ’em with a sledge hammer. (A large, clean rock would also do.) They juiced up, and I strained the whole thing in a giant colander, into jars for storage. That yielded me a decent amount of juice; a pretty quick method if you’re inundated with pomegranates. You can do a whole lot of fruits, and make pomegranate juice ice cubes, for future smoothies.
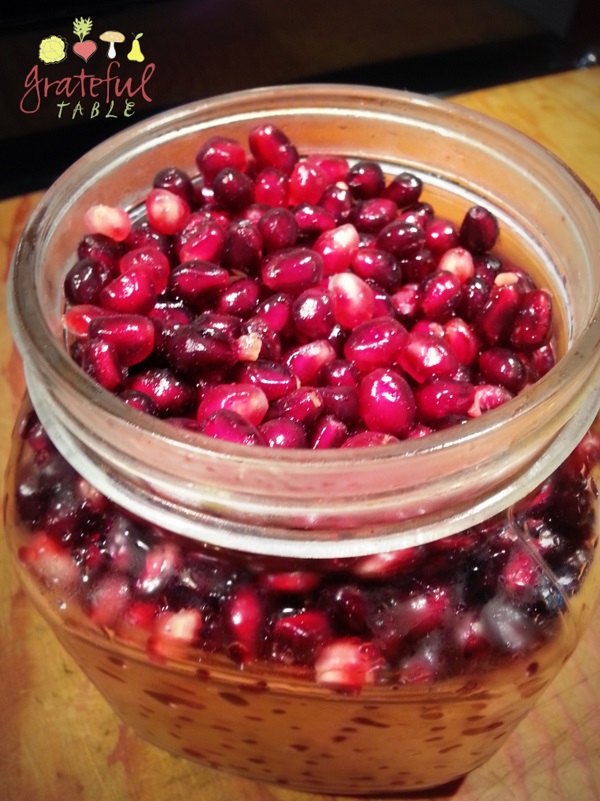
This year I used the more traditional bowl o’ water method. Warm water’s a good idea, since fruit-stained hands are less likely in warm warm (cold water sets fruit stains). I rolled ’em around a bit to loosen the seeds some, and cut the tops and bottoms off the fruits. I scored them into sixths (trying not to cut into the fruit and bruise the seeds). I broke them into sections underwater and broke the seeds apart from the pith. The pith floats and the seeds sink- perfect!
I strained the seeds, then set them on screen-racks to dry. (Paper towels could work too, on cookie sheets.) Once dried, they can be frozen, or stored in the fridge for 5 days or so. Another (healthy) way to “store” them is to turn them into pomegranate kefir, as follows:
Pomegranate Kefir
To blender, add: > approx. 1 quart pomegranate seeds > approx. 1 quart kefir water (strained from grains after a day or two of brewing)
Blend the seeds and kefir, letting seeds settle. Strain off liquid into kefir bottles; let ferment a day or two, until bubbly. Refrigerate when done!
See my post “Jen’s Green Drink Recipe“, if you want to “build your own” powdered blend, which saves money too. Below are more ideas, to tweak your diet on your way to natural health!
In one week, seven folks sought me out for thyroid health info. It’s become a hot topic, and no wonder- instead of trying to heal health problems with the foods and herbs God’s given us, we’re more often told how to treat symptoms, usually with drugs. My dentist scoffed when he found I’d gone to another (specialized) dentist to remove my silver/amalgam fillings (containing mercury). But I had done enough research to feel that leaving the amalgam fillings in my mouth could be potentially hazardous to my thyroid (and possibly other body parts.) Maybe I’ve become one of those whacky folks people roll their eyes at. At least that dentist did! (I’ve since gone to a different dentist…)
Traditional medical treatment had failed me. Not that I think doctors are pharmaceutical drug pushers. Drugs have their place, after all. Almost ten years ago, when I was a complete basket case, a prescription for Synthroid got me out of a horrible funk. My health improved radically. I did have to up the dose, and eventually felt like some old symptoms were returning. So when I discovered more natural approaches to thyroid health, I was eager to implement those approaches.
To sum it up, it appears that many health issues (thyroid included) are thought to be caused by inflammatory conditions. With hypothyroidism becoming almost epidemic, perhaps there is something quite inflammatory about our modern diets!
So I’ve decided to include links here, to several of my favorite items (featured at my shop). These are products I feel have helped me in my quest for health. My thyroid’s doing much better. I take ThyroGold (natural OTC thyroid gland), plus a lot of natural foods and herbs.
When my thyroid was at its worst, I was taking three baths a day to keep warm, heating tap water to drink so I wouldn’t get a chill (from room temperature water!). You get the idea. It was bad.
And now I feel great- it’s a miracle! I thank God, who I feel sent me on a long mission to wellness. In Genesis 1:29, God said, “I have given you every plant with seeds on the face of the earth and every tree that has fruit with seeds. This will be your food.” Our culture has strayed from such natural food, creating our own weird “foods”, with the help of machines, pesticides, genetic modification, etc. Maybe it’s time to get back on track!
Note that I’m not advocating that everyone should get off drugs right this second! But, there may be a long, natural journey ahead, for those who choose it.
And now, the list (some things might seem weight-related, but hypothyroid-sufferers often have weight problems too…)-
Eight Fave Health Products I’m Using
“Berkey Water Filter“- I’ll start with my water filter, since that was one of my initial purchases this past year. Much of what I read indicated that fluoride and chlorine potentially disrupted thyroid health, and I wanted a good filtering system that would get rid of those. It’s tricky to find systems that get rid of fluoride, but this one did the trick. In the process, we all discovered how incredible pure water could taste. Yay, Berkey!
“Grass-Fed Whey Protein Powder“- Nothing was working… I’d gained some weight I couldn’t shake (trying every latest trend in the process). I thought of protein powders, but so many include bogus, cheap ingredients. Sweeteners- even low calorie ones- all keep the sweet-tooth thing going. (We need to re-train our tastebuds!) Other powders may include bean proteins (the cheapest of proteins). I finally tried this whey powder, adding it to morning smoothies. It really seemed to help- I think it stimulated my digestive system, while nourishing me so I didn’t get ravenous. This product is quite pricey when bought in the smaller package but the large package is a great value. I’ve bought 20 lb. of this stuff in the past year! It’s a convenient, quick meal to add this to my morning smoothie, and the weight’s stayed off.
“Heather’s Tummy Fiber“- A friend had asked me to research an expensive weightloss product (TR90), so I found an ingredient list and researched each item. It seemed that acacia senegal (which is what “Heather’s Tummy Fiber” is) can lend a feeling of fullness, and soothes the stomach and digestion. A lot of IBS (irritabable bowel syndrome) sufferers resort to this product with much success, but it also seemed like a good ingredient to mix into my morning smoothie. I mix a half cup of it into eight cups of my protein powder, which makes blending my smoothie more of a one-step process.
“Organic Tart Cherry Powder“- A lot of supplement/powder mixes contain the cheapest ingredients. TR90 contains non-organic dried fruit powders. But… cherries are on the Dirty Dozen list (most full of pesticides). I really wanted to include tart cherry powder in the protein powder I was mixing myself, since it’s so helpful for inflammatory conditions (low thyroid, etc.). I was still having knee problems too, but apparently, this stuff’s helped. My knees have been great for months now! AND, this cherry powder is organic. It might seem expensive, but… it takes 52 pounds of tart cherries to make one pound of the extract powder. Can you really find organic cherries fresh for less than that anyway? I mix about 1/3 c. of this stuff into my 8 c. mix of protein powder; again, it saves time in the morning when I just need to add one scoop of a mix that contains everything I want to include.
“Nopal Powder“- This stuff’s actually prescribed in Mexico to treat diabetes. How exciting! I bought it because of its anti-inflammatory qualities, but found my blood sugar levels leveling out too. A friend suggested that I just buy fresh cactus leaves at hispanic markets, but… I need convenience. Again, I just add some of this into my big mixture o’ protein powder, with the other herbs, dried fruits, and tummy fiber, adding a scoop or two to a smoothie, and I’m good!
“Ashwagandha“- Say what? It’s an herb- a root powder. Reminds me a bit of ginseng, but it’s touted as helpful for those with thyroid disorders. It’s an “adoptogen”, which, in my words, means it can fill in the nutritional gaps for whatever we need at the moment. At night, it can promote a good night’s sleep, as it supplies a nutrient for that, but in the morning it can improve focus and increase energy due to some other nutritional factors. Yes, I add it to my protein mix too.
“Chlorella Powder“- On my path to thyroid health, I knew I wanted to get rid of the mercury that was potentially disrupting my endocrine system. Mercury can apparently play quite a part (of the bad guy) in the thyroid scenario. Many a dentist will disagree (“what’s wrong with the mercury in your fillings?!”). But a good many folks had written about how removing their amalgam/silver fillings had allowed them to give up their thyroid meds. An ultimate goal! It’s also suggested that, in any case, one can begin with a heavy-metal detox, starting with a cleansing diet. Chlorella (a little seaweed-type powder) can be a part of that cleansing diet, binding with the mercury in our system to aid in its removal. So I started guzzling an 8-ounce container of water with a scoop of this mixed into it every morning, first thing. I say, “guzzle” because I just want to get it over with. I don’t want to mix it into my smoothie. It tastes a tad fishy, I suppose. My husband and daughter-in-law can’t hang with it at all, though our oldest son and I think it’s drinkable (but then, we’re OK with sushi too). The powder mixes up pretty well when I shake it up in the container with water.
“Cod Liver Oil“- Helps balance your Omega 3/6 ratio. You can eat weekly rations of wild-caught salmon instead, but… that’s not always convenient. These capsules are handy, although I get the Liquid Fermented CLO from “Renewed health Supply”, since I’m so hardcore and didn’t want capsules or the flavored oils offered on Amazon. These WOULD be a next-best choice for me though. Purported to help improve so many conditions, & promote general health/well-being. Yay!
The combination of flavors here is perfect. Even without a party excuse, having these around will give reason to celebrate! I like using large scallops- they’re especially delicious. And this recipe is perfect for those Paleo folk looking for tasty gluten-free appetizers! Makes about 15 pieces, serves 5-8 people.
1. Bite-sized, medium large scallops will use about one slice of thin-sliced bacon per piece. Grill the needed amount of bacon until just golden but still quite soft.
2. Set bacon aside, drain off excess fat, and turn pan back on high. Sear the scallops briefly in the bacon pan. Don’t fill pan too full, or scallops will steam and not brown.
3. Arrange a piece of basil, parsley, or even spinach on top of each scallop, plus half a cherry tomato. Wrap a soft-but-grilled piece of bacon around each scallop, and broil 5-10 minutes until bacon has browned more. (Or bake in 475 degree oven 10 minutes or so.)
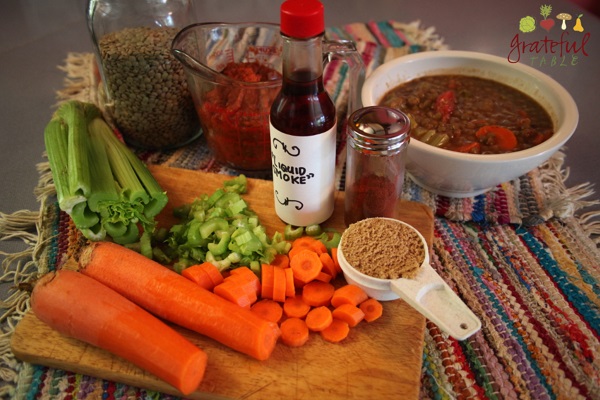
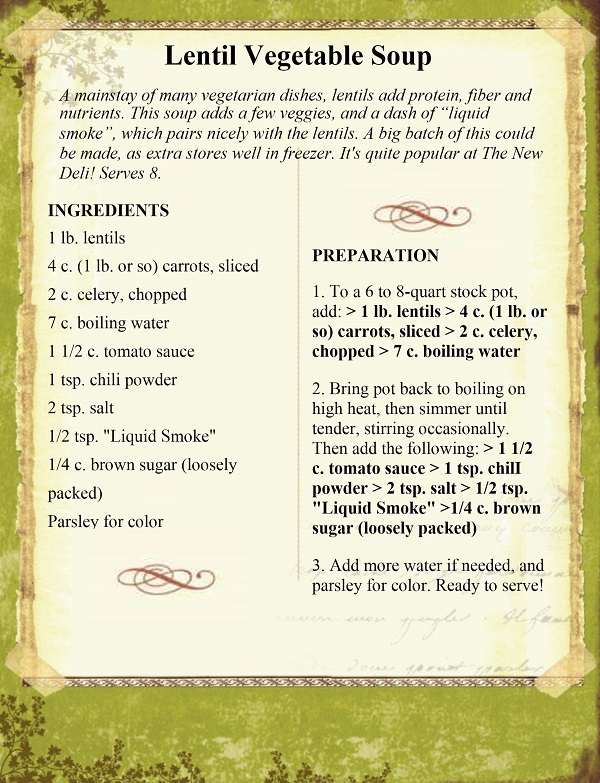
When we make a new batch of tomato sauce at the deli (with lots of sauteed, sweet onions, garlic, etc.), we like to make a batch of Lentil Vegetable Soup too, since it uses the tomato sauce, plus a few other goodies. A bit of sweetness (using brown sugar, or honey or palm sugar, if desired) seems to go well in this soup. That plus some “liquid smoke” makes it almost like a more natural, heartier version of baked beans. You know how overpoweringly sweet those can be, right? This soup just has a hint of sweetness. Like I said- a better version. Like, a healthier comfort food!
Below is the recipe, but in jpeg form, since I can’t actually publish the recipe directly onto this blog due to copyright hindrances (since my soup cookbook is already available on Amazon). You can find this recipe there, but I put a different copy below, in case you really want to make that soup now, and just aren’t ready to buy a digital copy of “SOUP’S ON!“. (Which, by the way, is just $6.99, and full of pictures and New Deli extra cooking tips!)
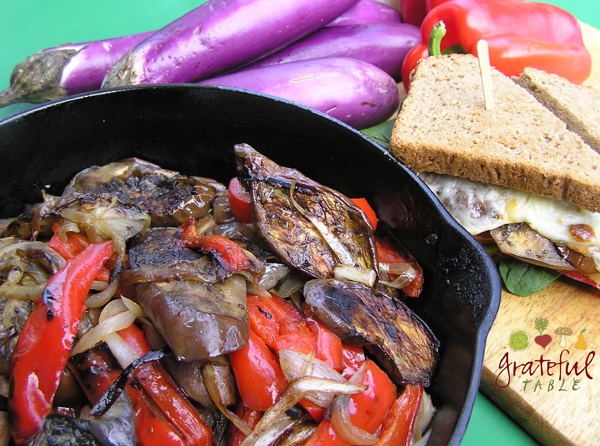
This is a simple eggplant recipe, but once you know how to cook eggplant this way, you can add it to a variety of dishes. Just change up the spices and seasonings, adding some kind of protein, for a great main dish. Another plus- eggplant’s not on the “dirty dozen” list, so I’m not as concerned about buying it organic.
We make a yummy sandwich with this eggplant (and some melted cheese, with or without bacon) at The New Deli. We also serve a salad with the grilled eggplant in it, tossed with Italian dressing, avocado, tomato, and Parmesan cheese. I love it in an omelet, or on pizza. A big batch of this will hold up for at least a week in the refrigerator; the reduced vinegar and soy sauce act to preserve the veggies. Serves 4 to 6.
INGREDIENTS
1 large eggplant, or several Japanese eggplants
1 red pepper
1 medium onion
Olive oil, to drizzle on layers
1/4 c. soy sauce
1/4 c. balsamic vinegar
PREPARATION
1. Add to a hot pan (preferably a 12″ iron pan, as it holds heat and distributes it well) and grill* : > 1 red pepper, sliced into strips > Drizzle of olive oil
2. Add and keep grilling on medium-high heat, stirring some: > 1 onion, sliced
3. Move grilled peppers and onion off to side, and add: > 1 eggplant, sliced into strips > Drizzle olive oil (2-4 TBS.)
4. Pile the grilled pepper mix back on top of the grilling eggplant, to help it to steam some. Turn the pan on low to finish cooking the eggplant until tender, stirring occasionally.
5. When eggplant’s cooked through (no longer white and spongy looking), turn pan back on high heat. Add: > 1/4 c. soy sauce > 1/4 c. balsamic vinegar
6. Let the mix cook on high just a few minutes, stirring often, so the soy sauce and vinegar can boil off some. Remove from heat, and continue stirring occasionally, to let off steam so mixture won’t be too soggy.
7. Serve this dish hot or cold, by itself, over rice, with salad greens, or as a sandwich condiment.
*An alternative method is to use the oven; no stirring of veggies is necessary. Roast the vegetables at 350 for 40-60 minutes, in a clay pot( or in an iron pan), until tender. An alternate method is to microwave the veggies for 10-20 min., using the clay pot or a ceramic bowl with a plate over it.
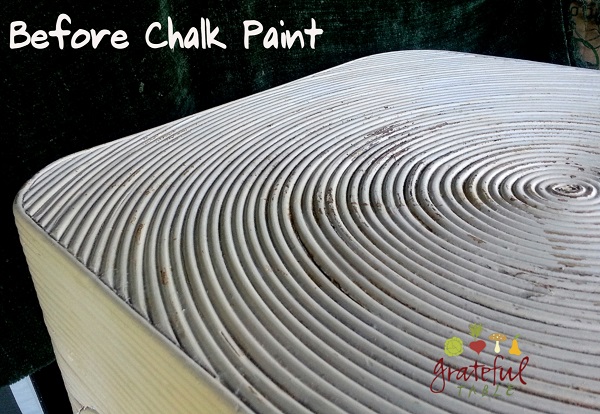
Tom and I bought our house back in 1986, on a skimpy lil’ budget- a miracle! We lived quite frugally for years. But we invested in a coffee table set; it seems to have been a wise purchase–timeless in many ways. I don’t want to replace it with trendier pieces, since it holds so many memories!
But the tables have had a lot of facelifts. I resorted to spray-paint several times, even though it never took long for the paint to start chipping off. I’d paint it again. And again.
Then I found out about chalk paint! My friend was so excited about it- telling me how easy it was, how you didn’t need to prep the surface first…
So I researched, finding that a much cheaper “chalk paint” solution (than the pre-mixed/Ann Sloan style ones), was to mix my own out of Calcium Carbonate. (Don’t buy the stuff on Amazon that’s CALLED chalk paint additive, as it costs much, much more.) The best “recipe” seemed to be this:
2 Tablespoons Calcium Carbonate to 1 cup of paint (Mix well)
Some folks add a tablespoon of water, but I didn’t do that with the fresh paint I was using. I added water when using an old can of paint, since it had been sitting around so long, getting thicker. Not necessary with the fresh paint.
Research indicated that some kind of urethane coat on top of the chalk paint would protect pieces that get high usage. So I added several coats of this Polycrylic Protective Finishon top. I loved that it was water-based (easier clean up). I did have to lightly sand between coats of that, but the whole project was really Quite Easy!
There is also a “Plaster of Paris” alternative; many folks use it. It’s similar to calcium carbonate, except that it’s heat-processed (sometimes from gypsum instead of limestone). Same effect though, from what I hear, AND it’s cheaper ($10.99/8lb., as opposed to $10/5 lb. of calcium carbonate).
Some people have noted that it can be quite difficult to mix the calcium carbonate into the paint, but if you’ve made cake before, I don’t think it’s any worse than folding flour into cake batter! And it’ll last longer than cake, haha…
I tried a simple, homemade toothpaste recipe using coconut oil, but I wasn’t super-thrilled about the oil going down the drain. Not that it’s a huge deal. But I decided to make some tooth powder for a change of pace.
Ha, then I got tired of making the powder and went back to buying this Uncle Harry’s Tooth Powder. I do love the product! Seems pricey, although it lasts a long time. (And now I’m buying the ECONOMY-size Uncle Harry’s. Letting my fingers do the walking, ha…)
If you’re into economy over convenience, homemade is an even better deal. Guess I’ve gotten lazy lately though!
I tried getting into the tooth-powder habit years ago, but it never happened. With most new habits, if you don’t conscientiously discipline yourself into doing something for thirty days, until it IS a habit, it can easily just become a chore that you soon give it up on. Know what I mean? (This applies to many things…)
But I started reading about the things going into toothpaste (stuff like fluoride, which is an endocrine disruptor, etc.), and I was tired of the expense, so I decided to take home-made dental care more seriously.
I’d already started using essential oils on my gums- rubbing a drop or two on them after meals, since my gums had deteriorated during my many years of undiagnosed hypothyroidism. (I believe that one “disease” of the body can affect many other parts.)
I tried coconut oil “pulling” for awhile (letting a tablespoon of coconut oil sit in the mouth for ten minutes or so, to pull out toxins and such). And I made an easy coconut oil/baking soda toothpaste (recipe here). But my favorite homemade dental product has become the tooth powder I made a few months ago… thought I’d share the recipe here.
First off, you can add essential oils of any kind, or not. You can add spearmint extract, etc. Or not. You can order excellent quality oils from Nature’s Gift (where I get most of mine). Or you can order on Amazon, or from Uncle Harry’s, to name a few. Some blogs mention adding powdered spices (cinnamon, etc.), since they’re cheaper. But I think the oils work better and are worth every penny. Here’s the healing oil recipe I use on my gums:
HEALING GUM OIL BLEND
You can use these proportions, but a different proportion might be more to your liking. In any proportion, all these oils support dental health!
8 parts Tea Tree Oil
1 part Myrrh Oil
1 part Clove Oil
1 part Cardamom Oil
Next project- the actual tooth powder. I had a big ol’ bag of Calcium Carbonate in the garage, that I’d bought to make cheap chalk paint out of, and wondered if I could use it to make my own tooth powder. After all, it is apparently the same main ingredient found in Uncle Harry’s stuff (AKA dolomite, chalk).
Answer (after research on several websites): Maybe not. The U.S. National Library of Medicine website mentions here, that when purchasing oyster shell calcium, dolomite, or bone meal, we ought to look for the word “purified” or the United States Pharmacopeia (USP) symbol on the label. Otherwise, the product may contain toxic metals like lead. We do NOT want lead in our tooth powder!
So I found food grade calcium carbonate, also know as dolomite. I used the proportions below, although, again, your personal preference may be to change it up a bit:
My husband was a tad disappointed the first time I made this, since we’d bought a deluxe amaretto for it, and he felt like you couldn’t taste it enough when it was added to the cake. Good point- so much of it bakes away, and almond extract would produce the same results, for probably less money. So next batch, I added the amaretto to the candied orange peel. Whoa- THAT was good!
Here’s a cake recipe that’s quick and easy enough, but still delicious (& slightly healthier than average!)- a moist cake with a fresh orange flavor and slightly crunchy texture from the cornmeal. Traditional Italian recipes might add some Amaretto to the cake; to preserve more of the liqueur’s flavor, it can be added to the orange peel garnish. (Unless serving the under-aged, that is!) Serves 12.
INGREDIENTS
3 large eggs
1 c. granulated sugar
1 1/2 c. milk (or yogurt or buttermilk)
1 c. extra-virgin olive oil, plus more for coating the pan
3 oranges, for zest and garnish
1 TBS. orange zest
1/2 tsp. almond extract
1 1/2 c. all-purpose flour, plus more for dusting the pan
1/2 c. coarse-ground cornmeal (fine-ground works too)*
1/2 tsp. baking powder
1/2 tsp. baking soda
1/4 tsp. salt
Optional: 2 TBS. each sugar and water, for orange peel garnish
Optional: 2 TBS. amaretto liqueur, added to orange peel garnish
Optional: (Instead of orange peel) Confectioner’s sugar to decorate top
PREPARATION
1. Preheat the oven to 350 degrees. Press foil into a 9” spring form pan and coat with olive oil and flour. Or, use two 9-inch round cake pans, which won’t need a foil liner, but which should still be coated with olive oil and flour. (If using two pans, they’ll bake faster.) Tap out any excess flour.
2. In a large mixing bowl, whip until well blended and light in color: > 3 large eggs > 1 c. granulated sugar
3. Stir into whipped egg/sugar mix: > 1 1/2 c. milk (or yogurt or buttermilk) > 1 c. extra-virgin olive oil > 1 TBS. orange zest > 1/2 tsp. almond extract
4. In another bowl, stir dry ingredients together: > 1 1/2 c. all-purpose flour > 1/2 c. cornmeal > 1/2 tsp. baking powder > 1/2 tsp. baking soda > 1/4 tsp. salt
5. Add egg mixture to the dry ingredients, stirring until just blended (the batter should still be slightly lumpy). Pour the batter into the prepared cake pan(s). Bake until a toothpick inserted into the middle of the cake comes out clean, about 40 to 50 minutes. Remove from the oven and let the cake cool, then run a knife around the edges of the pan and turn it out onto a serving plate.
6. To make a garnish of candied orange peel, carefully cut away the outer peel of one orange, slicing it into thin strips. Mix together in a microwavable bowl (or in a small saucepan): > Thin strips from 1-2 oranges > 2 TBS. sugar > 2 TBS. water
7. Microwave (or heat in pan) the sugar/orange/water mix for one minute. If using microwave, stir and repeat this three times, until peel has absorbed most of the sugar. (In saucepan, just keep simmering a few minutes until peel gets soft.) If desired, at this point, stir in: > 2 TBS. amaretto liqueur
8. Garnish the cake with the orange peel. Alternately, it can be decorated with a dusting of confectioner’s sugar instead
*I wasn’t thrilled with my experiment substituting masa flour (which I had) for the corn meal (which I didn’t have on hand). Most bloggers claim success with the switch, but I would say, approach that idea with caution!.
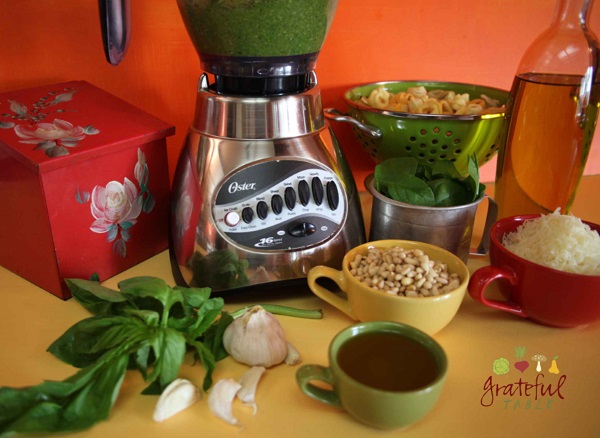
I was sorting through old food pics and found this colorful one of pesto. Seemed apt to post the recipe, if only to enjoy all the bright colors of summer in the picture- before summer fades!
Take advantage of fresh basil in its prime in late summer. To keep it at its greenest, process it first with the olive oil and spinach; the oil seems to protect the leaves from oxidizing and darkening. The acids in the garlic, nuts and parmesan can darken the basil, so add those last. Another tip: pesto seems to stay greener when the leaves are processed at room temperature. In our many years of making pesto at The New Deli, we’ve found that the leaves don’t seem to like to get too cold in the fridge, only to heat up when processed…
Some recipes suggest blanching, to retaining pesto’s ideal green color; experiments at the deli have not proven that technique to be superior. Plus– this recipe’s easier!
Frozen portions of the pesto will keep for months. For an easy meal, add pesto and grilled veggies to pasta (tortellini is especially tasty). Or add to pizza, drizzle in soups, or use for a Pesto Torta appetizer . Makes approx. 2 lbs. (4 c.).
INGREDIENTS
4 c. fresh basil leaves (12 oz.)
4 c. fresh spinach
3/4 c. olive oil
1/2 c. fresh garlic cloves, peeled
1 c. pine nuts
2 c. Parmesan
PREPARATION
1. Process the following: > 4 c. fresh basil leaves (12 oz.) > 3 to 4 c. fresh spinach > 3/4 c. olive oil
2. Add and process again with: > 1/2 c. fresh garlic cloves, peeled (or 1/4 c. minced)
3. To the above, add and process: > 1 c. pine nuts > 2 c. Parmesan
4. The pesto can be stored in the freezer, added to a zip-lock bag and flattened out; this makes it easy to break off a chunk of it as needed. Or, it will keep a week or so in the refrigerator; add a thin layer of oil on top (or press some plastic wrap against the surface), as exposure to air will darken it.
One more episode of “From the Land to the Table” (above)- it’s a local show running on Pinole TV. Some friends helped put this together; a fun project, even if I’ve been too busy to continue producing more…
All you need for some excellent caramel sauce is a bit of sugar and some cream. It’s that easy! Or, for caramelized walnuts, just “melt” (caramelize) the sugar first in an iron skillet; add the walnuts, then turn out onto a sheet to let cool. Add to your favorite salads- yum!

 I love being able to take my time making food. And I like supporting the local Farmer’s Market, small local businesses (but of course, what with us running The New Deli!), locally-sourced foods, etc. The whole Slow Food Movement thing is awesome. (BTW, it’s not a movement devoted to crock-pot cooking, in case you wondered!)
 For the last few years, I was still trying to save time, so I tried another approach. I put on the gloves, scored and broke apart all the fruits, added them to a 5 gallon bucket, and mashed ’em with a sledge hammer. (A large, clean rock would also do.) They juiced up, and I strained the whole thing in a giant colander, into jars for storage. That yielded me a decent amount of juice; a pretty quick method if you’re inundated with pomegranates. You can do a whole lot of fruits, and make pomegranate juice ice cubes, for future smoothies.


 “
“
 “
“
 “
“
 “
“
 “
“
 “
“



 (Don’t buy the stuff on Amazon that’s CALLED chalk paint additive, as it costs much, much more.) The best “recipe” seemed to be this: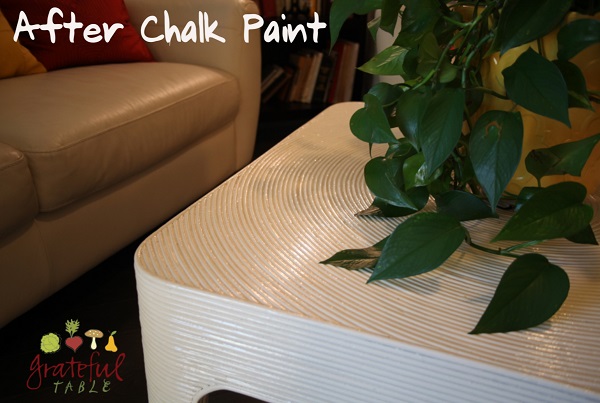
 on top. I loved that it was water-based (easier clean up). I did have to lightly sand between coats of that, but the whole project was really Quite Easy!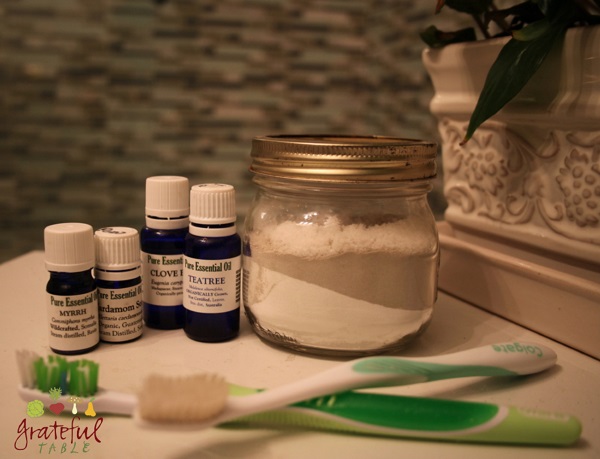
 )
)