Whole Foods: How to Cook Millet (A Good Sub for Couscous)

This is part of a series on Core Ingredients (how to cook them). Find more in this post: Cooking/using Amaranth, Beans, Buckwheat, and Cacao Nibs.

Wondering how to use millet? It’s a wonderfully crunchy little grain, when added to breads and cookies (Oatmeal Millet Cookie recipe here); for a softer version, it can also be cooked like brown rice. It’s a lot like couscous that way, only whole-grain and full of extra minerals and nutrition.
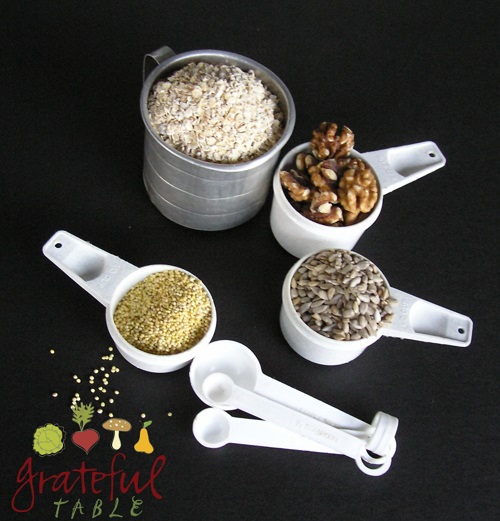
Measuring cup of oats, millet, walnuts, sunflower seedsI like to soak millet for a day, then rinse and let sit in a strainer in the cupboard for one more day. This process helps remove phytates, and makes the millet more digestible. Even if you plan to boil it or add it to baked goods, this pre-treatment is a helpful step.

Soaking might seem like it’ll take too much thought, time, and/or effort. And it can be inconvenient! But I started soaking a full 2 cups’ worth, which is a lot for just my husband and me. But then, after the one or two day soaking process, I have a few options for storing it.

  • #1) Package up portions for the freezer. Strong little zip-lock bags work for this, but it lumps together some due to the remaining moisture. (Thawing resolves this though!)
  • #2) Spread soaked grains on parchment paper-lined cookie sheet. Let dry in a warm oven (preheated to about 140 degrees works). Stir grains occasionally; leave in all day to let them slowly dry, heating oven again if necessary. This dehydrated millet won’t stick to itself, so you can freeze a big jar of it. But I’ve found I can keep it in the refrigerator for a couple weeks, since it keeps better in a dried state.
  • #3) Dry in a dehydrator and store in a jar in the fridge.

My husband and I eat sourdough breads (or breakfast bars) made with millet; it can also be made into a porridge. For those short on time in the morning, some boiling water can be added to the soaked millet the night before. Then in the morning, it should take just a few minutes more for it to finish cooking. It does make a super-healthy, non-extruded “cereal”. (See Sally Fallon’s article on extruded cereals, here, if you want to be inspired to replace your cereal with whole grains…)

For a nice change of pace, millet can be substituted for rice or pasta as a side dish. It will take about as long as brown rice- 45 minutes of simmering once it’s come to a boil. But it’s worth the wait! It can be a vehicle for flavored oils (even butter), or extra herbs or garlic. It can be topped with toasted nuts too; hazelnuts were a recent favorite in my book.

You might want to brown the millet in a dry pan first, to bring out the flavor. Or you can just add boiling water. Use double the water; a 2-to-1 ratio of water to millet (like with brown rice). Cook until the millet has kind of expanded into a light, fluffy grain. It is a bit like cous cous, but more nutritious. For folks looking for gluten-free, millet is perfect! Oh, plus, it’s delicious.

PS I shared this on the blog, “Delicious Obsessions”, on the “Traditional Tuesdays” post. (Featuring real food, no weird refined stuff…)
Lemon Caper Sauce: For Fish, Roast Beef, Sandwiches, Salads

Lemon Caper sauce is quite popular; the original recipe (from Martha Stewart) was designed to season rare beef. At The New Deli, the beef is sliced very thin; with added sauce and some horseradish butter, it makes a great sandwich. For appetizers, it can be served on baguette slices. The sauce is also good with fish, and some people like it as a salad dressing.

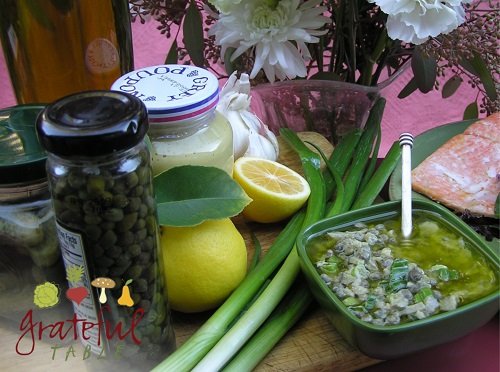
So just what are capers? They are a little bud off of a bush that grows in the Mediterranean. They get pickled, and lend a unique flavor to recipes. The other unusual ingredient in the Lemon Caper Sauce is the cornichons; a fancy French name for tiny, gherkin-sized pickles. But they’re sour, not sweet. And being so tiny, they mince well and retain a good texture; larger pickles might get rubbery. They add just a bit of crunch and tang; perfect in this sauce. Serves 7-8.

Capers, lemons, green onions, mustard, olive oilINGREDIENTS

  • 1/2 c. cornichons
  • 1 c. olive oil
  • 1/4 c. Dijon mustard
  • 1/4 c. capers
  • 1/4 c. lemon juice
  • 2 green onions (about 1/4 c.), chopped

PREPARATION

1. Ahead of time, make the “Lemon Caper Concentrate”. To do that, process the cornichons, or mince finely by hand: > 1/2 c. cornichons

2. Add the minced cornichons to a quart jar. Also add: > 1 c. olive oil > 1/4 c. Dijon mustard > 1/4 c. capers

3. Store the concentrate in refrigerator up to three months.

4. On serving day, add a half cup or so of the concentrate to a serving bowl. To serve, stir in last: > 1 tsp. fresh garlic, chopped > 1/4 c. lemon juice > 2 green onions (about 1/4 c.), chopped

Oatmeal Millet Cookies (AKA “Bird Seed Cookies”)

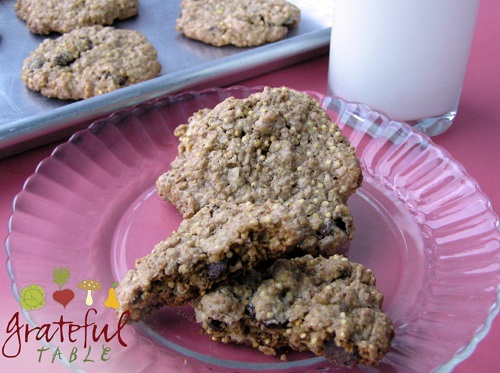
The use of whole grain “oat flour” in this recipe means: gluten-free, and no processed white flour! Regular oatmeal flakes are processed in a food processor or blender; toasting some of the other ingredients before-hand results in a perfectly crunchy cookie. Some refer to these as “Bird-seed Cookies”, though one should get their “birdseed” millet from a good, old-fashioned health food store.

Any extra of these cookies store well in the freezer, for a month or so. Makes about 4 1/2 dozen.

Oatmeal Millet Cookies w/ milk

INGREDIENTS

• 1 2/3 c. plus 3 c. oatmeal
• 1 c. millet
• 1/2 c. sunflower seeds
• 2 c. chopped walnuts
• 1 1/2 c. brown sugar
• 1 c. butter
• 1 tsp. vanilla
• 2 eggs
• 1/2 c. raisins
• 1/2 tsp. baking soda
• 1 tsp. salt
• Optional: 1 c. chocolate chips

PREPARATION

1. Toast 7-10 minutes at 350 degrees, until golden: > 1 2/3 c. Oatmeal > 1 c. Millet > 1/2 c. sunflower seeds > 2 c. chopped walnuts

2. Beat in a mixer until light: > 1 1/2 c. brown sugar > 1 c. butter > 1 tsp. vanilla > 2 eggs

3/ Add the following dry ingredients to a big bowl and mix: > 3 c. oatmeal, processed into flour in processor or blender > 1/2 c. raisins > 1/2 tsp. baking soda > 1 tsp. salt

4. Add remaining ingredients to the big bowl also, mixing again: > Toasted ingredients, cooled off > Creamed ingredients > Optional: 1 c. chocolate chips

5. Scoop 1oz.-size scoops onto parchment sheets (or lightly-oiled cookie sheets), 12 per sheet, flattening before baking at 350 degrees for 12-15 minutes. Loosen from sheet while still warm, as they tend to stick otherwise.

Chili, Meaty Traditional Style w/Kidney Beans

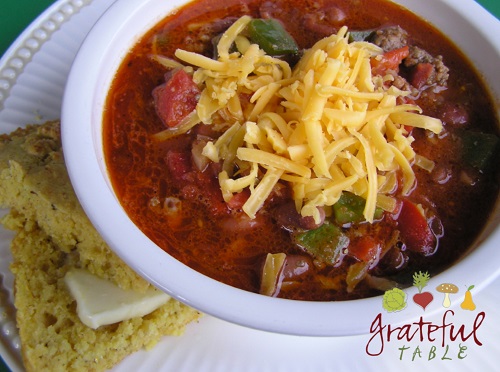
Chili can be a fun dish for a crowd, as guests can add their own favorite toppings (cheese, chopped jalapenos, cilantro and such). This recipe includes directions for making chili powder, as many store-bought mixes contain MSG and other questionable additives.

One might even leave the meat and cheese out of this recipe, to make it vegan. It’s still full of flavor! Serves 10-12.

Bowl of Chili and corn bread

INGREDIENTS

  • 1 lb. dry kidney beans
  • 2 lb. lean ground beef
  • Olive oil for grilling veggies
  • Approx. 4 c. chopped onion (2 lg.)
  • 3 chopped green peppers (sub Anaheim or Poblano for variety)
  • 2 (26 oz.) cans tomato pieces
  • 2 TBS. Worchestershire Sauce
  • 2 tsp. salt
  • 3 TBS. chili powder
  • 2 c. of water (more as needed)
  • Optional: 8 oz. grated cheddar cheese
  • Optional: Sour cream, cilantro, chopped jalapenos or raw onion, etc.

PREPARATION

1. In a medium-large pot, bring to boil: > Half-pot of water

2. Add, and then simmer until tender, 1 hour or more: > 1 lb. dry kidney beans

3. When beans are done, drain off cooking water. Put beans back in pot.

4. Saute’ in iron pan: > 2 lb. lean ground beef

5. Drain fat off if necessary; add to cooked beans in pot. In same pan, sauté: > Approx. 4 c. chopped onion > 4 or so chopped green peppers > 1/4 c. olive oil

6. Into the pot of beans and meat, add the grilled veggies, plus the following: > 2 (26 oz.) cans tomato pieces > 2 tsp. salt > 3 TBS. chili powder* > 2 TBS. Worchestershire Sauce > more water as needed (to right consistency)

7. Simmer all ingredients 1 hour or so. Serve with grated cheddar cheese and condiments, as desired.

*For homemade chili powder: Mix in a bowl and store in small jar: > 1/4 c. paprika > 1/4 c. garlic granules > 1/4 c. cumin powder > 1 TBS. cayenne

Coconut Bark W/Cacao Nibs: A Healthy Snack, & MCTs for Fuel

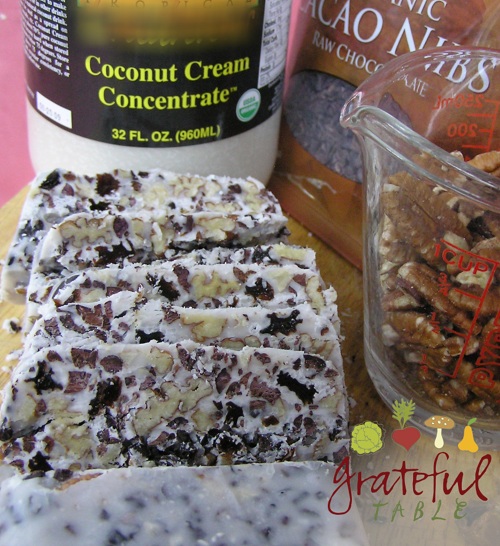
Rich with raw cacao nibs, this nourishing snack satisfies the chocoholic seeking health. The coconut oil (or cream) used in this is also rich in MCTs (medium-chain-triglycerides), which are a great fuel for the brain.

Grateful-Table-Coconut-Bark-w-Cacao-NibsUse virgin coconut oil or other fine products from specialty and health food stores: “coconut cream concentrate”, “coconut spread” or “coconut manna” are great products which contain much of the “meat” of the coconut, pureed into a smooth paste that is incredibly flavorful. (Canned coconut cream will not be firm enough.)

Refrigerate this confection, and personalize as desired, adding more or less of the ingredients, according to personal tastes. The lack of eggs or dairy makes this snack perfect for vegans too! Makes one loaf (20 or so thin slices).

INGREDIENTS

  • 1 c. virgin coconut oil or alternative (mentioned above)
  • 1 c. dates, pitted (Medjool if available)
  • 1 c. macadamia (or substitute pecans or walnuts)
  • 1 c. cacao nibs*
  • 1 c. raisins (or substitute dried cranberries or other favorite dried fruit)
  •   Optional: 1 c. pumpkin seeds

PREPARATION

1. Melt the coconut oil (or other), setting the jar in a pot of simmering water (with a rag at the bottom of the pot to keep the jar from breaking). An alternate method: Set in oven with just the pilot light on, for several hours. Use: > 1 c. virgin coconut oil

2. In a loaf pan, add the following, mixing somewhat: > Dates > Nuts > Cacao nibs* > Dried Fruits, etc.

3. Pour the melted coconut oil over the loaf of ingredients, mixing well. Press the mixture down and chill until firm.

4. Run hot water over the loaf pan (held upside-down) to get the coconut bark back out, and slice it up. Individual slices can be wrapped in plastic wrap; handy to grab in a hurry! A perfect between-meal snack.

*Toast nibs to improve texture and flavor, if desired!

Coconut Date Shake: No Juice Or Extra Sugars (All Natural!)

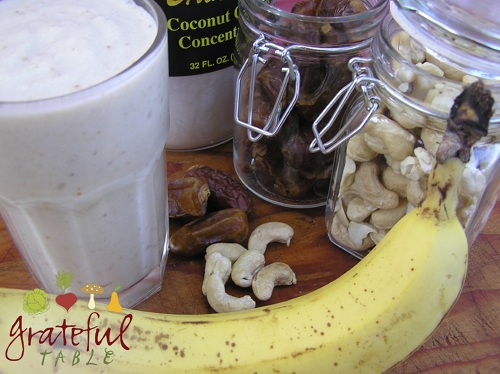
The perfect meal for staying healthy on-the-go: A Hawaiian style smoothie with no processed juice. Add extra protein if preferred, for a “protein shake”, but this already has protein from the cashews. With the nuts and the coconut cream (or virgin coconut oil), this can be a “meal replacement drink” full of healthy oils and “good fat”. (Yes, there are good fats!)

Grateful-Table-Coconut-Date-ShakeFreeze bananas ahead of time, and this smoothie comes together quickly. Note that room temperature banana can develop a different texture from blending, but frozen bananas whirl up with a texture like ice cream. Delicious!

For a smoother texture, soak the dates and cashews a day ahead, covered with cold water and stored in the refrigerator. Contains no dairy, but it’s still nice and creamy- a vegan delight!

INGREDIENTS

  • 1-2 c. frozen banana pieces
  • 1/3 c. “cashew milk”, or one handful raw cashews (soaked a day ahead, or not)
  • small handful dates, pitted (soaked a day ahead, or not)
  • 1-2 TBS. or so of coconut cream (more if using coconut milk)*
  • cold water as needed, for blending

PREPARATION

1. Ahead of time, prepare a bunch of bananas. Peel the bananas, slice through them, and lay them out on a tray that’s covered with an inside-out zip-loc bag (or other thick plastic bag). (Note: Plastic wrap is thin and might break apart and stick to the frozen bananas.)

2. Let the bananas freeze solid. Store them for weeks in the zip-loc bag, using as needed.

3. This step is not necessary, but for smoothest smoothie, soak raw cashews and dates in water; refrigerate overnight.

4. Blend all of the above until smooth in a blender.

* If using virgin olive oil, perhaps mix it with some boiling water first. It’s very solid, which can make it challenging to work with.

Hawaiian Rice Salad

What am I bringing to the 4th of July potluck? I suppose I better bring this- I know its the hostess’s favorite! Oh yay- it will even provide “resistant starch”, a prebiotic that helps us to have a healthy gut. (Healthy gut, happy life, isn’t that how the saying goes?!) (For the scientist in you, cooking and cooling starches like potatoes and rice reduces the carb load, reduces glucose response, and improves insulin sensitivity, all with a healthy dose of prebiotics. Mark’s Daily Apple goes into more detail.)

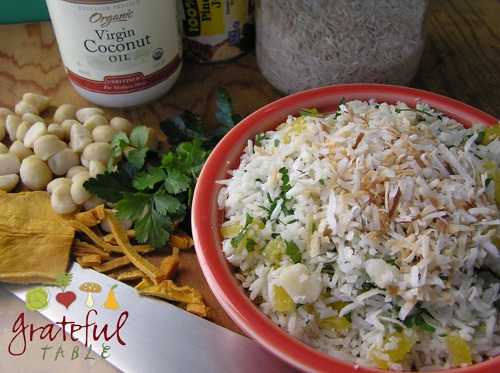
Grateful-Table-Hawaiian-Rice-Salad-Pilaf(There’s a video here, on how to make Hawaiian Rice Salad :D)

This Hawaiian recipe is a tropical combination of flavors and textures. Rice salads and pilafs are great for large gatherings; and for the vegans in the crowd. This dish can be served at room temperature– convenient! Serve 8 or so.

INGREDIENTS

  • 3 c. water
  • 2 c. white rice*
  • 1/4 c. coconut oil
  • 1/3 c. sweetened dried mango (or substitute sweetened dried pineapple)
  • 1/4 c. Macadamia nuts, raw
  • 1/4 c. Italian Parsley
  • 1/4 c. cilantro
  • 2 TBS. frozen pineapple juice concentrate
  • 1/2 tsp. salt
  • 1/3 c. sweetened coconut (optional)

PREPARATION

1. A day ahead (or earlier in the day), cook the rice, so it has time to cool. Bring to boil: > 3 c. water

2. Add to boiling water, stirring once, then let simmer, unstirred, for 20 minutes or so: > 2 c. white rice*

3. Remove rice from heat. Stir into rice: > 1/4 c. coconut oil

4. Leave lid on; refrigerate rice until chilled.

5. Prep the following ingredients, so the whole dish can be tossed together at serving time. Chop the following: > 1/3 c. sweetened dried mango (or substitute sweetened dried pineapple) > 1/4 c. Macadamia nuts, raw > 1/4 c. Italian Parsley > 1/4 c. cilantro

6. Close to serving time, add: > All the chopped ingredients (nuts, fruit, herbs) > 2 TBS. frozen pineapple juice concentrate > 1/2 tsp. salt

7. Turn the mixed ingredients out into a serving bowl. Garnish with: > 1/3 c. sweetened coconut, toasted (broil for 2-3 minutes, or bake 10 minutes or so, watching carefully)

8. Serve dish at room temperature.

*Substitute brown rice for white rice if desired; just use 4 c. water to the 2 c. rice, and increase cooking time to 40 minutes

“Convenience Food”: Freeze Your Fave Bean Recipe

Healthy Time-Saving in the Kitchen

Grateful-Table-Convenience-Foods-Beans-OnionYou may have to be over forty to appreciate the “Manic Monday” heading, which comes from a 1986 Bangles hit (originally penned by Prince). But it seemed a fitting title for Monday posts featuring some of my favorite time-saving practices. (Can’t we all stand to save a bit of time on Mondays?!)

I have my own idea of convenience food. In my kitchen, it’s highly convenient to open the freezer and discover portions of the pinto beans I put up last month. (See recipe here, using the variation at bottom of page.) I took a few packages out this morning, so hubs and I could have an easy, healthy soup for dinner tonight. I still have some chicken left over, so I’ll add that to the mix too. This is my “convenience food”, and it won’t have weird ingredients in it!

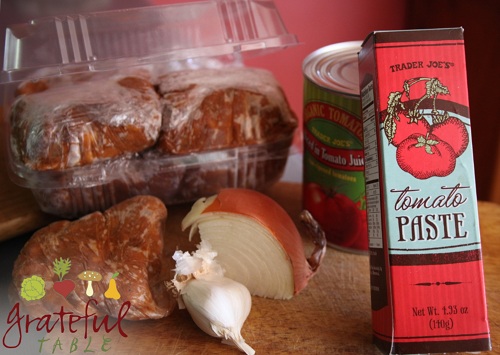
All I needed to have on hand for the original recipe were some dry beans, onion, garlic, tomato paste, olive oil, and spices. That IS convenient, seeing as all those ingredients keep so well. I can stock items like that because they won’t go bad getting neglected in my refrigerator for a couple weeks…

Speaking of “convenience foods” probably conjures up images of prepared foods, often found in packages in the freezer section, or perhaps in cans or boxes on grocery store shelves. A common denominator in such foods is a limited amount of a quality ingredient (say, real vegetables, and/or meat, fish, poultry, or bean protein), held together by a preponderance of cheaper ingredients (flour, modified food starch, etc.).

Even Trader Joe’s  attractively-labeled can of Lentil Soup* (not the organic one) let me down. I was curious as to the ingredients. Alas, it fit my description of typical “convenience foods”. Yes, lentils were a main ingredient, followed by five vegetables, but right after that was modified corn starch, wheat flour, autolyzed yeast extract, and salt. There was more salt than olive oil (and seven other ingredients), which kind of surprised me.

But that’s the beauty of making your own “convenience foods”. You can save time in the future by preparing larger batches of fave recipes, portioning some for the freezer. And you can control the amount (if any) of salt you use, and you can leave out things like flour and other cheap starches. And you can leave out the chemicals. Whoo-hoo!

* Ingredients in that can of Lentil Soup (thanks for posting picture, Di!): Water, lentils, carrots, potatoes, leeks, onions, spinach, modified corn starch, wheat flour, autolyzed yeast extract, salt, olive oil, tomato paste, spirit vinegar, thickener (guar gum), sugar, ascorbic acid (vitamin C), spices, garlic.

Soul Food Sunday: Isaiah 55:2- Eat What is Good!

Wallpaper: Desktop Backgrounds w/Verses

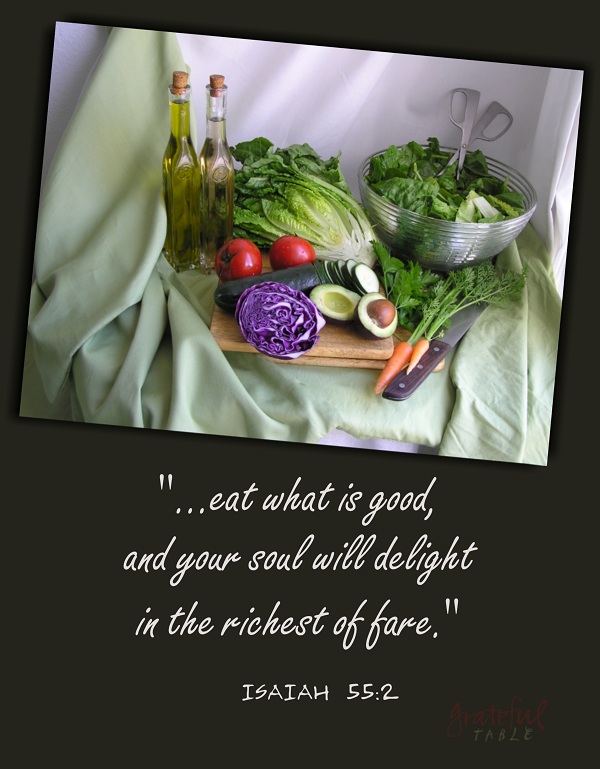
Isaiah-55-2-PINTERESTI’m hoping to post various thoughts on Sunday, that I might have pondered through the week. Or, as in this case, I might share one of the latest desktop wallpapers I’ve been working on.

This is one of my fave verses. It  fits in perfectly with our style at The New Deli (preparing wholesome meals with natural foods).

“Eat what is good and your soul will delight in the richest of fare.” Isaiah 55:2

To use for desktop wallpaper, left click on appropriate monitor size below. When the picture shows up, right click on the picture, select “Set as Desktop Background”. Enjoy!

>>> Background for wider monitors

>>> Background for shorter monitors

Easy Enough: “Simple” Birthday Cake for a Six Year Old Girl

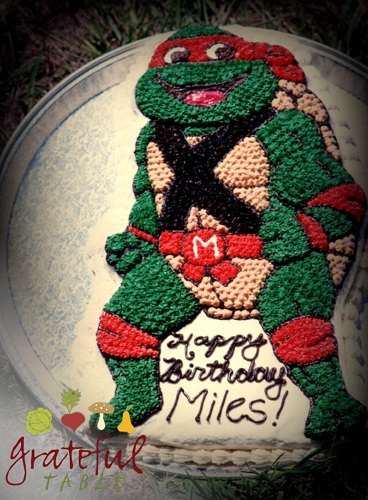
We hope any child’s birthday would turn out to be memorable, right? Over twenty years ago, I made our oldest son a Ninja Turtle Birthday Cake for his sixth birthday. It was quite memorable. Most memorable: It took HOURS just to decorate! Ah, but it was worth it.

Grateful-Table-Boys-6th-Birthday-CakeSo I asked my six-year-old granddaughter what kind of birthday cake she’d like last week. Me: “Honey, would you like chocolate, yellow, or strawberry cake?” She said, “Yes.” Then she excitedly informed her brother that I’d be making her a Chocolate Yellow Strawberry Cake. Time to get to work!

Girls-Birthday-CakeI found plenty of decorating ideas when I did a search for “images of girls’ birthday cakes”. Practically all of them used fondant. Humm… The last time I used fondant was on my own 50th birthday cake. That was when I discovered (after the fact) that it’s best to let ribbons and bows dry separately, overnight, lest they “melt” a little onto the main layer of fondant.

I cheated that time; bought packaged fondant. It made life easier, even if it didn’t taste particularly yummy.

I had saved this on Pinterest (recipe here, at “Annie’s Eats”), to remind me of an easy marshmallow fondant recipe. That particular recipe used extra ingredients; I found simpler versions on many other sites. This one (on the “What’s Cooking America” site) seemed most straight-forward, although I would sub butter for the Crisco. Also, most recipes call for 16 oz. , but I’d picked up a 10 oz.  bag of marshmallows, so I made a smaller recipe using that. It was enough for one two-layer cake. I posted the recipe here.

I’m all for easy decorating. I had bought some dipped marshmallow “pops” at the church bake sale, figuring that would help decorate Elizabeth’s cake. Wow- they tasted delicious, too! I saved this pic on Pinterest, to remind me to make those myself sometime. Melted chocolate chips would also work to dip the marshmallows into.

You could also use leftover fondant to create simple pieces to add on top of the main fondant. Even white leaves on top of white can look pretty cool. (See my pinterest pic here.)

Side note: yes, cake pops are all the rage. But isn’t that a lot of bother, when one might much more easily use marshmallows to dip? Says daughter-in-law Michelle, “I’m not real big on marshmallows, but these are awesome!” Easy too!

I guess the main point is: We celebrated a memorable sixth birthday over the weekend, and our granddaughter thoroughly enjoyed herself. So did we!