I’m quite a fan of coconut manna (also known as coconut spread or coconut cream concentrate, depending on who makes it). I discovered I could add it to soups, sauces, desserts, oatmeal… It is a great source of the kind of fats we need. (Just do a word search on “nutritional qualities of coconut” to get an idea. Or read my post on why coconut’s so great, here.)
Even though I like using coconut oil too, I particularly like coconut manna because it includes the fiber of the coconut, and is loaded with flavor. Plus, I love the idea of whole foods, and this is one of them!
If you can find it, the five pound coconut manna deal from Nutiva is the most bang for your buck. I’ve been getting lately though. It’s always in stock.
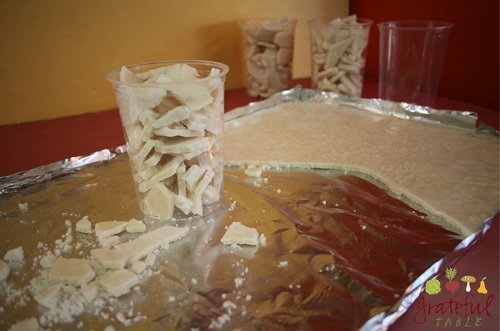
Getting the extra-firm coconut manna out of the jar (or foil bag) is a challenge. You can set the jar in a pot of hot water on the stove, with a rag under it so the glass doesn’t break. Once it’s melty-soft, spread onto heavy-duty aluminum foil, and chill it. Once firm, it will easily break into pieces, making it much easier to store and use. I store the broken chunks in zip-lock bags in the fridge. Easy to use this way!
I’ve been researching the nutritional value of the foods we might eat- there’s a plethora of information online. And while I do want to make informed choices about the food I eat, I have to remember that God wants us, above all, to be thankful for what we’ve got.
So. My research has led me to watch out for genetically modified foods (“GMOs”). And to limit PUFAs (“Polyunsaturated Fats”). I’m eating less of even whole grains and beans, as they contain “anti-nutrients”. And I’ve invested in grass-fed beef and organic, free-range chickens and eggs.
I’m doing a number of things! But most important of all, I want to remember that God has supplied us with everything we need. A concern for nutritional value has renewed my interest in gardening again, and I’m actually appreciating my food much more, as I discover how much effort it takes to produce that food.
We shouldn’t take our food for granted! The cost might seem slight, when there are so many “deals” out there. It does cost considerable less to consume genetically modified foods (through the food chain, as they’re fed to the animals we eat, and are an added ingredient in most prepared foods). Prepared foods using lower-quality, GMO ingredients can be produced at a fraction of the cost of quality foods. But meanwhile, our health declines. Is it worth the “bargain”?
Bottom line, I’m going to appreciate my food. I will seek higher quality, even if it means less quantity. And after I’ve eaten and am satisfied, I will praise God. Not every food IS satisfying, but God did provide the right stuff. We just need to choose it!
Wallpaper: Desktop Backgrounds w/Verses
“When you have eaten and are satisfied, praise the LORD your God for the good land he has given you.” Deuteronomy 8:10
If you like the verse, you might want to select one of the links below, and use the photograph and scripture for your computer background.
To use for desktop wallpaper, left click on appropriate monitor size, then right click and choose “select as desktop background” :
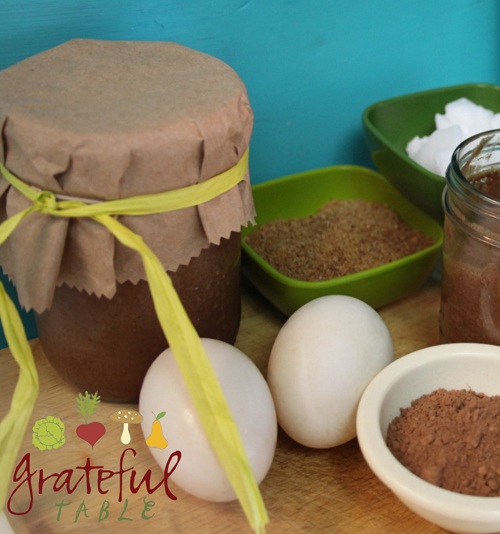
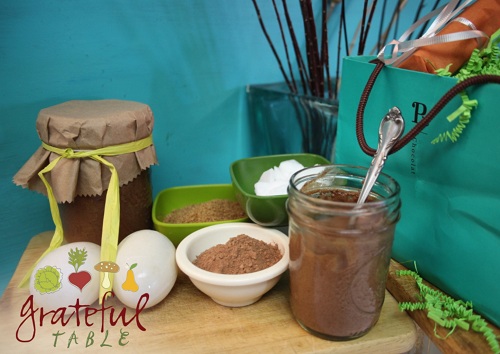
The story behind this “Chocolate Mousse Cream Recipe“: My friend started supplying me with her excess duck and chicken eggs, barter style. (“Of course I’d like to trade you a dozen eggs for a New Deli sandwich!”) Her problem had become, “What do I do with all these eggs?!” Not a problem for me. Our family had recently gotten into paleo-style eating. (I realized, after veggin’ out for several years, that getting some quality animal protein was a good thing.)
So we’ve been eating eggs. But let’s not get boring (can’t serve scrambled, fried, and omelets all the time). That’s when I figured it was time to try a recipe I’d seen on Pinterest. I had to tweak it, since I wanted to use coconut oil in place of coconut milk. Coconut oil is so stable- won’t go rancid, and it adds good MCTs to our diet (brain food, good for metabolism, etc.). Plus, I figured it would help firm up the mousse as it chilled.
It worked! It worked so good that my friend never saw the cute jar of chocolate mousse cream I’d thought I’d put up for her. Turns out, I put it up for myself, haha. I managed to wait ’till my husband got home, but then we polished off the whole batch. So delicious.
I made it again- thought I’d take another picture of it, but again, it didn’t last long enough. At least we managed to share that batch with our son, who got home just in time.
Next time I make this, I’ll have to double it. It may go a little further, and I can finally share with my friend. But we’ll see. This is some real good stuff!
Gelatin is a common ingredient in mousses, but some object to the flavor. This creamy dessert is held together using coconut oil instead, which firms up some when cooled. This mousse melts in your mouth!
For an extra light dessert, chill a can of coconut cream; whip half of it and fold it into the mix. Delicious! Makes 2-4 servings.
INGREDIENTS
1 TBS. water
1/3 c. coconut palm sugar
1/4 c. cocoa powder
1/3 c. coconut oil
4 eggs, separated
Optional: Half can coconut cream, chilled
PREPARATION
1. In a small pot, heat water. Use: > 1 TBS. water
2. On low heat, stir in palm sugar until dissolved. Use: > 1/3 c. palm sugar
3. To pan of palm sugar “syrup”, add cocoa powder and coconut oil. Heat a little more. Use: 1/4 c. cocoa powder > 1/3 c. coconut oil
4. In a separate bowl, beat egg yolks until pale yellow. Use: > 4 egg yolks
5. In another medium bowl beat egg whites to stiff peaks: > 4 egg whites
6. Slowly pour half the hot cocoa mixture into the beaten egg yolks, mixing continuously. Yolks should start to thicken a bit; don’t overheat.
7. Fold the remaining hot cocoa mixture into the whipped egg whites.
8.Optional: At this point, you can also whip a half can of pre-chilled coconut cream, to fold into the mix. Use: > Half a 16-oz. can coconut cream
9. Fold all the ingredients together, then pour into jars or stemmed glasses. Place in refrigerator several hours, or overnight, to set.
10. Garnish with a mint sprig or a bit of chocolate, to serve.
Some folks eat fish because they love it, not just because its healthy. Other folks don’t much like it, but figure they better get their Omega 3’s. Note: If you are into fish for health reasons, look for wild caught, especially salmon- it’s loaded with the oils you need. (Read this article or this one, on why wild is so much better than farmed- quite convincing!)
And still other folks hate fish. But maybe it’s because they’ve never had fresh fish. That can make all the difference.
From a culinary standpoint, you really can use frozen fish on certain occasions, for various reasons.
1. Frozen fish is way fresher than “fresh” fish that hung out too long
2. Frozen fish is so convenient to make into a meal when the fridge is bare
3. Many frozen varieties taste close enough to fresh, in the right dishes
However, a recent purchase confirmed my other suspicion: That fresh fish from a reputable source is better than anything. I had worked up a recipe for Baked Tuna (posted here), and it works quite well with the frozen tuna steaks I pick up at Trader Joe’s. Meaning, it’s tender enough, and pretty tasty in general.
But then I picked up some “Sear-Grade” tuna from a local specialty shop (“Berkeley Bowl”, to be exact). Wow. There IS a difference. I had bought fresh tuna steaks from another shop before, and they had seemed just a little better than frozen. But the “sear-grade” was what I’d been looking for. It was more like the stuff I eat on special occasions at fancy restaurants. In such establishments, they typically sear the tuna; it’s often “encrusted” with something exotic, like ground black sesame seeds and Wasabi powder, etc. The restaurant entree is always insanely tender and delicious, even cooked rare.
I can now officially tell you: Maybe you DO get what you pay for. The “sear-grade” tuna costs a bit more than other options (except “sashimi-grade”, which is an even better grade). But it is a special treat.
If the pocket book says no, or the convenience factor of Trader Joe’s frozen tuna steaks is too high, stick with a simple baked fish recipe. But if you can afford the treat, go for “sear grade”!
“Mark’s Daily Apple” has a great post here on making healthy fish choices (concerning sustainability and toxins)
Baking is one of the easiest ways to prepare fish. For a quick meal, set on a bed of grated carrots and zucchini (or other favorites). Being grated, the veggies will cook about as quickly as the fish; the whole package can be wrapped in foil (or parchment), and popped in the oven.
I’ve also had much success following this recipe, but using my slow-cooker, layering veggies with fish on top, and simmering in the slow-cooker for 20 minutes or so. When dinner time is up in the air, I can “hold” the meal, turning the slow-cooker off for up to an hour if necessary.
The following microwave method works great for a quick Hollandaise Sauce. Substitute olive oil for the butter, if butter’s a concern. But most “new traditionalists” will tell you butter’s way better than most polyunsaturated oils, to help balance our Omega 3 to 6 ratio.
Use favorite varieties of fish, in steak or fillet form: Salmon or Tuna steaks, or fillets of trout (and others) are all options. Some markets carry frozen tuna steaks that are convenient to stock in the freezer, if fresh aren’t available. The steaks will take a bit longer than fillets to cook. Serves 4.
INGREDIENTS
2 lb. tuna or salmon steaks, or fillets, or fish of your choice
2 TBS. (plus 1 TBS.) olive oil
2 TBS. (plus 3 TBS.) lemon juice
1-2 carrots, peeled
2-3 zucchinis
2 egg yolks
1/2 c. butter (or substitute olive oil and 1/2 tsp. salt)
3 TBS. lemon juice
PREPARATION (FISH)
1. Time permitting, marinate tuna steaks a day ahead of time. Use: > 2 lb. tuna steaks (or other) > 2 TBS. olive oil > 2 TBS. lemon juice
2. If lacking time, the fish should still be fairly tender, even if you bake it without marinating it. Prepare veggies, to layer onto a large piece of foil, under the fish. By grating them, they should get done in the same length of time as the fish (unless you eat your fish quite rare.) Grate: > 1-2 carrots, peeled > 2-3 zucchinis
3. Place grated veggies on large piece of aluminum foil, sprinkling with: > 1 TBS. or so olive oil
4. On top of veggies, place: > 2 lb. tuna or salmon steaks, or fillets, or fish of your choice (marinated, if possible)
5. If not marinated, top with: > 1 TBS. more olive oil > juice from 1-2 lemons
6. Pull up the foil at the corners, to enclose ingredients; fish will stay moist this way. Place on baking sheet, or big pan; cook in oven at 375 degrees for 20 to 40 minutes, depending on thickness of fish and how well done you like it. Meanwhile, prepare sauce. To serve, arrange grated veggies on plate, add fish (removing skin if necessary). Add sauce and a bit of parsley, as desired.
PREPARATION (HOLLANDAISE)
1. Mix in small ceramic bowl: > 2 egg yolks
2. Heat the following in small sauce pan. Or, in a separate bowl (glass measuring cup works well), microwave the mixture 30-60 seconds, until melted: > 1/2 c. butter (or substitute olive oil) > 3 TBS. lemon juice
3. Slowly add melted butter/lemon to the yolk mixture. Microwave entire mixture 10-15 seconds at a time. Stir well after each time, microwaving in 10-15 second-increments until mixture gets hot and thickens. It also continues cooking a bit on its own; don’t overcook it! If making the sauce with olive oil, add 1/2 tsp. salt. If foregoing the microwave, reheat gently in saucepan, stirring constantly, until thickened.
4. Serve the fish on the bed of grated veggies, topped with sauce, and chopped chives and lemon peel, if desired.
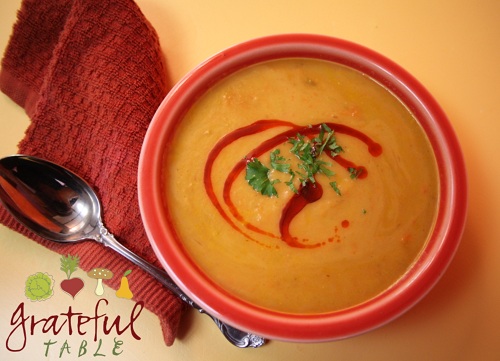
If you love flavor, love “healthy”, love saving money, you’ll love this! You can make an easy “infused olive oil”, using dried Chipotle peppers, to add that robust, smokey chipotle pepper flavor to any dish. You might be into paleo recipes, or gluten-free recipes, or traditional or trendy recipes; in any case, this works! We swirl of dash of Chipotle Pepper Oil into our Roasted Vegetable Soup at The New Deli- it goes over real well. But it can also be added to any dish you’re serving up. It’ll add a little heat, and nutrition (antioxidants and all), and flavor- whoo hoo!
I began researching chipotle options when we wanted to feature it on a sandwich special, and discovered many, many products containing chipotle. Of course they were mainly comprised of the cheapest of ingredients: Flour and other additives.
But I discovered that dried chipotles are quite economical (found in the ethnic spice section of many grocery stores, or international markets, or on Amazon). I tried these on Amazon: Chipotle Dried Whole chile Peppers – 8 oz.– they cost more a little more than the ones I found locally. But hey, if you don’t happen to have a market that carries dried chipotle peppers, I do recommend the Amazon dried peppers; they’re still much better than mixes containing minimal chipotle (and maximum junk!).
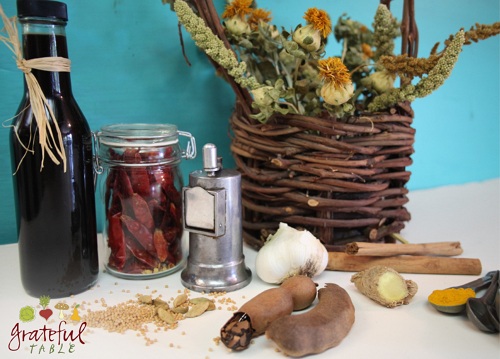
But on to that infused oil. Take the hard, crusty little peppers, stem them and chop them coarsely by hand, pouring a bit of boiling water over them, some salt, and a bit of virgin olive oil. Let them soak in a jar in the fridge overnight, processing the softened peppers into a puree the next day. Add more virgin olive oil to them, and some paprika for extra color.
Love that smokey chipotle flavor!
PS I linked to this page from Kelly the Kitchen Kop’s Wednesday blog carnival (here). It took me awhile to post the link, since last time I visited Kelly’s Wednesday blog carnival page, I spent a week or two in follow-up research, after the plethora of good articles I’d found on her page. Good stuff!
It’s great to have a simple, refreshing, natural punch recipe on hand when feeding a crowd. This non-alcoholic, healthy punch recipe still tastes great. And it’s HFCS-free! (No high fructose corn syrup, that is.) Change it up by using different frozen juice concentrates, although the raspberry is very delicious. Serves 6-8, but multiplies easily.
INGREDIENTS
1 liter of soda water (unsweetened, carbonated water)
2 cans frozen white grape/ raspberry juice concentrate (100% juice)
Optional: 1 pint ice cream (check labels for corn syrup)
PREPARATION
1. Simply add the frozen fruit juice concentrate to a punch bowl, pour in the soda water, and top with some ice cream, if desired.
2. For a super-fizzy, layered effect, make individual servings. Add a tablespoon or two of the fruit juice concentrate to each glass, add a scoop of ice cream, and then pour the soda water over the top. Like a natural-style root beer float!
What with the anchovies and HFCS (high fructose corn syrup) in most Worchestershire products, a friend had wondered if I had a recipe to make it from scratch.
We’d actually been making our own “Worchestershire Sauce” at the deli for ages, just to save money. A gallon of the stuff seemed too big an investment. After reading the ingredient list, I came up with something close enough to the real thing (for most purposes, anyway), and it was considerably cheaper.
We don’t miss the anchovies at all, though they could be added. This Worchestershire Sauce recipe (on saveur.com) sounded excellent, but I made a simplified version for The New Deli. Our version saves a step; instead of bringing a pot of the vinegar and spices to a simmer, we just “steep” them for a month or so in the vinegar, lazy-man-style. We also use less vinegar than the saveur recipe; maybe their recipe is more authentic, but we do like our blend!
We have an even simpler “Worchestershire” recipe, too, using 1 c. each, soy sauce and white vinegar, plus 1/4 c. Sugar, 1/2 TBS. Molasses, 1/2 TBS. Garlic granules. It’s not as complex a blend of flavors, but it is easy!
If you’re adventurous, you might try the following recipe. It will keep for some time, and you can be creative, using more or less of certain spices. Makes 1 quart.
INGREDIENTS
Several tamarind pods (a handful)
1 TBS. mustard seeds
1/2 TBS. peppercorns
1/2 tsp. powdered cloves (or 1 tsp. whole)
1 tsp. curry powder
Several cardamom pod seeds (open pods, discard outer part)
1/4 tsp. cayenne
1/2 tsp. cinnamon
1 tsp. ginger, dry (or 1 TBS. fresh, sliced)
1/2 TBS. garlic granules
2 c. white vinegar
1/2 c. white sugar
1/4 c. molasses
2 c. soy sauce
PREPARATION
1. Several weeks ahead, let spices steep in the white vinegar in a glass quart jar. Add the first ten ingredients to the white vinegar; store in a dark place until vinegar is flavored.
2. Heat a heavy-bottomed sauce pan, adding sugar and tilting pan as needed (to get grains to “melt”, as the edges turn golden-colored).
3. When sugar has caramelized, remove from heat and slowly add the molasses and soy sauce, mixing until smooth.
4. Strain the steeped white vinegar into the pot, mixing well, discarding spices. Pour Worchestershire sauce back into the glass jar; store up to a year or so.
I’m not really a “baker”. My ma’s a baker. She made her own croissants, back in the day. And Napoleans, tortes, and other crazy fancy desserts.
But my 50th birthday was coming up, and I wanted a good cake. Mom was back in Michigan so I would be on my own. I looked into it. Took a few of mom’s suggestions. It wasn’t too challenging to make a decent cake, and it was way cheaper than having a specialty bakery make it. (OK, so I’m fussy. No Costco cake for me!)
But a little research helped. You might dive right in to a recipe like this one (for Chocolate Pistachio Cake). Or you might be like me: Do a little research first. Here are some of the notes I took, before baking that yummy cake.
The Beauty of the Sponge Cake Recipe
The (Genoise) sponge cake recipe is great for a couple of reasons: It turns out light, and it cooks through without having a gooey center. If more moisture were added to the cake before baking, it would be harder for it to cook through without burning the edges. Ah, the beauty of Genoise!
While it’s possible to overcook (as I’ve found out), the layers will typically be spread with some kind of flavored syrup, which adds moisture and flavor. Or, whipped cream and other moist fillings like mousses might be used between layers. The cake doesn’t get too soggy, as it’s already slightly dry.
The Mechanics of the Sponge Cake Recipe
The big catch is to let the egg/sugar mix warm up to a good temperature for whipping well. A double-boiler can work; the mixture can get stirred fairly often until the sugar seems to dissolve, and the eggs are lukewarm to the touch. At this point, they will increase quite a bit in volume as they whip, which is just what you want. You have to take care not to actually cook the whites though- that won’t do!
Using the Right Pan
Cake batter for a Genoise cake should fill a pan 2/3, to insure proper baking. Also, as layers are often split in order to spread with fillings, the cake can’t be too thin to start with.
If you increase the recipe, do the eggs in batches though, as a mixer won’t hold much more than eight eggs once they’ve increased in volume. When I made a triple-batch of an 8-egg recipe for my 50th, I did that. Baked it in a half-sheet-cake pan (12″x18″). It was great!
Ideally, a cake pan will have straight sides and corners perpendicular to the bottom. The cake bakes better in such a pan (as opposed to the pans with edges that flare out from the bottom). You don’t need to trim such a cake in order to achieve straight edges; you get a more professional look.
Coloring That Cake
I really like the color of “Pistachio Green”. I experimented, adding a touch of red to the green food coloring. If you stick with the green as it comes from the bottle, you won’t have a pistachio color at all! I added extra yellow as well, until the color was pleasant, not gaudy. I also bought some packaged fondant, making a ribbon on one cake, as shown above. The box of fondant contained a somewhat abrasive mix of colors, but with a little blending, I got the color I was looking for. Typically, you want to add just a touch of the opposite color to your frosting. Greens might need a touch of red; purple or orange might need a touch of green, etc. This tones them down and makes for a classier look.
Fond of Fondant?
I learned from the experts that you can let any ribbons you make dry overnight. Why do this? I discovered the hard way: If you start laying “ribbons” on your typical frosting, the colors might start running by the end of the day. Letting them air-dry for a day or so helps resolve that issue. At some point, I may try making my own fondant. My mom did this for my dear sister-in-law’s wedding, years ago. I still remember the beautiful smell of the rose water my mom added to the mix. That was one special occasion!

 I’m quite a fan of coconut manna (also known as coconut spread or coconut cream concentrate, depending on who makes it). I discovered I could add it to soups, sauces, desserts, oatmeal… It is a great source of the kind of fats we need. (Just do a word search on “nutritional qualities of coconut” to get an idea. Or read my post on why coconut’s so great, here.)

 – they cost more a little more than the ones I found locally. But hey, if you don’t happen to have a market that carries dried chipotle peppers, I do recommend the Amazon dried peppers; they’re still much better than mixes containing minimal chipotle (and maximum junk!).