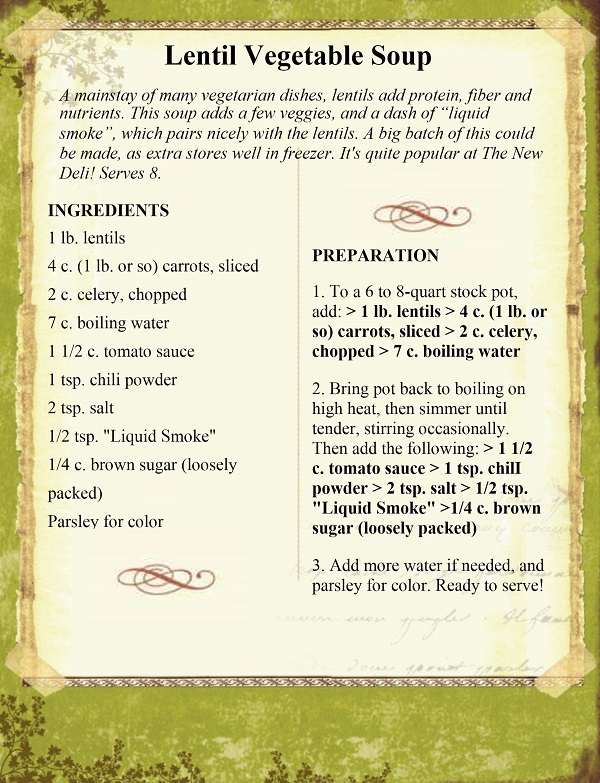
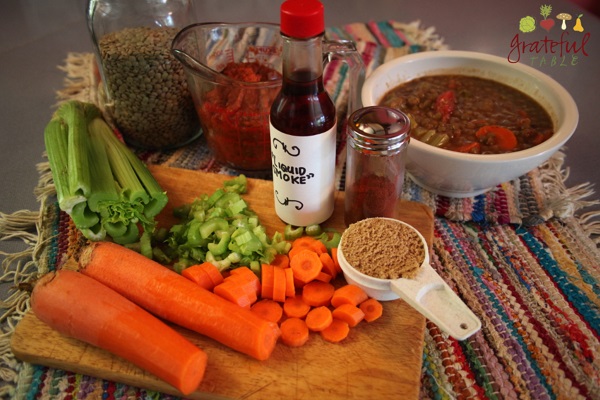
When we make a new batch of tomato sauce at the deli (with lots of sauteed, sweet onions, garlic, etc.), we like to make a batch of Lentil Vegetable Soup too, since it uses the tomato sauce, plus a few other goodies. A bit of sweetness (using brown sugar, or honey or palm sugar, if desired) seems to go well in this soup. That plus some “liquid smoke” makes it almost like a more natural, heartier version of baked beans. You know how overpoweringly sweet those can be, right? This soup just has a hint of sweetness. Like I said- a better version. Like, a healthier comfort food!
Below is the recipe, but in jpeg form, since I can’t actually publish the recipe directly onto this blog due to copyright hindrances (since my soup cookbook is already available on Amazon). You can find this recipe there, but I put a different copy below, in case you really want to make that soup now, and just aren’t ready to buy a digital copy of “SOUP’S ON!“. (Which, by the way, is just $6.99, and full of pictures and New Deli extra cooking tips!)
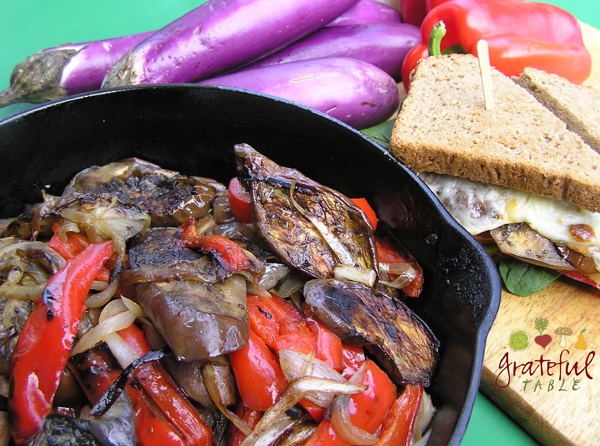
This is a simple eggplant recipe, but once you know how to cook eggplant this way, you can add it to a variety of dishes. Just change up the spices and seasonings, adding some kind of protein, for a great main dish. Another plus- eggplant’s not on the “dirty dozen” list, so I’m not as concerned about buying it organic.
We make a yummy sandwich with this eggplant (and some melted cheese, with or without bacon) at The New Deli. We also serve a salad with the grilled eggplant in it, tossed with Italian dressing, avocado, tomato, and Parmesan cheese. I love it in an omelet, or on pizza. A big batch of this will hold up for at least a week in the refrigerator; the reduced vinegar and soy sauce act to preserve the veggies. Serves 4 to 6.
INGREDIENTS
1 large eggplant, or several Japanese eggplants
1 red pepper
1 medium onion
Olive oil, to drizzle on layers
1/4 c. soy sauce
1/4 c. balsamic vinegar
PREPARATION
1. Add to a hot pan (preferably a 12″ iron pan, as it holds heat and distributes it well) and grill* : > 1 red pepper, sliced into strips > Drizzle of olive oil
2. Add and keep grilling on medium-high heat, stirring some: > 1 onion, sliced
3. Move grilled peppers and onion off to side, and add: > 1 eggplant, sliced into strips > Drizzle olive oil (2-4 TBS.)
4. Pile the grilled pepper mix back on top of the grilling eggplant, to help it to steam some. Turn the pan on low to finish cooking the eggplant until tender, stirring occasionally.
5. When eggplant’s cooked through (no longer white and spongy looking), turn pan back on high heat. Add: > 1/4 c. soy sauce > 1/4 c. balsamic vinegar
6. Let the mix cook on high just a few minutes, stirring often, so the soy sauce and vinegar can boil off some. Remove from heat, and continue stirring occasionally, to let off steam so mixture won’t be too soggy.
7. Serve this dish hot or cold, by itself, over rice, with salad greens, or as a sandwich condiment.
*An alternative method is to use the oven; no stirring of veggies is necessary. Roast the vegetables at 350 for 40-60 minutes, in a clay pot( or in an iron pan), until tender. An alternate method is to microwave the veggies for 10-20 min., using the clay pot or a ceramic bowl with a plate over it.
My husband was a tad disappointed the first time I made this, since we’d bought a deluxe amaretto for it, and he felt like you couldn’t taste it enough when it was added to the cake. Good point- so much of it bakes away, and almond extract would produce the same results, for probably less money. So next batch, I added the amaretto to the candied orange peel. Whoa- THAT was good!
Here’s a cake recipe that’s quick and easy enough, but still delicious (& slightly healthier than average!)- a moist cake with a fresh orange flavor and slightly crunchy texture from the cornmeal. Traditional Italian recipes might add some Amaretto to the cake; to preserve more of the liqueur’s flavor, it can be added to the orange peel garnish. (Unless serving the under-aged, that is!) Serves 12.
INGREDIENTS
3 large eggs
1 c. granulated sugar
1 1/2 c. milk (or yogurt or buttermilk)
1 c. extra-virgin olive oil, plus more for coating the pan
3 oranges, for zest and garnish
1 TBS. orange zest
1/2 tsp. almond extract
1 1/2 c. all-purpose flour, plus more for dusting the pan
1/2 c. coarse-ground cornmeal (fine-ground works too)*
1/2 tsp. baking powder
1/2 tsp. baking soda
1/4 tsp. salt
Optional: 2 TBS. each sugar and water, for orange peel garnish
Optional: 2 TBS. amaretto liqueur, added to orange peel garnish
Optional: (Instead of orange peel) Confectioner’s sugar to decorate top
PREPARATION
1. Preheat the oven to 350 degrees. Press foil into a 9” spring form pan and coat with olive oil and flour. Or, use two 9-inch round cake pans, which won’t need a foil liner, but which should still be coated with olive oil and flour. (If using two pans, they’ll bake faster.) Tap out any excess flour.
2. In a large mixing bowl, whip until well blended and light in color: > 3 large eggs > 1 c. granulated sugar
3. Stir into whipped egg/sugar mix: > 1 1/2 c. milk (or yogurt or buttermilk) > 1 c. extra-virgin olive oil > 1 TBS. orange zest > 1/2 tsp. almond extract
4. In another bowl, stir dry ingredients together: > 1 1/2 c. all-purpose flour > 1/2 c. cornmeal > 1/2 tsp. baking powder > 1/2 tsp. baking soda > 1/4 tsp. salt
5. Add egg mixture to the dry ingredients, stirring until just blended (the batter should still be slightly lumpy). Pour the batter into the prepared cake pan(s). Bake until a toothpick inserted into the middle of the cake comes out clean, about 40 to 50 minutes. Remove from the oven and let the cake cool, then run a knife around the edges of the pan and turn it out onto a serving plate.
6. To make a garnish of candied orange peel, carefully cut away the outer peel of one orange, slicing it into thin strips. Mix together in a microwavable bowl (or in a small saucepan): > Thin strips from 1-2 oranges > 2 TBS. sugar > 2 TBS. water
7. Microwave (or heat in pan) the sugar/orange/water mix for one minute. If using microwave, stir and repeat this three times, until peel has absorbed most of the sugar. (In saucepan, just keep simmering a few minutes until peel gets soft.) If desired, at this point, stir in: > 2 TBS. amaretto liqueur
8. Garnish the cake with the orange peel. Alternately, it can be decorated with a dusting of confectioner’s sugar instead
*I wasn’t thrilled with my experiment substituting masa flour (which I had) for the corn meal (which I didn’t have on hand). Most bloggers claim success with the switch, but I would say, approach that idea with caution!.
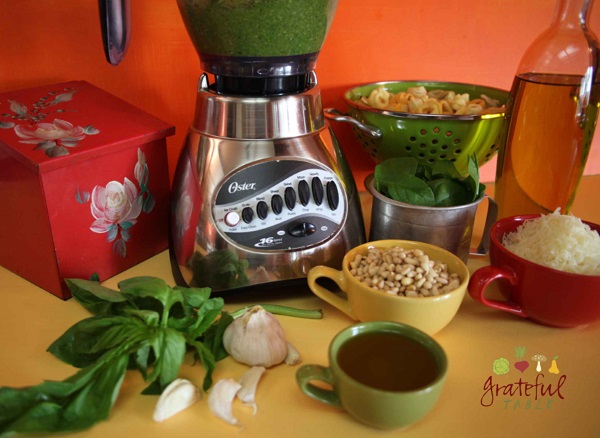
I was sorting through old food pics and found this colorful one of pesto. Seemed apt to post the recipe, if only to enjoy all the bright colors of summer in the picture- before summer fades!
Take advantage of fresh basil in its prime in late summer. To keep it at its greenest, process it first with the olive oil and spinach; the oil seems to protect the leaves from oxidizing and darkening. The acids in the garlic, nuts and parmesan can darken the basil, so add those last. Another tip: pesto seems to stay greener when the leaves are processed at room temperature. In our many years of making pesto at The New Deli, we’ve found that the leaves don’t seem to like to get too cold in the fridge, only to heat up when processed…
Some recipes suggest blanching, to retaining pesto’s ideal green color; experiments at the deli have not proven that technique to be superior. Plus– this recipe’s easier!
Frozen portions of the pesto will keep for months. For an easy meal, add pesto and grilled veggies to pasta (tortellini is especially tasty). Or add to pizza, drizzle in soups, or use for a Pesto Torta appetizer . Makes approx. 2 lbs. (4 c.).
INGREDIENTS
4 c. fresh basil leaves (12 oz.)
4 c. fresh spinach
3/4 c. olive oil
1/2 c. fresh garlic cloves, peeled
1 c. pine nuts
2 c. Parmesan
PREPARATION
1. Process the following: > 4 c. fresh basil leaves (12 oz.) > 3 to 4 c. fresh spinach > 3/4 c. olive oil
2. Add and process again with: > 1/2 c. fresh garlic cloves, peeled (or 1/4 c. minced)
3. To the above, add and process: > 1 c. pine nuts > 2 c. Parmesan
4. The pesto can be stored in the freezer, added to a zip-lock bag and flattened out; this makes it easy to break off a chunk of it as needed. Or, it will keep a week or so in the refrigerator; add a thin layer of oil on top (or press some plastic wrap against the surface), as exposure to air will darken it.
Old friends helped record the above episode of “From the Land to the Table”, shown on local TV back in 2007. (Apparently, they’re still playing re-runs!). Ah, secrets for making vegetarian Black Bean Chili! or enchiladas…
The beauty of this recipe is: It’s ideal for bulk cooking. It will cook up well in a big batch; just scoop 1/2 c. portions onto plastic wrap and freeze for future meals. It starts out thick; for Chili, just add water when heating up, to desired thickness. Top with grated cheese, sour cream, and fresh chopped tomatoes as desired. The filling is versatile; use for burritos, tostadas, and enchiladas.
Skip using chicken stock or adding cheese, to make this a vegan entree. Still full of flavor! Serves 6-8.
INGREDIENTS
1 lb. black beans
3 to 4 c. chopped yellow onions
2 TBS. minced garlic
3 to 4 TBS. olive oil
1/4 c. dry basil
1/4 c. oregano
2 TBS. whole cumin seed
1/2 c. tomato paste
1 TBS. salt
1 TBS. paprika 1/4 tsp. cayenne
1/3 c. flour
1 TBS. paprika
1-2 TBS. Chile Powder
1 tsp. salt
1 1/2 pt. hot chicken stock or water (optional—substitute tomato juice for liquid)
10 corn tortillas (or more or less)
Black Bean Filling
PREPARATION
1. Bring approx. 2 qt. water to a boil, then add and simmer 1-2 hours until tender: > 1 lb. black beans
2. Strain cooked beans, return to pot and mash some with potato masher. Set aside. In iron skillet, sauté the following on med. heat until tender (an hour or so): > 3 to 4 c. chopped yellow onions > 2 TBS. minced garlic > 3 to 4 TBS. olive oil
3. Cover onions with a lid at first, so they “sweat” and cook down quicker. Stir occasionally, turning heat down as necessary. Meanwhile, in a hot, dry skillet, stir the following until toasted, setting aside when done: > 1/4 c. dry basil > 1/4 c. oregano > 2 TBS. whole cumin seed
4. Finally, mix the following all together: > Cooked, mashed beans > Sautéed onions/garlic > Toasted herb mix > 1/2 c. tomato paste > 1 TBS. salt > 1 TBS. paprika > 1/4 tsp. cayenne
Red Sauce
PREPARATION
Make this completely vegetarian by omitting the chicken stock. It will still have plenty of flavor.
3. Then add: > 1 1/3 pt. hot chicken stock or water (optional—substitute canned tomato juice)
4. Bring mixture to a boil, boil 2 minutes, turn off heat.
Black Bean Enchiladas
PREPARATION
1. Sear in hot skillet in a bit of olive oil: > 10 corn tortillas (or more or less)
2. Lay out on board and fill with 1/4 c. Black Bean Chile Mix. Roll up, place in 13x 9 inch pan. Pour Red Sauce over, add 3/4 lb. or so cheddar cheese (grated or sliced in strips). Bake at 375 degrees, 20 minutes or so, until bubbly and golden on top. Top with sour cream or guacamole if desired, or cilantro garnish.
We have fun chowing down on this dish at parties- ah, a dip that’s not loaded with chemicals and bad fats! It’s even naturally low-carb and paleo. Not everyone’s savvy to what it is, and some may even be afraid (“I don’t think I like eggplant”). But with the way the eggplant’s roasted, then mixed with plentiful garlic, lemon, and sesame (butter or even sesame oil), it’s got a great, silky texture. Yum!
Sometimes we feel a bit silly about the name. (Say that fast, three times.) The word means “Father who spoils”… you can tell it’s been affectionately named, right? One Jewish tradition is to drizzle a bit of pomegranate juice on top, or garnish with pomegranate seeds; other recipes might add a bit of yogurt.
This Mideastern recipe also includes tahini, a nut butter made from sesame seeds. In East Asian cultures, the tahini is often made from unhulled, brown sesame seeds, which are most nutritious, with extra minerals and fiber. The seeds can be ground to a paste with a small electric coffee/spice grinder.
More typical is a ground paste of hulled white sesame seeds, which is a bit smoother than its unrefined cousin, often found at specialty stores (or here, on Amazon). An other alternative to tahini, for those with limited resources: Toasted sesame oil, found in the Asian section of many grocery stores.
The standard Globe eggplant takes longer to cook through; Italian and Japanese eggplants will cook more quickly. The eggplant is broiled or pan-roasted (or grilled) until the skin is quite charred, which yields a soft, silky “meat” inside- the basis of this spread. Serves 6 as a side dish; serves 10-15 as an appetizer.
INGREDIENTS
1 lb. eggplant (one large eggplant, or up to 6 skinny ones)
Zest of half lemon
Juice of 1 lemon (about 1 TBS.)
1 1/2 tsp. chopped fresh garlic (about 3 big cloves)
1/4 c. Tahini (see notes above, or substitute 2 TBS. toasted sesame oil)
1/2 tsp. salt
1/4 c. Virgin olive oil (plus extra for garnishing)
Parsley for garnish
6 or so Pitas, or crackers or other bread, for dipping
Optional: 1/4 c. black or Greek olives
Optional: Pomegranate juice, for drizzling on afterwards, or fresh pomegranate seeds
PREPARATION
1. Use a charcoal grill if available, or roast the eggplant in a dry skillet on highest heat. Use: > 1 lb. eggplant, whole
2. Let the eggplant cook on a hot charcoal grill, or in an iron pan. Turn every 7 minutes or so, as needed, until the skin is charred on each side, and the eggplant feels soft. This will probably take 30-60 minutes, depending on heat and the size of the eggplants. Covering the pan will help it to cook through.
3. Let the eggplant cool enough to handle. Peel the skin and discard. Hand-chop the eggplant, or use a food processor (or blender), processing until smooth. Add: > 1 tsp. grated lemon peel > 1 TBS. lemon juice > 1 1/2 tsp. garlic cloves (3 big cloves) > 1/4 c. Tahini (or 2 TBS. toasted sesame oil) > 1/2 tsp. salt > 1/4 c. Virgin olive oil
4. To serve, turn mixture out into shallow serving bowl, drizzle more olive oil on top, and garnish with chopped parsley. Other garnishing options: top with olives, pine nuts, or pomegranate seeds, or drizzle pomegranate juice on top, or even yogurt. Serve at room temperature, with toasted pita triangles, crackers, or other breads.
Find lots of reasons for using whey powder in this article on Mark’s Daily Apple. Like…it can help w/glutathione synthesis, fight allergies, improve Vitamin A absorption, increase serotonin, help prevent bone loss, neutralize virus/bacteria toxins. Other studies show it helping reduce fasting insulin levels if overweight (& glucose spikes), increasing satiety, lowering oxidative brain stress (in mice, at least!). Even helping induce cancer cell death (thanks to whey-specific nutrients), reducing blood pressure & gut inflammation, improving gut health… No wonder I love it!
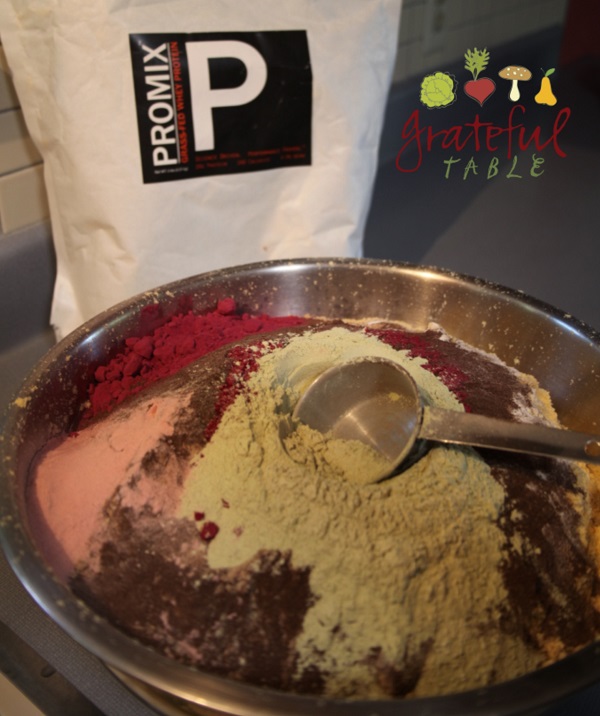
I talked about a basic Protein Powder Mix I make in this article. Below is another real simple recipe you can work off of, to make a top-quality, fruit-flavored protein mix that contains no cheap fillers, but only the highest-quality, organic products. Opt out of certain herbs and/or super-fruit powders, according to your individual needs and preferences. (And pocket-book, haha!)
I don’t add every ingredient to every batch of “Fruity Protein Mix”, but use some variation of this every time. For a change-of-pace, I also mix up a “Vanilla” blend, using a basic whey powder/acacia senegal/psyllium seed powder mix, plus some of this super-pure, organic Vanilla Bean Powder, which does NOT contain dextrose and other junk (like many dry flavorings do).
Use the following as a basic guideline, but feel free to just add your favorites!
1 c. Freeze Dried Organic Tart Cherry Powder(Tart cherry fights inflammation and pain, and it’s loaded with antioxidants. Plus, the melatonin it contains can even help folks sleep better.)
Optional: 1 c. Organic Beet Root Powder(I tried dealing with fresh beets, but couldn’t keep up with it on a regular basis…)
Optional: 1/2 c. Nopal Powder(really great for inflammation, and balances blood sugar levels too)
Optional: 1/2 c. Organic Ashwagandha Root Powder (an “adaptogen”, which nourishes in so many ways, helps with energy levels, thyroid, sleep, and more!)
Optional: 1/2 c. Yucca Root Powder(which addresses high blood pressure and high cholesterol, arthritic pain, swelling, and stiffness)
PREPARATION
1. Mix all the ingredients together in a large, large bowl. Store in glass jar in cupboard. Use 2-3 scoops in a smoothie, to add tons of nutrients!
2. To make an easy smoothie that’s low-sugar (and pretty Paleo!), use: > 2-3 (1-oz.) scoops “Fruity Protein Powder” Mix > Half banana > small handful organic, frozen berries of choice > 2 Brazil nuts (or other fave) > 1 TBS. coconut butter > water (or kefir or kombucha)
My friend asked me to post my secret for perfect hard-boiled eggs, so I thought I’d share how we do that at The New Deli. We’ve learned a thing or two in thirty-plus years in the business- we boil about fifteen dozen eggs a week. So take it from us!
It is quite common to put eggs into a pot, cover with water, and bring to a boil. (Then, eggs are removed from the heat to sit for 10 minutes. After that, the hot water is poured off and the pot’s refilled with cold water to cool them.)
The above method might work all right, but it’s not fool-proof. A fellow co-worker tried that method last week, and said peeling them was torture. I think the reason’s because the eggs take longer to get up to a boil if you start with cold water, and the eggs closest to the burner get too hot (becoming overcooked and rubbery).
Instead, at the deli, we bring a separate pot of water to a boil first. We pour the boiling water over a pot of eggs… see the full method below.
For colorful deviled eggs, let the eggs sit in a mix of food-coloring and water for two hours, to color the outsides in a festive way! There’s a picture of those here, plus a recipe for “No Mayo Deviled Eggs”, using avocado and such.
Oh, and for Easter, the egg coloring companies aren’t joking when they tell you to use cooled-off eggs. I tried using very freshly boiled, slightly warm eggs one year, thinking it would help the colors to stick better, but they don’t!
Deviled Eggs (& Hard-Boiled Eggs)
We often make a tray of deviled eggs for church events, so some of the ladies wondered how to do that. Deviled eggs are easiest to make right after cooking the eggs; the yolks mash up best while slightly warm, making creamy eggs. Makes 24 eggs.
INGREDIENTS
12 eggs, boiled
1/2 c. mayonnaise (or sub butter for all or part of mayo)
2 TBS. sweet relish
2 tsp. mustard (hot and spicy is nice)
For garnishing: Paprika and parsley
Optional: Capers (for garnish)
PREPARATION
1. Bring a pot of water to a boil and pour over another pot filled with: > 12 eggs
2. Bring pot of eggs and boiling water back up to a boil, then turn the heat down to low for 4 minutes.
3. Turn burner off; let eggs finish cooking as they sit it the hot water for 20 more minutes. (They can sit up to an hour).
4. Pour off the hot water, toss the pot of eggs around so that shells will crack. Fill pot with cold water, and peel eggs under water.
5. Cut each egg in half by scoring around the egg, not cutting through the yolk. This way, the two halves of egg whites can be turned to separate them, and the yolk can pop out whole.
6. To make filling, mash yolks (best done before chilling). Use potato masher if available (or a fork), then add remaining ingredients to taste: > 1/2 c. mayonnaise (or all or part butter) > 2 TBS. sweet relish > 2 tsp. mustard (hot and spicy is nice)
4. Put deviled egg yolk mixture into zip-lock (or other) bag. Cut tip off and pipe filling into whites. Sprinkle w/ paprika, garnish w/dill. Optional: Add a sprinkling of capers.
Serve this at parties- a great switch from the phone-it-in, grocery-store-version, No added chemicals here!
For extra color, hollow out a red cabbage to serve the dip in. Slice leftover cabbage up and mix with any leftover Ranch Dip for a great side dish the next day. This recipe makes enough to serve a large crowd, with plenty of veggies on the side.
Use this in salads, or for a party tray. Will keep weeks in the refrigerator. Makes 1 quart, serves 35-45.
INGREDIENTS
2 c. mayonnaise
1 pt. sour cream
1 TBS. dill weed
1 TBS. rubbed Italian herbs
1/2 TBS. black pepper
1 1/2 TBS. VegeSal (found at health food stores)
2 TBS. sugar
1/4 c. lemon juice
Green leaf lettuce (to line veggie tray)
2 lb. or so carrots (approx. 6 large)
1 lb. or so broccoli crowns
1-2 cucumbers
1 lb. or so red peppers (approx. 3 large)
1 red cabbage for holding the dressing
PREPARATION
1. Mix the following in a bowl: > 2 c. mayonnaise > 1 pt. sour cream > 1 TBS. dill weed > 1 TBS. rubbed Italian herbs > 1/2 TBS. black pepper > 1 1/2 TBS. “VegeSal” (found at health food stores) > 2 TBS. sugar > 1/4 c. lemon juice
2. To assemble veggie tray, line a platter with some green-leaf lettuce (or ornamental kale). Set the hollowed-out cabbage in the center, filling with the dip just before serving, if transporting the tray. Arrange the following veggies on the platter. The broccoli looks especially appetizing added last, nestled around the edge of the cabbage-dip-bowl.
Use the following:
> Carrots: Peel, slice, and add to a jar, with a splash of white vinegar and salt. Shake thoroughly, drain. You can prep the carrots the day before, draining the vinegar mix off and refrigerating until ready to assemble. This process really brings out the color, avoiding the “dry look”.
> Broccoli: Rub the tops in a bit of olive oil. Again, this brings out the color, tastes great, and is easier than blanching them. Also, they won’t have that dry look. (Steam as mentioned for Green Beans below, if desired.)
> Green Beans/Asparagus/Etc.: Get a big (preferably iron) pan very hot. Add prepped veggies and steam quickly by adding a splash of water and a lid. Broccoli and asparagus will only take a minute or two like this, then cool off quickly by spreading on a cookie sheet and refrigerating. Their color will be bright and the flavor will be fresh.
> Cucumbers: Score lengthwise with tines of a fork; cut into 1/4″ thick slices.
> Red peppers and any other favorite veggies: Cut into strips, to add color to the tray.
Here’s a streamlined shortbread recipe, unique and full of flavor. Change it up by using toasted fennel seeds in place of the lavender flowers, or dip half the cookie into melted chocolate…
Makes almost 2 dozen cookies.
INGREDIENTS
1 stick butter (1/2 c.), room temperature
1/4 tsp. salt, as desired (especially if using unsalted butter)
1/4 c. virgin olive oil (“blood orange-infused”, if you have it)
1/4 c. sugar
1/2 tsp. orange extract
2 c. flour
1 TBS. dried lavender flowers*
zest of one orange (blood orange if available)
PREPARATION
1. Beat the first five ingredients until light and creamy: > 1 stick butter > 1/4 tsp. salt > 1/4 c. virgin olive oil > 1/4 c. sugar > 1/2 tsp. orange extract
2. Slowly add the dry ingredients to the creamed mixture, stirring together until just blended: > 2 c. flour > 1 TBS. dried lavender flowers* > zest of one orange
3. Divide dough in half. Roll each half into a 6” log or square-shaped cylinder; wrap in plastic and refrigerate for an hour or more. Preheat oven to 350 degrees. Unwrap and cut each log into 1/4″ to 1/3” thick slices. Place on baking sheet, bake until golden brown, about 15 minutes or so. Let cool, serve with coffee or tea!
* Make your own “dried lavender flowers” by removing blossoms from some fresh lavender. Set on paper towel and microwave on lowest power setting, for a few minutes, until dry. Or, wrap string around a lavender bouquet, hanging upside-down for a few days to air-dry, removing dried blossoms afterward.
 When we make a new batch of tomato sauce at the deli (with lots of sauteed, sweet onions, garlic, etc.), we like to make a batch of Lentil Vegetable Soup too, since it uses the tomato sauce, plus a few other goodies. A bit of sweetness (using brown sugar, or honey or palm sugar, if desired) seems to go well in this soup. That plus some “liquid smoke” makes it almost like a more natural, heartier version of baked beans. You know how overpoweringly sweet those can be, right? This soup just has a hint of sweetness. Like I said- a better version. Like, a healthier comfort food!