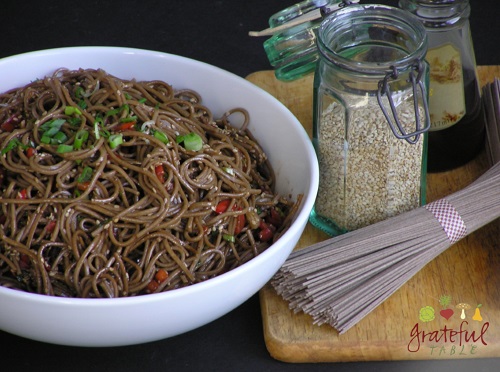
The following recipe uses whole-grain buckwheat noodles that have a great texture (not too heavy, as some whole grain pastas can be). Eden makes a 100% buckwheat soba noodle, which would even be gluten-free (some other brands include wheat flour as well). The sesame seeds can be white or brown (unhusked are healthier than white though); the black ones are nice for a change too.
The recipe will be higher in salt content if you use the prescribed amount of soy sauce. If salt’s a problem, just use less. It will still be quite flavorful.
With its Asian flavors, this pasta goes well with Ginger Chicken, or a Spinach Salad with sweet n’ sour dressing. Serve cold or at room temperature. Double or triple this recipe for a large group–it’s a great party food. Serves 3-4.
INGREDIENTS
8 oz. buckwheat noodles (“Soba Noodles”, in Asian section of the grocery store)
1/4 c. sesame seeds
1 small red pepper, diced fine
1/3 c. soy sauce
1/4 c. white vinegar
1/4 tsp. cayenne
1/4 c. toasted sesame oil
Optional: 2 TBS. fine-diced green onion
1/4 c. honey
PREPARATION
1. Cook, then drain, rinsing in cold water to cool: > 8 oz. buckwheat noodles
2. Toast, then set aside: > 1/4 c. sesame seeds
3. Grill in iron pan, in a touch of olive oil; then set aside: > 1 small red pepper, diced fine
4.Reduce liquid to approx. 1/4 c., boiling in saucepan until it’s half-evaporated: > 1/3 c. soy sauce > 1/4 c. white vinegar
5. To the reduced mix, add and mix in: > 1/4 tsp. cayenne
6. To cooked noodles, add, mixing well: > 1/4 c. toasted sesame oil > Optional: 2 TBS. fine-diced green onion
7. Once oil’s been mixed into noodles, add: > 1/4 c. honey > the toasted sesame seeds > grilled red peppers
8. Finally, toss back into pan of reduced soy sauce/vinegar, to coat noodles.
There’s a lot of info below, but the main point is: Omega Six is Nix! Contrary to all we’ve heard, the overload of polyunsaturates in the modern diet leads to inflammation. I’ve experienced this first-hand. After balancing my diet with more Omega 3s (from salmon, cod liver oil, meats, butter and such, mainly), I had a huge change in my inflammatory conditions. My “thermometer” was my knees, which had become ridiculously swollen most of the time. That disappeared. The only time it came back was when our avocado crop came in. I unwittingly ate way too many avos (whoops!). I won’t do that again. The results are too amazing…
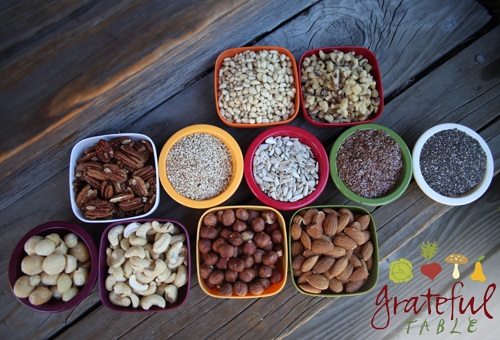
Below is a picture of foods with a lot of polyunsaturates in them. Which means they are high in Omega 6’s (but less so that the oils derived from them). I posted here on the dangers of PUFAs, and here about how you don’t want to cook with most of them. But at least the ones pictured today are in whole-food form! I set them up in order of their PUFA content per hundred grams (as listed here, at the US National Library of Medicine National Institutes of Health). Macadamias are the winner, with only 1.5 grams of PUFAs. From there we have cashews (7.8), hazelnuts (7.9), almonds (12), and pistachios (13). The next row are all in the 20-something range: pecans, brazil nuts, pumpkin, sesame seeds, hemp, sunflower, flax, and chia seeds. Top row is more extreme: pine nuts clock in at 34, and walnuts at 47.
Did I mention that we don’t want to obsess?! Stressing out about the exact amount of PUFAs in any given handful of nuts is not the answer. But I have become a bit more careful about making a meal of those nuts. Yes, I was kind of a nut freak- I could eat almost a half cup of them instead of a meal. I ate a lot of vegetarian meals, and figured nuts were a great source of calories, in whole-food form.
Now I use nuts more as a garnish on top of something, sprinkling chopped nuts or toasted seeds on top of soups or salads for extra texture. I’ve starting using macadamias more often than pine nuts and walnuts, since they’re about the lowest in polyunsaturated fatty acids. My inflammatory symptoms have simmered down; I suspect this dietary change had a lot to do with it.
Dr. Weil’s website is loaded with info. This page on “balancing Omega 3 and Omega 6 tells you more. Chris Kresser, M.S., L.Ac has a good article too (…”Not Enough Omega 3 is Making Us Sick!“). To sum it up: Our bodies need both Omega-3 and Omega-6, but they need balanced amounts. There are tons of sources of Omega 6 in our diets (thanks, junk food). But Omega 3’s are harder to come by, coming mainly from the fat of cold water fish (salmon, sardines, herring, mackerel, black cod, bluefish). Walnuts and flax seeds contain a form of omega-3 that we don’t readily convert into the form we need, so they can’t really resolve an Omega 3 deficit very effectively.
Not that Omega 6’s are useless. We make hormones from them. But the hormones we make with omega-6 fatty acids typically increase inflammation. This is a good thing in small quantities–it helps our immune response, blood clotting, and cell proliferation. Omega-3 fatty acids, on the other hand, help us make hormones that decrease those functions. When the two oils are in balance, we have the best of both worlds.
There’s been all kinds of talk about inflammation in our house this past year. My dad’s research revealed that the cholesterol deposits accumulating in the wrong places in my mom’s brain were not the actual problem, but a symptom. The cholesterol proliferates when there is inflammation. It’s a response to the inflammation. So let’s go after the real bad guy! Cholesterol just happened to be there–it doesn’t mean it committed the crime.
I even found out that my hypothyroidism was related to inflammation. OK, now I’m listening!
In any case, as mentioned on Dr. Weil’s website, the dietary imbalance between the two Omegas might explain the increase we’ve seen in a lot of diseases: asthma, heart disease, cancers, autoimmunity, and neurodegenerative.
That imbalance might also increase obesity, depression, dyslexia, hyperactivity and even violence. In one study, taken in a British prison, violence dropped by 37 percent after omega-3 oils and vitamins were added to the prisoners’ diets. That’s some powerful Omega!
It’s not just affecting us. Commercially raised animals are pumped full of corn and soy (yipes- totally GMO), so they get too much omega 6 (and not enough omega 3). The resulting meat reflects that unbalance. Get free-range, grass-fed, organic meat to avoid that.
If you are going to cook with nuts and seeds, the following make good choices: Cashews, macadamia, filberts, almonds, and pistachios; be more careful with sunflower, sesame, pumpkin seeds and walnuts, as they can’t take much heat.
Like I said, we don’t want to get too obsessed. But I am eating more Omega 3s from healthy sources (salmon, grass-fed beef and free-range chicken). The American Institute for Cancer Research has noted that Omega-3s may decrease the onslaught of heart disease, dementia, arthritis, diabetes, and cancer. I’m down with that!
And I’m eating a few less nuts now. Working to keep the omega 3/6 balance in check. My inflammatory conditions seem to have lightened up. Yay!
My absolute favorite “soda” recipe for water kefir is this Orange Kefir Recipe. Though I’ve tried all kinds of flavors/juices/etc., the orange kefir recipe is the most successful for extra fizz and deliciousness. Oh, plus there are extra nutrients in orange rind, so… yeah!
Update, April, 2024: My kefir’s been going strong for almost ten years now! At one point, I had given some to a friend, and she had to give me some of hers when mine died. I hadn’t realized my Berkey filter needed replacing (the resulting chlorine killed mine off that time). Pure, filtered water can make all the difference for delicate probiotic critters.
Also, partway into this kefir venture, I discovered another helpful tip: Add an 1/8 tsp. baking soda every other time, and your grains will be extra happy.
I found they also get depressed when I’ve fed them regular “Grandma’s Molasses”, as it’s not organic, and doesn’t contain nearly as many nutrients as organic blackstrap. My grains had started getting tinier and tinier; when I switched back to the organic, they resumed their bouncy, fluffy-big demeanor. I think this says something to us about how nutrient-dense foods can really impact our health for the good as well.
Get some grains from a friend, or buy some water kefir grains from Amazon. Just don’t use milk-kefir grains. These are NOT the same thing!
Spring water is best- chlorine will slow down (or kill) your grains. Also, don’t use honey. It is anti-bacterial, so it can slow the culture down (or stop it dead in its tracks).
I tried organic raw sugar, but after a month of that, my grains died. Coincidence? Not sure, but now I like to use a blend of half refined white sugar and half palm sugar (100% palm sugar seemed to turn out weird).
Oh, and never add fresh pineapple to the first ferment; one woman posted that her grains got irreparably damaged. Maybe it’s the extra enzymes in the pineapple? I’m not going to use pineapple.
Making water kefir is a fairly easy process, with just a little daily maintenance. After the kefir grains convert their food supply to probiotics (within a day or two), add them to a fresh jar of sugar/molasses water. You can tell by tasting the brew after the first 24-48 hours- if still sweet, you can let it ferment for another day or two, before bottling it for the second ferment.
Kefir Management (Buying Yourself Some Time)
Give yourself (and the grains) a vacation- the grains appreciate a little bath now and then anyway. Just drain off the sugar/water into a bottle, and add the grains back into their fermenting jar; cover with filtered water (unsweetened). Store these water-bath kefir grains in the fridge for a week or two, to the benefit of all.
Another trick: When getting bogged down with extra kefir, throw out all but two tablespoons of the grains. It takes longer for fewer grains to eat through the sugar water. (The more grains you have, the more quickly they eat through a new batch of sugar water.)
A friend tried refrigerating her grains in a strong sugar syrup so she could (hopefully) ignore them for months. The grains gradually multiplied to practically fill the whole jar. But they ate through every last bit o’ sugar/molasses that the water contained. And then… they died. They looked all right, but they had essentially gotten preserved in that jar like pickled brains or something. Looking prolific, but… dead!
The grains multiply; put the extras in the compost pile, or give to a friend (or even eat them?), or just throw ’em out. More will be created! Note: I discovered that our son’s dogs LOVE kefir grains, so they’re the clean-up crew for any extra grains when they’re around.
INGREDIENTS
1/4 c. sugar (not raw, but refined white sugar, or half white/half palm sugar)
2 tsp. molasses (organic blackstrap makes the grains so happy)
1 slice lemon (optional)
4 c. Spring water (filtered, non-chlorinated)
Kefir grains (1/4 to 1/2 c., more or less)
PREPARATION
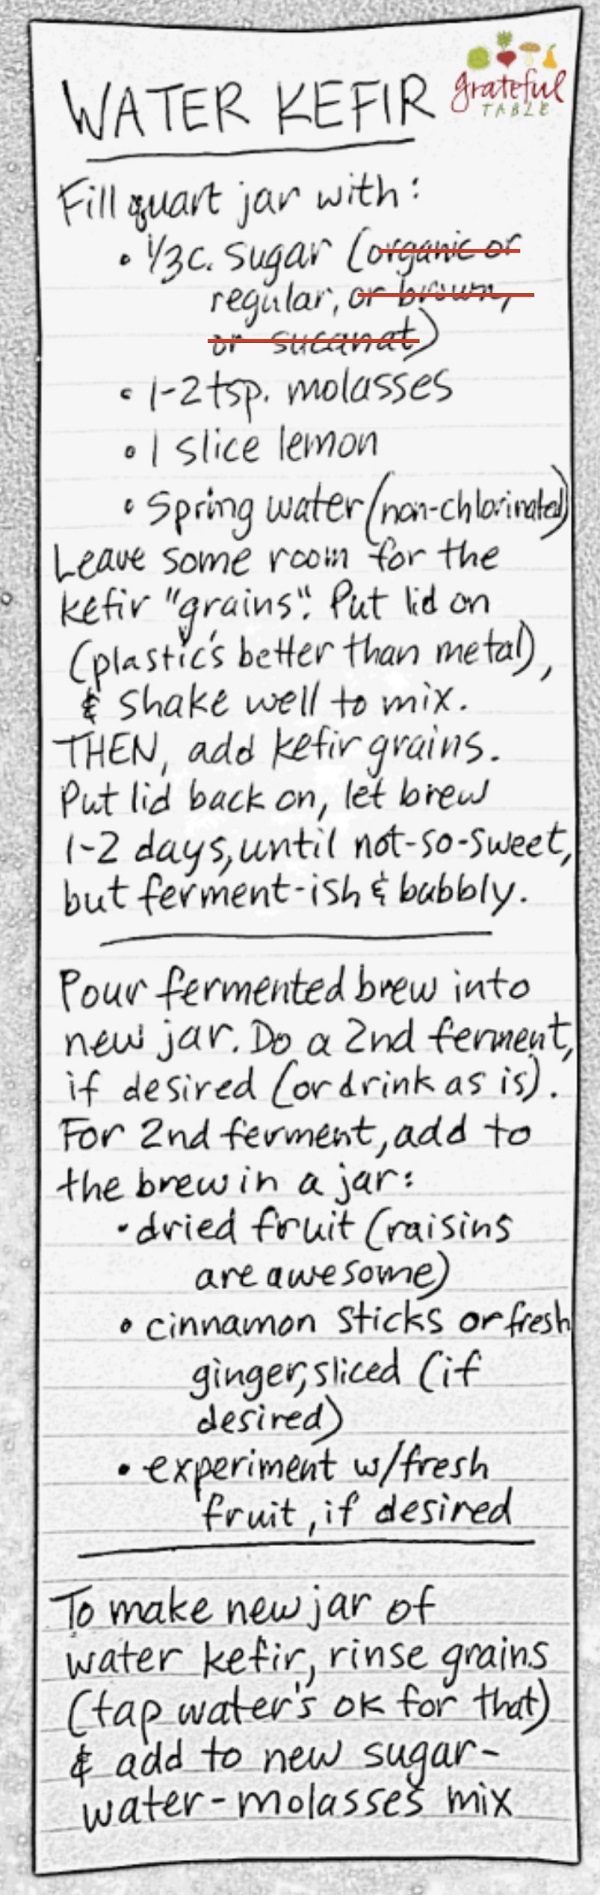
1. Fill a quart jar with: > 1/4 c. white sugar > 2 tsp. molasses > 1 slice lemon (Optional) > 3-4 c. spring water (leaving space at the top for adding the grains)
2. Add lid and shake jar vigorously until sugar and molasses are mixed in.
3. Add rinsed kefir grains, cover with a lid.
4. Let mixture brew for 1-3 days, until not-so-sweet, but fermented.
5. For a second ferment, where carbonation will build up, making it like soda, drain brew into bottles with ceramic stoppers. See below for “Preparation for 2nd Ferment”.
6. Add the strained-out grains to fresh jar of sugar/molasses water, repeat steps. (As grains multiply, discard some as necessary, or give to friends.)
INGREDIENTS FOR 2ND FERMENT
Handful of dried fruit (raisins or other), or fresh fruits or juices
Other spices if desired (fresh sliced ginger, organic orange peel, vanilla, tamarind, etc.)
Optional: Favorite fruit juices or concentrates (fresh-juiced make the ferment go bonkers- super bubbly!)
PREPARATION FOR 2ND FERMENT
1. Into a clean 32-oz. bottle (or jar), decant the brewed kefir water, straining out the kefir grains, leaving space for other ingredients.
2. Add a small handful of favorite dried fruits (or experiment with fresh fruits), or use a cup or so of juice.
3. Optional: Add other flavorings if desired ( fresh ginger, organic orange peel, etc.),
4. Optional: If you add non-sweet flavorings like ginger, vanilla, or orange peel, you can actually add honey (or sugar) to this mix to give the kefir something to feed on, to make the brew extra tasty and extra fizzy. Although I don’t add honey to the kefir grains in the first ferment, it seems to work in the second ferment. Use organic honey if possible!
4. Let ferment another day or two, with lid or cap on. Check the bottle after a day or so (if you have the Grolsch-type bottle with resealable cap), to see if it’s fizzy enough. Refrigerate after about one or two days. Will keep for a couple weeks, refrigerated. Remove lid with care (over the sink, with hand over it, as it may become quite bubbly)!
5. Certain glass bottles can be reused (if they’re the kind you use a bottle-opener on); just get this to hold in the fizz. Or buy something like Grolsch beer, with its ceramic/rubber seal stopper, and reuse that. My fave are these Cobalt Blue 32 oz. Bottles; they’re sturdy, and are “family-size”, which is nice! (Some note that the blue glass protects against fluorescent rays also, which may/may not be an issue…)
I’ve linked this post to Kelly the Kitchen Kop’s “Real Food Wednesdays”; check out the other great links she’s listed, HERE!
I’ve also linked this post to My Humble Kitchen. Check out Diana’s page, “Simple Lives Thursday“, for more great ideas.
PS You might want to print up this simplified copy of the directions, below.
So… my soup ebook is coming together. Whoot! Expected release? Hopefully September. Exciting!
(Update: OK, it took a bit longer than I’d said. The book is finally “in review” this Cyber Monday, December 2, 2013. Which means, it will available within twelve hours or so…)
I have to get excited. I have to talk about it. That way, maybe you’ll keep me accountable. Just ask me, OK? (“So, Jen, when IS that book coming out?!”)
I like to think that I’m orchestrating some grand stew, which will all come together in its time. But meanwhile, the cow’s still grazing in the pasture, the carrots are in the ground, the bell peppers are ripening, and the spices are getting dried.
Uh, in other words, I have been fine-tuning the thirty-plus soup recipes. (Is that the cow, grazing?) And I have been researching digital requirements, how to format, etc. (Is that the carrot in the ground?) And I’ve been taking the last few photographs, since every soup needs an inspiring picture. (Is that the pepper ripening?) As for the spices, I’ve selected just a few favorite verses, which will add a dash of “seasoning” to the book.
And then it’ll all come together, right?!
That’s just the behind-the-scenes stuff. Meanwhile, it can’t all be behind the scenes, or you might forget about “Grateful Table”. We can’t have that!
So. Besides the behind-the-scenes book work I’m doing, I’ll continue to post some of those recipes folks are still looking for. Back when I had my old website (pccuisine.com), I’d posted over two hundred recipes, and people are still looking for some of ’em. (If YOU are looking for any of them, just ask, and I’ll get ’em posted here for you 😀 )
I just posted the Chicken Salad with Caramelized Walnuts recipe, and its sister recipe, Caramel Sauce (posted here). Why? Because, everyone needs to know how to caramelize sugar, don’t they? It really is pretty easy. Really. We do it all the time at The New Deli.
It’s easy to take abundance for granted in our land of plenty. I can only imagine how bittersweet it was for Job to remember the days when God had so blessed him. What a trial Job went through–such a contrast to his previous days!
But it’s a good reminder for us. If we briefly considered how very tough life could be (if “X” happened, or maybe even “Y”), then we can “look back” on our current days in a new light. Perhaps then we can appreciate all that we have, right here, right now.
Job got a bit sentimental, saying, wow, my cows had tons of milk, and my olive trees produced massive quantities of olive oil. But we can almost say that ourselves, today! I guess it’s good to appreciate what we have 😀
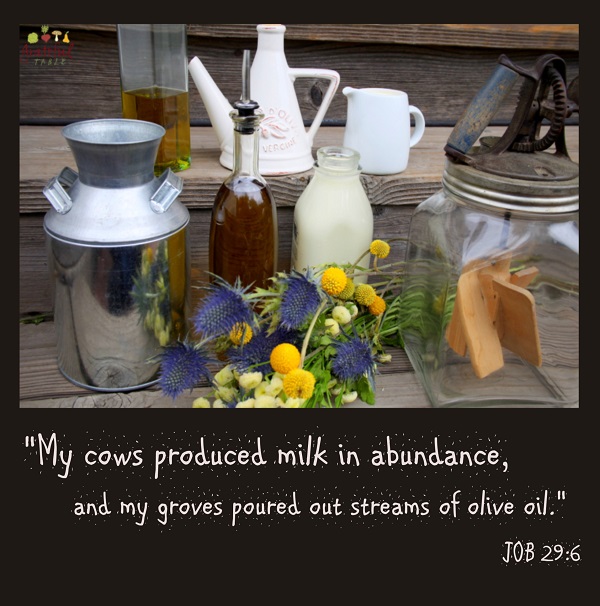
Wallpaper: Desktop Backgrounds w/Verses
The following are a couple of backgrounds you might enjoy, using a verse from Job 29:6.
“My cows produced milk in abundance, and my groves poured out streams of olive oil.” Job 29:6
(To use for desktop wallpaper, left click on appropriate monitor size, then right click and choose “select :
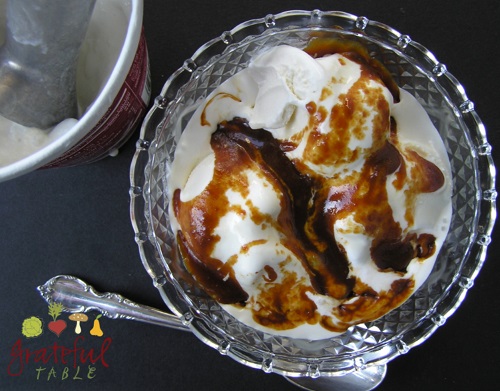
With some ice-cream, sugar, and cream on hand, one can pull together an awesome dessert in no time! This is one of those quick and easy recipes; a perfect dessert choice for special occasions when time runs out. For a larger amount, increase quantities and use a larger pan.
For a variation, substitute butter for the cream, adding a touch of salt, and some water too, if necessary, to thin it out. Butterscotch!
Serves 4 or so.
INGREDIENTS
1/2 c. sugar
Approx. 1/4 c. cream
PREPARATION
1. To caramelize sugar, get med.-small heavy skillet smoking hot. Turn pan off and sprinkle sugar in (enough sugar for a layer to cover the bottom of the pan): > 1/2 c. sugar
2. Tilt the pan to let unmelted sugar fall into “hot spots”. Turn pan back on if necessary, until sugar becomes a golden brown syrup
3. Remove pan from burner and very slowly add cream, stirring a bit in to incorporate it before adding the rest: > Approx. 1/4 c. cream, heated
3. Pour into a creamer or pitcher, dish up the ice cream, and enjoy!
If you’re cooking for a crowd, multiply this recipe. It’s definitely a crowd pleaser; we serve it regularly at The New Deli.
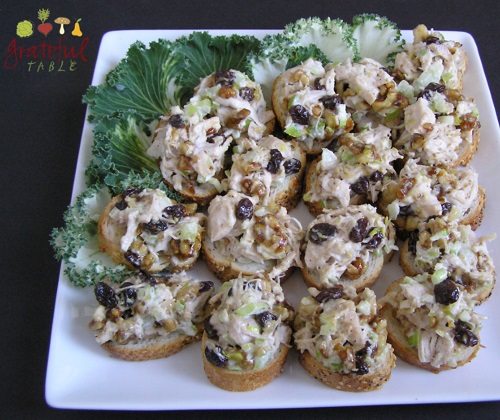
Part of the secret to using raisins: they get soaked overnight in red wine vinegar. It gives them the perfect sweet/sour flavor, plus, it keeps the raisins from soaking up mayonnaise (which doesn’t look as appetizing!).
Serves 8 (or more, for appetizers).
INGREDIENTS
1/2 c. raisins
1 1/2 TBS. red wine vinegar
1/3 c. white sugar
1 1/2 to 2 c. walnuts
1 1/2 lb. raw, boneless, skinless chicken breast (or use 2 c. leftover chicken)
1 c. mayo
1/2 tsp. salt
1/4 tsp. pepper
PREPARATION
1. A day before, soak together: > 1/2 c. raisins > 1 1/2 TBS. red wine vinegar
2. Also ahead of time, caramelize walnuts. For smaller amounts, as in this recipe, use a medium-small skillet; for best results, use a heavy skillet, such as iron. Preheat until quite hot, even smoking. Turn heat off, turning back on as needed to finish “melting” the sugar. Sprinkle the sugar in the hot pan across the whole surface, and let melt on its own, without stirring. Tilt the pan to encourage the melting process; the melted parts will help dissolve any remaining white parts. Use: > 1/3 c. white sugar
3. To pan of caramelized sugar, which should soon appear translucent and golden, add: > 1 1/2 to 2 c. walnuts
4. Pour walnuts into the heated pan, stirring until mixed well with caramelized sugar. Turn into large bowl to cool.
5. For the chicken, bake some boneless, skinless chicken breasts at 375 degrees for one hour (or use already-cooked chicken): > 1 1/2 lb. raw, boneless, skinless chicken breast (or 2 c. leftover chicken)
6. Chop (or process) the cooked chicken, add to a big bowl. Also chop: > The cooled, caramelized walnuts
7. Mix all ingredients together in the bowl: > 2 c. fine-chopped celery > 1 c. mayo > 1/2 tsp. salt > 1/4 tsp. pepper > Soaked raisin/vinegar mix > Caramelized walnuts > Chopped chicken
8. Mix all the above together. To serve for lunch or a light dinner, scoop onto lettuce leaves or make into sandwiches. For appetizers, put onto thin-sliced sweet baguettes.
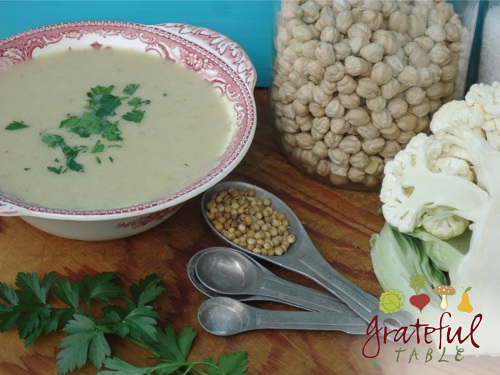
The garbanzo beans add protein, plus a sort of buttery richness. Also, after roasting the cauliflower (to develop flavor), “steeping” it in some hot water creates a creamier texture and flavors the broth. Chicken stock and other seasonings aren’t necessary, although one might play with the ingredients according to what’s on hand.
On the nutritional front, cauliflower’s a “white veggie”, full of special nutrients (see more about that on this page). The recipe is adapted from Yelena Strokin’s (using different methods).
The sum can be greater than the parts: the buttery creaminess of the garbanzo beans complements the cauliflower, and the toasted, ground coriander seeds season it perfectly. Roasting the cauliflower first also enhances its flavor. Make this big batch and freeze some for later. Serves 6 or so, depending on size of cauliflower.
INGREDIENTS
1 c. dry garbanzo beans (3 c. or so, cooked)
1 head cauliflower
1/3 c. virgin olive oil
1 1/2 tsp. salt
1 TBS. toasted coriander seed
Pine nuts and green onions (or chives) for garnish
PREPARATION
Cook until tender: > 1 c. garbanzo beans (or use 1-2 cans cooked beans, drained)
Set aside the cooked beans when done. Meanwhile, halve the cauliflower head, wrapping loosely in heavy-duty foil. Bake at 375 degrees for 1 hour, using: > 1 head cauliflower
Set roasted cauliflower in a large pressure cooker (or pot). Add boiling water just to cover; bring up to pressure, cooking again for 10 minutes or so. The cauliflower will soften in texture this way and make for a smoother soup.
Meanwhile, toast the coriander seeds for 2-3 minutes in a toaster oven or under broiler (or in a dry, hot pan, stirring constantly): > 1 TBS. coriander seed
Process the coriander seed in a small electric coffee grinder (or a blender, or with a mortar and pestle). Set aside.
Next, strain off and reserve the cooking broth. The core and outer leaves of the cauliflower will pull away easily; discard these. Process the cauliflower tops with the cooked garbanzos. To the processed beans and cauliflower, add: > 1/3 c. virgin olive oil > 1 1/2 tsp. salt > 1 TBS. toasted coriander seed
Add cooking broth back in and reheat, serving with chives or parsley as a garnish. You can also top with extra cauliflower, grilled until tender, and perhaps a sprinkling of pine nuts (toasted or raw).
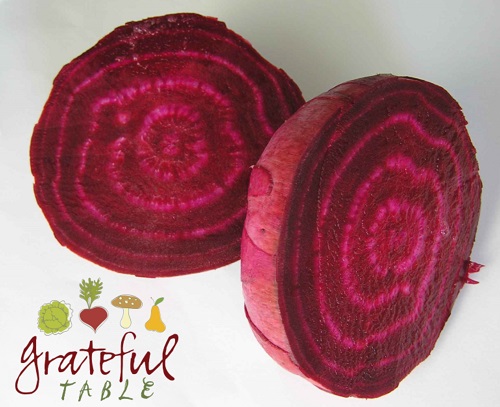
I’d heard a lot of raves about Red Velvet–it’s been quite popular at The New Deli. But I had hoped to create a way around using all that Red Dye #4. Not that I have a problem ingesting an ingredient made from crushed beetle (where most red dye comes from). I’d never noticed any reaction to it, although a few folks might be allergic to it.
The “Red” Velvet Beet Cake wasn’t exactly red…
I just thought beets would work! So I tried a Tyler Florence recipe for Red Velvet Beet Cake, using beets for color instead of food coloring. Alas, the Red Velvet Beet Cake didn’t turn out red at all. It was a delicious chocolate cake though (with a secret side of veggies thrown in). I tweaked Florence’s original recipe and posted it here, if you wanted to try a good chocolate cake with beets in it!
Are you looking at Red Velvet Cake recipes? If so, you’ll notice there are quite a few versions. Some use butter, some use (eek!) shortening. I use olive oil, and it’s delicious (and more healthy). I also use unbleached all-purpose flour, and it works great. Some recipes call for cake flour, but it is typically even more processed than white flour, and isn’t necessary. Back when I was a nervous baker and followed every rule, I bought some cake flour. Most of the box sat on a back shelf for five or ten years–no bugs ever even got into it, if that tells you anything!
If you were hoping to find the Red Velvet Cake recipe I had posted years ago on my old website (pccuisine), it has moved to here. This recipe wouldn’t qualify to serve for a health food convention, but it’s still a great, traditional cake for a special occasion. Totally worth it. (What can beat a homemade cake?!)
One feature of the traditional Red Velvet Cake is the frosting, made with a roux of sorts. There are versions out there using cream cheese frosting, but it’s not quite the same. If you’re looking for authentic, go for the traditional recipe and skip the cream cheese.
I remember my aunt making this cake ages ago. She retold its tale, which supposedly started at the Waldorf-Astoria Hotel. Legend has it that a guest at the restaurant asked for the recipe for the wonderful dessert she’d just had, and was given the recipe, plus a huge bill for it. So she decided to give the recipe to every person she could think of, since she’d paid such a price for it. It’s just urban legend, but it makes a good story. Maybe that’s why you can find so many versions of the recipe out there?
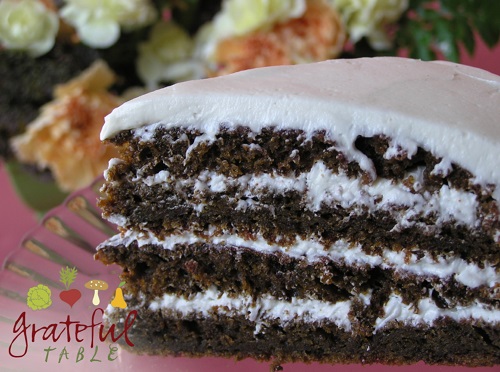
Traditional Red Velvet Cake (looks so GOOD!)
More details about this cake: Before the age of Dutch-processed cocoa powder, unsweetened cocoa was more acidic (not so alkaline). Theory has it that vinegar was added to the recipe; it reacted to the more acidic, old-style cocoa powder, giving it a reddish color. (This probably prompted the name of “Devil’s Food Cake” as well.) Thanks to modern science, our modern cocoa powder is not affected by the vinegar anymore, but we do love that red color, and that name, don’t we? Hence, the red food coloring to the rescue! Ah, modern science…
If you decide to make the Red Velvet Cake, don’t underestimate the quantity of red food coloring you’ll need: Two big bottles. (You don’t want to have to rename the cake, “Sort-of-Red Velvet Cake”.) I personally like using the gel paste food colorings found at craft/baking supply stores. I get mine at Michael’s, for a fraction of the cost of the grocery store’s bottles of liquid coloring. And, it only takes a teaspoon of the gel paste to get the same color a quarter cup of the liquid would give you. It’s the way to go!
This is a beautiful cake for special occasions. If using liquid red food coloring, it takes two small bottles, but one can use just a teaspoon of gel paste food coloring to get the same effect.
This is a classic Red Velvet Cake recipe, using the traditional cooked butter cream frosting, but with a shortcut, using microwave. Serves 8 or so.
CAKE INGREDIENTS
2 1/4 c. all-purpose flour
1 1/2 c. sugar
1 tsp. baking soda
1 tsp. fine salt
2 TBS. cocoa powder
1 1/3 c. olive oil
1 c. buttermilk, at room temperature
2 large eggs, room temperature
1/4 c. red food coloring (2 ounces), OR 1 tsp. red gel paste (found at craft or baking shops)
1 tsp. white distilled vinegar
1 tsp. vanilla extract
FROSTING INGREDIENTS
3 TBS. flour
1 c. milk
1 c. sugar
1 tsp. vanilla
1 c. butter, room temperature
CAKE PREPARATION
1. For cake, preheat the oven to 350 degrees. Oil and flour three 9″ round cake pans.
2. In a large bowl, mix the following well (breaking up any clumps of cocoa powder), then set aside on wax paper: > 2 1/4 c. flour > 1 1/2 c. sugar > 1 tsp. baking soda > 1 tsp. salt > 2 TBS. cocoa powder
3. In another large bowl, mix together: > 1 1/3 c. olive oil > 1 c. buttermilk > 2 eggs > 1/4 c. food coloring, OR 1 tsp. red gel paste (found at craft or baking shops) > 1 tsp. vinegar > 1 tsp. vanilla.
4. With mixer on low, slowly pour the wax paper-full of dry ingredients into the wet ingredients until just combined and smooth.
5. Pour cake batter into the prepared cake pans. Bake until the cake pulls away from the side of the pans, and a toothpick inserted in the center of the cakes comes out clean, about 30 minutes.
6. Run a knife around the edges of cakes to loosen them, and invert the cakes onto a plate, re-inverting them onto a cooling rack, with rounded-sides up. Let cool completely.
FROSTING PREPARATION
1. Make roux using small saucepan on the stove, or use the following microwave method: Choose a larger, microwaveable bowl (quart-size or larger) to mix flour and sugar in, as mixture might bubble up some- this will reduce chances of spills in the microwave. To the large, microwaveable bowl, mix together: > 1 c. sugar > 3 TBS. flour
2. In separate, smaller bowl, microwave 1 minute or so, until hot: > 1 c. milk
3. Add hot milk to flour/sugar mix slowly, to avoid lumps. Microwave 2 minute more, stir. Return to microwave for 30 more seconds, if necessary, until mixture’s bubbly hot. (Watch to make sure it doesn’t bubble over.) Add to hot milk/flour/sugar mix: > 1 tsp. vanilla
4. Cover bowl with plastic; cool completely in refrigerator.
5. To a standing mixer, add: > The sugar/flour/milk mix > 1 c. butter, room temperature
6.Cream until light, on high speed, until very fluffy. Split cakes to make four layers; frost the layers and outside of cake.
 INGREDIENTS